My Garage
My Account
Cart
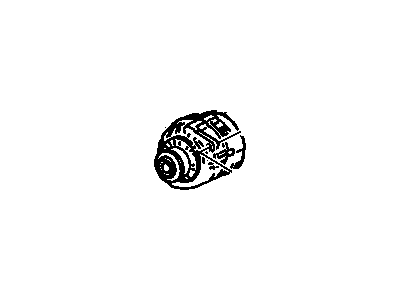
Genuine 1999 Oldsmobile Cutlass Alternator
Generator- Select Vehicle by Model
- Select Vehicle by VIN
Select Vehicle by Model
orMake
Model
Year
Select Vehicle by VIN
For the most accurate results, select vehicle by your VIN (Vehicle Identification Number).
1 Alternator found
- Product Specifications
- Other Name: Generator Asm,(Remanufacture) ; Generator, Engine Electrical; Alternator
- Replaces: 10464414
- Item Weight: 11.60 Pounds
- Item Dimensions: 7.0 x 7.8 x 8.8 inches
- Condition: New
- Fitment Type: Direct Replacement
- SKU: 10464427
- Warranty: This genuine part is guaranteed by GM's factory warranty.
1999 Oldsmobile Cutlass Alternator
We are your prime source for competitively priced and high-quality OEM 1999 Oldsmobile Cutlass Alternator. We provide you with parts that will allow you to save a lot of money without sacrificing quality. All our OEM parts are backed by the manufacturer's warranty and shipped out at a swift rate.
1999 Oldsmobile Cutlass Alternator Parts Questions & Experts Answers
- Q: Is it advisable for the home mechanic to replace a faulty alternator unit on 1999 Oldsmobile Cutlass?A: Because of the sensitivity of different parts of the alternator it might be more appropriate for the home mechanic to replace the faulty unit with a new one or a rebuilt one. However, if an overhaul is selected, it is essential to check avaiable of substitute components before proceeding. First of all, unlatch the alternator and pulley; thereafter hold the alternator in a vise for instance applying pressure in the mounting flange. To disassemble both the slip-ring, end frame, and stator assembly from the drive-end and the rotor assembly, unbolt the four through-bolts using a screwdriver then lever off H, I, K and L while aligning the drive-end frame G with mark G1 for reassembly. Then, unscrew the nuts connecting the stator lead, to release the stator from the end frame, thereafter, unthread the rectifier bridge, securing screw, and BAT terminal screw to unclip the capacitor lead and remove the rectifier bridge from the end frame. Remove the two security screws to pull out the brush holder and the regulator along with the insulating sleeves and washers and take out the capacitor from the end frame. If the slip ring end-frame bearing is dry or noisy it should be replaced, not greased; remove the old bearing with a hydraulic press, remove the oil seal, insert the new bearing until it conforms with the end frame, refit a new oil seal while adequately supporting the end frame. To the drive pulley end insert a ¼ inch Allen wrench to lock the shaft from rotating; then remove the pulley retaining nut followed by the washer, the pulley, the fan, and lastly the spacer. The rotor and the spacers need to be taken out from the drive end frame and if the bearing of the drive end frame was found either dry or noisy, it will have to be replaced without greasing. Remove the retainer plate bolts and separate the plate / seal assembly, to remove the bearing and replace it with a tube on the inner and outer races, making sure that the slinger is properly in its place and use the recommended grease before putting it back into use. After the alternator is totally disassembled, wash all the components, but do not use solvent on the stator or rotor windings and look for the signs of wear or damage; then replace the worn-out parts with the new ones. Wipe slip rings to free them of filth; when scraping the rotor turn it while holding 400 grain abrasive paper on slip rings to prevent making flat spots; deep scoring or very bad wear in slip rings indicates that the complete rotor needs to be replaced. Look at the brushes-if they look like this, throw them away, and replace the springs only if they look flimsy or misshapen halfway along their length. Reassembly is the process opposite to dismantling which requires certain specific details like tightening of the pulley nut until it gets fully tightened, proper positioning of insulating washers and sleeves on brush clip screws, cleaning brush contact surfaces before fixing the slip ring end frame, holding brushes up in their holders with a thin rod during assembling and rechecking the marks placed on the slip ring and drive end frame before starting dismantling.

