My Garage
My Account
Cart
Genuine 1999 Pontiac Grand Prix Timing Chain
Engine Timing Chain- Select Vehicle by Model
- Select Vehicle by VIN
Select Vehicle by Model
orMake
Model
Year
Select Vehicle by VIN
For the most accurate results, select vehicle by your VIN (Vehicle Identification Number).
2 Timing Chains found
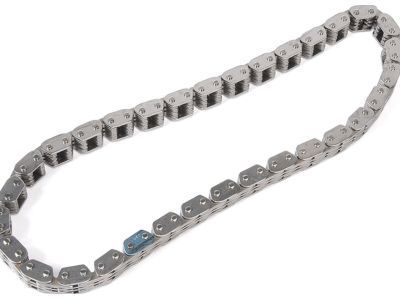
1999 Pontiac Grand Prix Chain Assembly, Timing
Part Number: 10166352$43.37 MSRP: $84.97You Save: $41.60 (49%)Ships in 1-2 Business DaysProduct Specifications- Other Name: CHAIN, Engine Timing; Timing Chain
- Item Weight: 1.40 Pounds
- Item Dimensions: 12.2 x 1.0 x 0.8 inches
- Condition: New
- Fitment Type: Direct Replacement
- SKU: 10166352
- Warranty: This genuine part is guaranteed by GM's factory warranty.
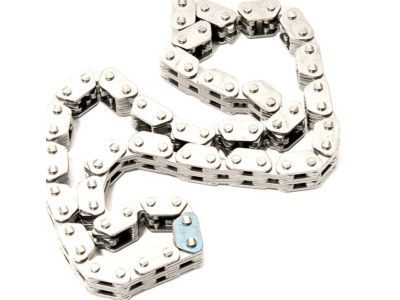
- Product Specifications
- Other Name: CHAIN, Engine Timing; Timing Chain
- Item Weight: 1.30 Pounds
- Item Dimensions: 3.1 x 3.0 x 3.2 inches
- Condition: New
- Fitment Type: Direct Replacement
- SKU: 24504668
- Warranty: This genuine part is guaranteed by GM's factory warranty.
1999 Pontiac Grand Prix Timing Chain
We are your prime source for competitively priced and high-quality OEM 1999 Pontiac Grand Prix Timing Chain. We provide you with parts that will allow you to save a lot of money without sacrificing quality. All our OEM parts are backed by the manufacturer's warranty and shipped out at a swift rate.
1999 Pontiac Grand Prix Timing Chain Parts Questions & Experts Answers
- Q: How to Replace the Timing Chain and Variable Timing Sprocket in 2.3L four cylinder (Quad-4) engine on 1999 Pontiac Grand Prix?A: Specific instruments are used for this process, so it is critical to review the whole process before starting to work. Begin with the negative cable of the battery removed and if in touch with the Theftlock then make sure that this feature that locks the audio system is not active. Unbolt the coolant reservoir, undo the timing chain cover vent hose and finally loose the engine lifting bracket at the drive belt end. Subsequently, take out the crankshaft pulley and the fasteners of the upper and lower timing chain covers; then, you may take off the covers and their gaskets from the housing. Shift the oil slinger aside from the crankshaft and pay attention to the position of the part; then, tighten the crankshaft pulley bolt to enable the turning of the crankshaft. Crank the crankshaft clockwise and set the camshaft sprocket such that the pin holes on it fit into the hole on the timing chain housing; use 8 mm pins or bolts to lock the alignment. Guarantee that the crankshaft sprocket mark matches the engine block mark and then take off all the three timing chain guides. Remove both the timing chain tensioner sleeve and the spring, and where all slack in the timing is above the tensioner assembly then use the removal of the timing chain tensioner shoe. If required apply a special tool and take out the sprocket bolt and washer and take out the sprocket by applying a three jaw puller if required. Loosen the tensioner assembly retaining bolts and then take out the tensioner and be careful as the tensioner plunger is of spring type. Remove the timing chain form the sprockets beginning with the exhaust CAM sprocket, and use a scribe to indicate the relationship between the sprockets before their removal. The crankshaft sprocket can be easily removed by using your hands while in the case of the idler sprocket and the bearing it might be extremely hard and one might need to seek the services of a professional mechanic. Grasp and shake all parts to check component's tightness and seek for any sign of abrasion, cracks or loosening up of pins on contact surfaces: to do this it is necessary to replace worn out components. For installation, rotate the camshafts in such a way that the dowel pins are at the top, then apply sealant on the bolt threads where camshaft sprockets are to be installed and then tighten the bolts. Check once again the position of the camshaft and crankshaft sprockets as far as the timing of the valves is concerned, before rotating the crankshaft in order to avoid any kind of damage. Slide from the exhaust camshaft sprocket and fit around the idler and crankshaft sprocket; turn the intake camshaft while sliding the timing chain to engage it. Ensure that you align the timing marks if necessary, then put the chain housing to block stud in place and again install the timing chain tensioner assembly. The tensioner assembly can be installed; the tensioner shoe, spring, and sleeve; the anti-release tool must be removed and it should fit when checked. Turn the crankshaft clockwise by 7200 and make sure that the timing marks coincide, than fit the rest components in the reverse sequence. The last objects to review are the fluid levels, the engine is turned on, the system is checked for normal functioning, and leaks.


