My Garage
My Account
Cart
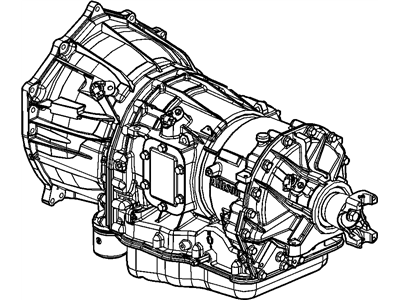
Genuine 2000 Chevrolet Tracker Transmission Assembly
Trans Assembly- Select Vehicle by Model
- Select Vehicle by VIN
Select Vehicle by Model
orMake
Model
Year
Select Vehicle by VIN
For the most accurate results, select vehicle by your VIN (Vehicle Identification Number).
2 Transmission Assemblies found
- Product Specifications
- Other Name: TRANSMISSION, Automatic; Transmission
- Item Weight: 163.20 Pounds
- Condition: New
- Fitment Type: Direct Replacement
- SKU: 91175950
- Warranty: This genuine part is guaranteed by GM's factory warranty.
- Product Specifications
- Other Name: TRANSMISSION, Automatic; Transmission
- Item Weight: 179.90 Pounds
- Condition: New
- Fitment Type: Direct Replacement
- SKU: 91175951
- Warranty: This genuine part is guaranteed by GM's factory warranty.
2000 Chevrolet Tracker Transmission Assembly
We are your prime source for competitively priced and high-quality OEM 2000 Chevrolet Tracker Transmission Assembly. We provide you with parts that will allow you to save a lot of money without sacrificing quality. All our OEM parts are backed by the manufacturer's warranty and shipped out at a swift rate.
2000 Chevrolet Tracker Transmission Assembly Parts Questions & Experts Answers
- Q: How to remove and reinstall a transmission assembly on 2000 Chevrolet Tracker?A: First remove the negative terminal of the battery, in order to remove the transmission. Moreover, take off the transfer shift control lever and then unbolt the wiring harness couples, breather hose clamp, kick down cable, and vacuums. Lift the car and safely park it on jack stands and then drain out the transfer case and the transmission along with the pan for reassembly. Actually, the torque converter cover and mark the torque converter to the drive plate for reinstallation. When crancking to loosen the bolts attached to the torque converter to drive plate turn the crank only in a clockwise direction. Take off the nut & E-ring in order to remove the select cable and take off the cable bracket. Relax the clamps and then remove the oil cooler hoses and using the plug keep the open ends sealed to avoid any dripping off the fluid. Disconnect the driveshafts, exhaust the starter motor, take off the speedometer cable connection and if there is a vacuum hose to the modulator, disconnect it. Any exhaust parts that may prove a hindrance in the transmission removal process should be unplugged. Place jack under the engine with placing block of wood at the oil pan of the engine, use a jack which is particularly used for supporting the transmission of car and use safety chains. Lose the rear mount crossmember bolts and crossmember to frame bolts and the two engine rear support to transmission extension housing bolts. Lift the transmission high enough to clear the crossmember, then remove the transmission to engine bolts and lower the transmission down a little. Pull out the transmission dipstick tube then rotate the transmission backward to get it off the engine block dowel pins parallel to the vehicle, making sure the torque converter is no longer connected to the drive plate but is tightly clamped on the front end of the transmission. For installation, make sure that torque converter can be connected to the pump, and then lift the trans up into position while maintaining a level to prevent the torque converter from sliding forward. Join the transmission fluid cooler lines, center the torque converter over the drive plate, and smoothly push the transmission forward to dowel-pinned and torque-converter'd. Tighten the transmission housing to engine bolt, then torque converter to drive plate bolts up to the recommended torques. Bolt in the cross member to the transmission mount and tighten the bolts, after this remove the jacks holding up the transmission and the engine. Replace all the vacuum hoses if any, slide in the dipstick tube and the starter motor. Reconnect the select cable into the bracket and reconnect the transmission wire harness connectors then finally secure the torque converter cover. Install driveshafts and speedometer cable, center shift linkage and kick down cable, reinstall exhaust parts for the four-wheel drive system if removed, lower the vehicle, and fill the transfer case and transmission with the recommended fluid, start the engine and inspect for leakage on the floor.


