Make sure this part fits

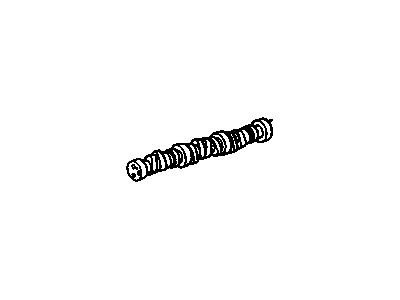
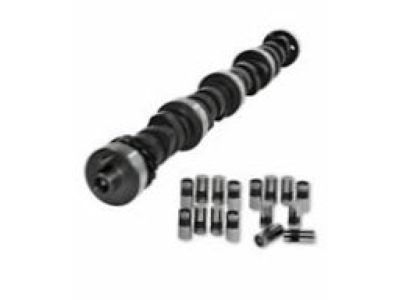
Chevrolet 10166324 Camshaft Asm

1985-1995 Chevrolet

Customer Questions & Expert Answers (13)
GM 10166324 Camshaft Asm
  • Part Description
    CAMSHAFT, Engine
  • Manufacturer
    General Motors
  • Manufacturer's Notes
    This part is discontinued.
Make sure this part fits
  • Related Parts
  • Product Specifications
  • Vehicle Fitment
  • Customer Questions & Expert Answers
  • Product Specifications

    BrandGenuine Chevrolet
    Manufacturer Part Number10166324
    Part DescriptionCAMSHAFT, Engine
    Other NamesCamshaft
    Item Dimensions3.0 x 3.0 x 26.9 inches
    Item Weight8.20 Pounds
    ConditionNew
    Fitment TypeDirect Replacement
    ManufacturerGeneral Motors
    SKU10166324
    WarrantyThis genuine GM part is guaranteed by GM's factory warranty.
    Shipping & ReturnShipping Policy Return Policy
    Warning: California's Proposition 65
  • Vehicle Fitment

    Year Make Model Engine Important vehicle option details
    1987-1993 Chevrolet Beretta6 Cyl 2.8L, 6 Cyl 3.1L2 DOOR, 4 DOOR, 4 DOOR NOTCHBACK, 4 DOOR PLAIN BACK HATCHBACK, LTZ
    1985-1986 Chevrolet Cadet6 Cyl 2.8L2 DOOR HATCHBACK, 2 DOOR NOTCHBACK, 4 DOOR, CONVERTIBLE, CS 2 DOOR HATCHBACK, CS 4 DOOR, CS STATION WAGON, RS 2 DOOR HATCHBACK, RS 2 DOOR NOTCHBACK, RS 4 DOOR, RS CONVERTIBLE, RS STATION WAGON, STATION WAGON, Z24 2 DOOR NOTCHBACK, Z24 2 DOOR PLAINBACK HATCHBACK
    1985-1995 Chevrolet Camaro6 Cyl 2.8L, 6 Cyl 3.1L, 6 Cyl 3.4L, 8 Cyl 5.0L, 8 Cyl 5.7L2 DOOR, CONVERTIBLE, RS 2 DOOR, RS CONVERTIBLE
    1985-1994 Chevrolet Cavalier6 Cyl 2.8L, 6 Cyl 3.1L2 DOOR, 2 DOOR HATCHBACK, 2 DOOR NOTCHBACK, 4 DOOR, CONVERTIBLE, CS 2 DOOR HATCHBACK, CS 4 DOOR, CS STATION WAGON, RS 2 DOOR, RS 2 DOOR HATCHBACK, RS 2 DOOR NOTCHBACK, RS 4 DOOR, RS CONVERTIBLE, RS STATION WAGON, STATION WAGON, Z24 2 DOOR, Z24 2 DOOR HATCHBACK, Z24 2 DOOR NOTCHBACK, Z24 2 DOOR PLAINBACK HATCHBACK, Z24 CONVERTIBLE
    1985-1990 Chevrolet Celebrity6 Cyl 2.8L, 6 Cyl 3.1L2 DOOR, 4 DOOR, STATION WAGON
    1985 Chevrolet Citation6 Cyl 2.8L2 DOOR, 4 DOOR
    1987-1993 Chevrolet Corsica6 Cyl 2.8L, 6 Cyl 3.1L2 DOOR, 4 DOOR, 4 DOOR NOTCHBACK, 4 DOOR PLAIN BACK HATCHBACK, LTZ
    1990-1994 Chevrolet Lumina6 Cyl 3.1L, 6 Cyl 3.1L Flex2 DOOR, 4 DOOR
    1986-1993 Chevrolet S106 Cyl 2.8L2 DOOR, 4 DOOR, PICKUP
  • Customer Questions & Expert Answers

    Q:
    I am wonder if this is complete and correct part for my vehicle. Posted by GMPartsGiant Specialist
    A:
    You can Select Your Vehicle to check if 10166324 fits your vehicle.
    Posted by GMPartsGiant Specialist
    Q:
    How should you examine and maintain the Camshaft and Camshaft Bearing in V6 engine on Buick Skylark? Posted by Customer
    A:
    Check the bearing surfaces and the surface of the cam lobes; light pitting or scratching may be smoothed with fine emery cloth or an oil stone, but if the camshaft is deeply scored a new one will be necessary. Camshafts should be mounted on V-blocks and employed with a dial gauge to measure camshaft lobes lift and run-out and exclude camshafts that do not meet the stipulated camshaft lobe lift and run-out. Use a micrometer to measure the journal diameters; it is mandatory to scrap any camshaft which does not conform to the above limits. In the case where either camshaft bearings are worn out or in some conditions damaged, then they have to be replaced; it can be done by having to detach the crankshaft but maintaining cylinder heads and pistons. To avoid getting damaged, the connecting rod bolts should be taped before the removal of the crankshaft and the connecting rods should also be taped to the side of the engine to minimize on interference when removing the bearings. Take out the camshaft rear cover from the top of the cylinder block. Bearing can be removed using GM tool part number J-6098 or a like bearing remover / installer tool according to the instructions. The same set of tools is used to set the camshaft bearings where, for instance, the front and the rear bearings help in centering the remainder of the bearings so that the oil hole in the bearings will match the oil hole in the block. Remove any debris, oil or old gasket material from the camshaft rear cover, then give the cover a layer of RTV or any other equivalent sealant with 1/8 in x 3mm diameter around the sealing surface before fixing the cover on the engine block. Finally, reinstall the crankshaft.
    Posted by GMPartsGiant Specialist
    Q:
    How to replace the camshaft and Lash Adjuster in 2.3L four cylinder (Quad-4) engine on Chevrolet Beretta? Posted by Customer
    A:
    To do this, the operator requires special tools. Removing the timing chain and sprockets entail unplugging the negative battery cable. The subsequent steps are taking out the timing chain housing-to-camshaft housing bolts, removing the ignition coil and module assembly, and disconnecting an Idle speed power steering pressure switch. The power steering pump as well as brackets need to be removed first then followed by removal of power steering pump drive pulley. Remove oil/air separator as an assembly with hoses attached, then remove fuel rail from cylinder head. At rear for exhaust, unplug oil pressure sending unit wire and unbolt engine lifting bracket. Both intake and exhaust: Loosen camshaft housing-to-cylinder head bolts in 1/4-turn increments while reversing tightening sequence. Remove housing from cylinder head and then remove camshaft cover as well as housing bolts. Very gently lift the camshaft out of the housing. Remove old gasket material, clean surfaces. Pull oil seal from intake camshaft. Remove lash adjusters keeping them organized. Inspect lash adjusters visually; measure bore, check lash adjuster diameters anyway. When installing new gasket, position camshaft housing with lubricated components in it followed by installation of lash adjusters and lubricating lip on oil seal (intake cam). Install cam shaft up in its bearing with dowel pin UP in front sprocket hole on gear side of engine block! Apply pipe sealant to bolt threads, install new housing seals, install cam shaft cover with bolts making sure that oil seal depth does not exceed 0.020 inches from outside face of end cap or bearing holder flange that provides a leak-free joint between two components; tighten these down in order specified by manufacturer's instructions until tightened properly according specifications listed under "tightening torque" section of their website; make certain there is no excess around edges which could cause damage during handling process or while being installed onto other parts such as valve cover gasket's edge. Power steering pump pulley must be installed again along with all other parts previously removed before this can happen, so don't forget about changing oil filter first too! If you are installing new lash adjusters or are experiencing lash adjuster noise, follow a bleed procedure to warm up the engine and increase the engine speed until the noise goes away. Road-test vehicle and check for leaks.
    Posted by GMPartsGiant Specialist
    Q:
    How to extract and install a camshaft on Pontiac Fiero? Posted by Customer
    A:
    It is assumed that the engine is already out of the vehicle and the rocker arm cover has been removed, as this procedure cannot be performed with the engine installed. Once lobe lift has been determined, the pushrods, pushrod cover, valve lifters, distributor, oil pump driveshaft, front pulley and hub, and timing gear cover must be removed before the camshaft can be extracted. Camshaft lobe lift is a critical inspection procedure that should be conducted before removing the head from the engine. Lobe lift is typically measured by placing a dial indicator atop the cylinder head next to each pushrod and measuring the rocker arm's movement as it is pushed upward by the pushrod and cam lobe. Starting with the number one cylinder, mount a dial indicator with the stem resting on the rocker arm, aligned with the exhaust valve pushrod. Rotate the crankshaft slowly in the normal running direction until the lifter stem is on the heel of the cam lobe, at which point the pushrod will be at its lowest position. Zero the dial indicator, then slowly rotate the crankshaft until the pushrod reaches its highest position, noting and recording the reading on the dial indicator for comparison with lobe lift specifications. Repeat this for each remaining valve, and if the measurements do not meet specifications, a new camshaft should be installed. For a four-cylinder engine, remove the camshaft thrust plate screws/bolts by rotating the camshaft until the access holes in the timing gear align with them, then extract the camshaft and timing gear through the front of the block, taking care to avoid damaging the camshaft bearings. If the timing gear needs to be removed from the camshaft, it must be pressed off using a hydraulic press; if unavailable, take it to an automotive machine shop. Before installing the camshaft, coat each of the lobes and journals with engine assembly lube or moly-base grease, then slide the camshaft into the engine block, ensuring not to damage the bearings and aligning the marks on the gears. For a V8 engine, after removing the valve lifters, crankcase front cover, timing chain, and timing sprocket, detach the camshaft rear cover and use a long bolt in one of the camshaft bolt holes for support during removal. Carefully pull the camshaft out of the engine block, ensuring not to damage the camshaft bearings, and before installation, coat the lobes and journals with engine assembly lube or moly-base grease, sliding the camshaft into the engine block while supporting it with wire to prevent bearing damage.
    Posted by GMPartsGiant Specialist
    Q:
    How to remove and install a camshaft in V8 engine on Pontiac Firebird? Posted by Customer
    A:
    Before removing the camshaft, measure the lobe lift. If equipped with air conditioning, have the system discharged, as it is under high pressure; do not loosen any hose fittings or remove components until after discharge, and ensure refrigerant is properly handled by an EPA-approved recovery/recycling unit. Always wear eye protection when disconnecting fittings. Disconnect the cable from the negative battery terminal, drain the oil from the crankcase, and drain the coolant from the radiator. Remove the radiator and, if applicable, the condenser and grille. Remove the intake manifold, valve lifters, and crankcase front cover. For carbureted models, remove the fuel pump and pushrod. Remove the timing chain and sprocket. Install a long bolt in one of the camshaft bolt holes to use as a handle for support, then carefully withdraw the camshaft from the engine block, taking care to avoid damage to the bearings. Before installing the camshaft, coat each lobe and journal with assembly lube, then slide the camshaft into the engine block, ensuring no damage occurs to the bearings. Install the camshaft sprocket and timing chain, then reinstall the remaining components in reverse order of removal. Adjust the valve lash and have the air-conditioning system recharged if equipped.
    Posted by GMPartsGiant Specialist
    Q:
    What are the steps involved in removing and reinstalling a camshaft in four cylinder engine on Pontiac Firebird? Posted by Customer
    A:
    However, if you wish to do this for any other reason, always ensure that you rotate the Crank in the normal Direction before measuring the lobe lift before pulling out the camshaft. If used with AC then release the pressure, since there is an inherent pressure in AC and then transport the refrigerant to a certified facility after wearing eye protective goggles. Remove the negative battery terminal, siphon the oil from the crankcase, and siphon the coolant while removing the radiator, if you must. If necessary, take off the condenser fan, and the pulley of the water pump. Remove the rocker arm cover, then rotate the rocker arm/nut upward till enough clearance is created between the bolt threads, and rocker arms, and pushrods. This can be done by first dropping the oil pump driveshaft assembly, then the spark plugs, and the distributor cap and rotor, then the gasket for the pushrod cover, as well as the pushrods. Subsequently, take out the valve lifters, crankshaft pulley hub, as well as the timing gear cover. Loosening of camshaft thrust plate screws and pulling out of camshaft and gear assembly must be done in a slow manner in order to avoid bearing shock. In case the gear is required to be removed, it is usually off pressed and when putting the thrust plate, care is taken not to damage the gear. Position the gear back in the camshaft by fitting the rods in place, and verify that the gear mesh has an adequate clearance if you reinstall it again. Before putting it in, use assembly lube to lubricate the camshaft lobes and journals, and then gently thread the camshaft through the block being conscious of the bearings. The position of the camshaft gear with relation to the crankshaft gear should be such that together with the marks consistent with the number four cylinder being at TDC in the firing position. Replace the thrust plate mounting screws in the camshaft and tighten it as per the recommended torque intensity and then again perform the above process in the reverse to complete the installation. Last of all, if necessary, re-charge the air conditioning system.
    Posted by GMPartsGiant Specialist
    Q:
    How to properly remove and install a camshaft in V6 engine on Pontiac Firebird? Posted by Customer
    A:
    Measurement of lobe lift should however occur before the camshaft is removed. At first, remove the cable from the negative terminal of the battery, drain the oil from the crankcase and the coolant from the radiator tank. Third, pull out the thermostat circuit, followed by the radiator and, if there is one, the air conditioning condenser. Move on to tackle the valvelifters the crank case front cover as well. For carbureted models remove only the fuel pump and pushrod, timing chain and sprocket. Place a long bolt into one of Camshaft bolt holes so as to act as a handle for pulling and supporting the Camshaft. Withdraw the camshaft with more concern so that it should not droop and the lobes should not cut into the camshaft bearings while passing over the bearing surfaces. Apply camshaft assembly lube on every one of the lobes and journals prior to installing the camshaft. Swing the camshaft into position in the engine block with reference to the bearings, avoiding to mar them. Slide the camshaft sprocket and the timing chain back into place and fasten the other parts in the sequence opposite to that which was followed for their removal. Last of all, check the valve lash, if necessary, and get the air conditioning system recharged if needed.
    Posted by GMPartsGiant Specialist
    Q:
    How do I start the process of removing the camshaft and camshaft bearings in the 1987 Buick Century? Posted by Customer
    A:
    Begin by removing the timing chain and cover. If the engine has air conditioning, unbolt the condenser and move it aside before removing the radiator.
    Posted by GMPartsGiant Specialist
    See expert answers on similar Camshaft
    Q:
    What should be used to lubricate the camshaft bearing journals and cam lobes for the 1990 Chevrolet Beretta? Posted by Customer
    A:
    Moly-base grease or engine assembly lube should be used to lubricate the camshaft bearing journals and cam lobes.
    Posted by GMPartsGiant Specialist
    See expert answers on similar Camshaft
    Q:
    What should be confirmed before re-installing the camshaft for the 1986 Oldsmobile Cutlass? Posted by Customer
    A:
    Confirm that the camshaft timing marks are aligned.
    Posted by GMPartsGiant Specialist
    See expert answers on similar Camshaft
    Q:
    What should be done regarding air conditioning disconnection for the 1986 Oldsmobile Cutlass? Posted by Customer
    A:
    Since this procedure requires air conditioning disconnection, take the car to a dealer or specialist for A/C de-pressurization.
    Posted by GMPartsGiant Specialist
    See expert answers on similar Camshaft
    Q:
    How should the camshaft gear that drives the balance shaft be installed for the 1993 Pontiac Grand Prix? Posted by Customer
    A:
    Install the camshaft gear that drives the balance shaft, aligning it with the keyway and matching the marks on both balance shaft gears by turning the balance shaft.
    Posted by GMPartsGiant Specialist
    See expert answers on similar Camshaft
    Q:
    How do you measure lobe height and base circle if the cylinder head is removed for the 1988 Pontiac Grand Prix? Posted by Customer
    A:
    Use a micrometer to measure the lobe height and base circle, calculating the lobe lift by subtracting the base circle measurement from the lobe height.
    Posted by GMPartsGiant Specialist
    See expert answers on similar Camshaft
    If you have any questions about this product, please don't hesitate to ask us. We will be happy to help you!

Genuine GM Part 10166324, the Right Choice

To ensure reliability, purchase GM part # 10166324 Camshaft Asm. It is sometimes referred to as Chevrolet Camshaft. Directly from GM, genuine parts are superb with regards to quality, longevity, and fit. Every single part passed stringent quality testing, so you can be sure that it's safe, durable, and built to perform like your original parts. This part fits specific Chevrolet Camaro, Cavalier, S10 models.

GMPartsGiant.com is a leading supplier of genuine GM parts and accessories such as GM 10166324 Camshaft Asm. You're certainly in the right place if you're searching for the great cost-effective OEM GM parts. Look no further than our vast inventory of genuine GM parts offered at unbeatable online prices, all of which are backed by the manufacturer's warranty. Not to forget, our hassle-free return policy and quick delivery service ensure a smooth shopping experience for you. For detailed Chevrolet parts information, click here.

Why choose GM Parts Giant

  • Dedicated Service

    Your complete satisfaction is our #1 goal

  • Lowest Prices

    Best deals on genuine OE parts from dealerships

  • Fast Delivery

    Orders are processed and delivered promptly