Make sure this part fits

Chevrolet 12604896 Camshaft Assembly, Exhaust

2008-2017 Chevrolet

Customer Questions & Expert Answers (9)
GM 12604896 Camshaft Assembly, Exhaust
  • Part Description
    CAMSHAFT, Engine
  • Manufacturer
    General Motors
Make sure this part fits
$95.74 MSRP: $165.18
You Save: $69.44 (43%)
Ships in 1-3 Business Days
1
ADD TO CART
  • Related Parts
  • Product Specifications
  • Vehicle Fitment
  • Customer Questions & Expert Answers
  • Product Specifications

    BrandGenuine Chevrolet
    Manufacturer Part Number12604896
    Part DescriptionCAMSHAFT, Engine
    Other NamesCamshaft, Valve Cover
    Item Dimensions28.6 x 6.2 x 6.2 inches
    Item Weight5.90 Pounds
    ConditionNew
    Fitment TypeDirect Replacement
    ManufacturerGeneral Motors
    SKU12604896
    WarrantyThis genuine GM part is guaranteed by GM's factory warranty.
    Shipping & ReturnShipping Policy Return Policy
    Warning: California's Proposition 65
  • Vehicle Fitment

    Year Make Model Engine Important vehicle option details
    2012-2015 Chevrolet Captiva Sport4 Cyl 2.4LSPORT LS FWD, SPORT LT FWD
    2009-2010 Chevrolet Cobalt4 Cyl 2.2L2 DOOR, 4 DOOR, LEVEL 4 PERFORMANCE/SC (SS) 2 DOOR, LEVEL 4 PERFORMANCE/SC (SS) 4 DOOR, LEVEL ONE (LS) 2 DOOR, LEVEL ONE (LS) 4 DOOR, LEVEL TWO (LT) 2 DOOR, LEVEL TWO (LT) 4 DOOR
    2010-2017 Chevrolet Equinox4 Cyl 2.4LLS SUV, LT SUV, LTZ SUV
    2009-2011 Chevrolet HHR4 Cyl 2.2L Flex, 4 Cyl 2.4L5 DOOR HIGH ROOF HATCHBACK, 5 DOOR HIGH ROOF HATCHBACK SS, 5 DOOR HIGH ROOF PANEL, 5 DOOR HIGH ROOF PANEL SS, 5 DOOR UPLEVEL HIGH ROOF HATCHBACK, 5 DOOR UPLEVEL HIGH ROOF PANEL
    2014 Chevrolet Impala4 Cyl 2.4LLS 4 DOOR NOTCHBACK, LT 4 DOOR NOTCHBACK
    2008-2014 Chevrolet Malibu4 Cyl 2.4L4 DOOR HYBRID, LS 4 DOOR NOTCHBACK, LT 4 DOOR NOTCHBACK, LTZ 4 DOOR NOTCHBACK
    2012-2014 Chevrolet Orlando4 Cyl 2.4LLS 4 DOOR HIGH ROOF WAGON, LT 4 DOOR HIGH ROOF WAGON, LTZ 4 DOOR HIGH ROOF WAGON
  • Customer Questions & Expert Answers

    Q:
    I am wonder if this is complete and correct part for my vehicle. Posted by GMPartsGiant Specialist
    A:
    You can Select Your Vehicle to check if 12604896 fits your vehicle.
    Posted by GMPartsGiant Specialist
    Q:
    How to Remove and Install the Camshafts in 3.0L and 3.6L V6 engine on Chevrolet Equinox? Posted by Customer
    A:
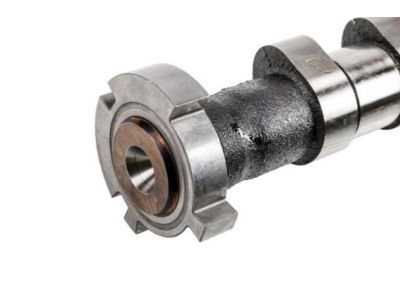
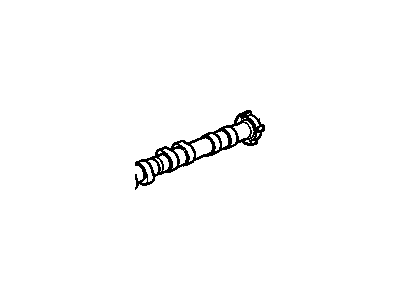
    The camshaft bearing caps are numbered and lettered and are fitted with a raised arrow; the number refers to the bearing journal position from the front of the engine, the letter to the camshaft and the arrowhead is at the front. For this procedure, special timing chain holding tools EN 48383-2nd EN 48383-3rd are required; otherwise, the timing chain cover has to be detached in order to keep the chains connected to their lower sprockets. First of all, the negative battery cable should be disconnected, the valve cover(s) should be taken off, and depending on which camshafts are being removed the high-pressure fuel pump, for 3.0L, and the lower intake manifold, for 3.6L. Next to do, remove the Camshaft position sensors and the camshaft position actuator solenoid valves. Turn the engine over until the camshaft flats are parallel with the ground, measure the amount of In/Out and be very careful not to damage the camshaft. Lose the camshaft position actuator bolts, position the special tool to hold the timing chain and sprockets, then remove the actuator bolts. After the assembly place all the bearing caps in specifically marked box, unravel the camshaft bearing cap bolts in the reverse procedure that was used to tighten them, to do a check on the camshafts for wear or damages make use of the micrometer. Scrub the camshaft, check the bearing journals for any wear, measure the wear of the camshaft lobes and look for any signs of damage. Check the camshaft bearings and measure the bearing oil clearance; if clearance exceeds the standard it is usually advisable to replace the bearings and this is best done by a professional. For installation; before fitting the camshafts to the engine, the camshaft bearing journals and cam lobes needs to be lubricated, the correct position of the camshafts need to be ensured, the bearing caps need to be smeared with a layer of engine oil, and then the bearing caps have to be fitted to their correct position in the newly fitted camshafts. Loosen the bearing cap bolts and then assemble the cap back on the shaft and torque each of the bolt to required specifications. After ensuring the efficient working of the timing chain holding tool, start the engine and to finish the job reverse the whole process of removal. Before starting of the engine, it is required to replace the oil filter and to change the oil also.
    Posted by GMPartsGiant Specialist
    Q:
    Should the camshaft be thoroughly inspected before installation, and what steps must be taken to ensure proper removal and installation in 3.6L V6 engine on Pontiac G6? Posted by Customer
    A:
    It is always required to inspect the camshaft before assembling it, while end play must necessarily be measured before dismantling. The camshaft bearing caps have some numbers and letters on them; the number refers to the bearing journal of the camshaft, and the letter indicates whether it belongs to the intake or the exhaust side; the arrow also designates the front of the engine. For this, special timing chain holding tools EN 46108 or EN 48313 are required; if these are not available, the timing chain cover has to be taken off to guarantee correct connection of the chains to their lower sprockets. For the start of removal, the negative battery cable must be disconnected and also the valve cover(s) and the lower intake manifold and any other parts that may hinder the process. Next, take out the camshaft position sensors and at least one of camshaft actuator solenoid(s). Turn the engine so that the flats of the camshaft are on the top and dorsoventral to the surface of the cylinder head, then measure the camshaft end-float by pivoting a dial gauge. There may be a tendency to break the camshaft while turning the engine and therefore care should be taken to avoid this. Relax the camshaft sprocket bolts, put the timin g chain holding tools in place and mark the sprockets and the chain. Unbolt the camshaft sprocket and take off the sprockets, keep the bearing caps and store it in the box where you marked it. Bolts of camshaft bearing cap should be loosened a little at a time, in the reverse order of how they were tightened, and the camshafts must be checked for wear or damage. For installation, check if the sealing rings are properly in position and apply assembly lube on the bearing journals as well as on the cam lobes. Coat the bearing journals on the RH cylinder head and align the camshafts on it with the flat surfaces of the camshafts facing the surface of the valve cover gasket. Again put some engine oil on the bearing caps, screw the caps into the block as a sensible pattern and screw them by hand. Place his for head bolt and vice-vice using torque wrench tighten the bearing cap bolts in the order of M1 M2 M3 M4 M6 and re-check to ensure that the torque is adjusted. Do the same for the LH cylinder head camshafts as well as the number of turns of the crankshaft accessible from that area. Any doubts about the positioning of a timing chain holding tool should be resolved prior to engine ignition since chains and sprockets react to this step. The rest of the removal process is done in the reverse order and before engaging the engine, replace the oil and the oil filter.
    Posted by GMPartsGiant Specialist
    Q:
    How to remove and inspect the camshaft in 3.4L engine on GMC Terrain? Posted by Customer
    A:
    To remove the engine, first to undo the bolt and clamp that is situated at the oil pump drive, then the oil pump drive should be pulled upwards and out of the block. Fourth, the timing chain, sprockets, as well as the valve lifters should be pulled out. Then remove the bolts with holding the camshaft thrust plate to the block surface and remove the thrust plate. Remove the camshaft by pushing it directly out of the engine using one long bolt as a lever and maintaining the support of the shaft at the block end with your hand; in this process try not to harm the bearings. If the camshaft has to come out, it is advisable to remove the bearings also, clean the camshaft with solvent, dry and inspect the bearing journals for signs of wear such as pitting or seizure etc, if they are damaged both the shaft and bearings will have to be replaced. This should be done using a micrometer on the bearing journals and on the camshaft lobes in order to check for conditions such as excessive wear or out of round and to measure the lobe lift by measuring at the largest and smallest points of the lobe. Check the camshaft lobes for any sign of dullness, scratching or wear, if the camshaft lobes are in good health and within legal size the camshaft can be regenerated. Gently rock the cam shaft to check the bearings in the block for deformation, galling or pits and the housing journals for any replacement. Measure the inside diameter of each bearing using an inside micrometers or a bore gauge; in calculating the bearing oil clearance subtract the camshaft bearing journal diameter from the inside diameter of each bearing; if clearance is in excess then new bearings will be required. Because camshaft bearing replacement undoubtedly means taking the block to an automotive machine shop, it would be better to do so. To install it, the camshaft bearing journals and the lobes must be lubricated with a special grease after which it should be slid into the engine using a bar and a long bolt, by holding it as close to the block as possible and also avoiding the bearing area. Lastly screw on the camshaft retainer plate and make sure that the camshaft sprocket bolts have been tightened to the recommended torque. For the oil pump drive, dip only the gear portion on fresh engine oil and screw it into the block so that it fits squarely against the mounting boss and then tightened by its retaining bolt. Also it is advisable to fit a new O-ring on the oil pump driveshaft before screwing onto the drive.
    Posted by GMPartsGiant Specialist
    Q:
    How to remove and install the camshaft and Lash Adjuster in 2.4L four cylinder engine on GMC Terrain? Posted by Customer
    A:
    The removal of it turns out to be complicated and special tools are needed, new camshaft sprocket bolts, which you should probably buy every time. There are three special implements required to hold the timing chain relative to the cylinder head on the intake and the exhaust side. Then the pressure of the fuel system must be released and the negative terminal of the battery must be disconnected whereas the air filter housing, the ignition coils, the spark plugs, and the valve cover should be unbolted. The timing chain tensioner is then removed, the crankshaft is turned in order to place the special tool that will loosen the camshaft actuator bolts in place. All actuators are tagged for the re assembly and the upper chain guide is also taken off. Other tools are used to secure the timing chain before the removal of camshaft actuators and camshaft solenoids. Camshaft cap is identified by its location and orientation; the camshafts are lifted off the cylinder head but all the related accessories have to remain neat. The hydraulic lash adjusters are located on the heads or issuces of their respective rockers and properly storrage with the rockers. Lash adjusters, for example, are checked for wear or damage, and the measurements of the rocker arms as well as camshaft lobes are gone through to meet a specified gauge. Any elements, which are recognized as worn beyond their acceptable limit, have to be replaced. There is also the lubrication of the rocker arms and the lash adjusters, correct setting of the camshafts and the final tightening of the bearing caps as per a set sequence. Camshaft sprocket actuators and timing chain are put in position and screwed then timing chain tensioner is reprogrammed. Last of all, the upper timing chain guide is bolted and tightened and the battery connection is restored and the process is then done.
    Posted by GMPartsGiant Specialist
    Q:
    How to remove and install a camshaft in 3.5L,3.9L V6 engine on Pontiac G6? Posted by Customer
    A:
    To remove the camshaft, first of all, unbend the terminal of the cable of the battery's negative pole. Third, it is pull the bolt and clamp which holds the oil pump drive and then pull out the oil pump drive upwards from the block. Then remove the timing chain, sprockets and valve lift as shown in the following image to you. Yank out the bolts that are holding the camshaft thrust plate to the block and then withdraw the thrust plate. Pull out the camshaft in a straight manner using a long bolt as a bar while resting your hand around it near the block, lest you damage the bearing. One removed, wash the camshaft in solvent, then dried, and checked for bearing journal for wear or damage, if any, then both camshaft and bearings will have to be replaced. The bearing journals and camshaft lobes must be checked with a micrometer to determining their wear or out of round conditions; the lobes must also be observed for discoloration or any signs of damage. The lobes are designed to exchange or throw oil and if the lobes are in good condition and measurements are within the specifications listed above then the camshaft can be reused. Camshaft bearings in the block should be checked for galling and discoloration as well as the housing journals. Measure the bearing's inside diameter of the bearing using the small hole gauge and the outside micrometer; to calculate the bearing oil clearance subtract the camshaft bearing journal diameter from the bearing inside diameter. Where the clearance has been allowed to be too high, new bearings or housings will be the requirement. Since the bearing in a camshaft is sensitive, replacement has to be done carefully; it is recommended for the block to be taken to an automotive machine shop. Before installing, coat the camshaft bearing journals and the cam lobes with special camshaft lube if available, after which the camshaft is slid into place on the engine with help of a long bolt that is passed through from the front of the block. Place the camshaft retainer plate as indicated above and fasten the bolts to the appropriate degree of turning out. Last but not the least the gear portion of the oil pump drive should be dipped in engine oil and fitted into the block in such a manner that it should be placed in contact with its mounting boss and the retaining bolt should be inserted next and with reference to the oil pump driveshaft a new O-ring to be fitted.
    Posted by GMPartsGiant Specialist
    Q:
    What are the key steps in the camshaft removal process for the 2010 Chevrolet Cobalt? Posted by Customer
    A:
    For these engines, remove the upper timing chain guide and use a special tool to secure the camshaft sprockets in place. Remove the camshaft sprocket bolts and slide the camshaft sprockets forward, securing them with wingnuts. If working on 2009 and later models, remove the camshaft position actuators; for 2008 and earlier models, remove the timing chain tensioner.
    Posted by GMPartsGiant Specialist
    See expert answers on similar Camshaft
    Q:
    What preparations are needed before undertaking camshaft removal and inspection for the 2009 Chevrolet HHR? Posted by Customer
    A:
    Before beginning, prepare the necessary special tools and acquire new camshaft sprocket bolts. Additionally, relieve the fuel system pressure on 2.0L supercharged models and disconnect the negative battery terminal.
    Posted by GMPartsGiant Specialist
    See expert answers on similar Camshaft
    Q:
    What should be checked on each hydraulic lash adjuster for the 2014 Chevrolet Malibu? Posted by Customer
    A:
    Check each hydraulic lash adjuster for excessive wear, scoring, pitting, or an out-of-round condition.
    Posted by GMPartsGiant Specialist
    See expert answers on similar Camshaft
    If you have any questions about this product, please don't hesitate to ask us. We will be happy to help you!

Genuine GM Part 12604896, the Right Choice

To ensure reliability, purchase GM part # 12604896 Camshaft Assembly, Exhaust. It is sometimes referred to as Chevrolet Camshaft. Directly from GM, genuine parts are superb with regards to quality, longevity, and fit. Every single part passed stringent quality testing, so you can be sure that it's safe, durable, and built to perform like your original parts. This part fits specific Chevrolet Cobalt, Equinox, Impala models.

GMPartsGiant.com is a leading supplier of genuine GM parts and accessories such as GM 12604896 Camshaft Assembly, Exhaust. You're certainly in the right place if you're searching for the great cost-effective OEM GM parts. Look no further than our vast inventory of genuine GM parts offered at unbeatable online prices, all of which are backed by the manufacturer's warranty. Not to forget, our hassle-free return policy and quick delivery service ensure a smooth shopping experience for you. For detailed Chevrolet parts information, click here.

Why choose GM Parts Giant

  • Dedicated Service

    Your complete satisfaction is our #1 goal

  • Lowest Prices

    Best deals on genuine OE parts from dealerships

  • Fast Delivery

    Orders are processed and delivered promptly