Make sure this part fits

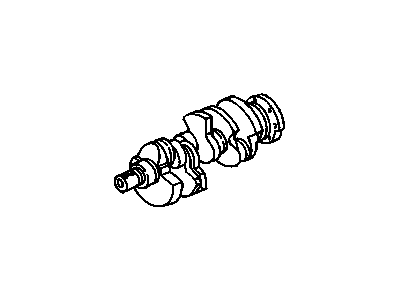
Oldsmobile 12555637 Engine Crankshaft

1999-2001 Oldsmobile Bravada

Customer Questions & Expert Answers (11)
GM 12555637 Engine Crankshaft
  • Part Description
    Crankshaft, Engine
  • Replaces
    12558256
  • Manufacturer
    General Motors
Make sure this part fits
$513.90 MSRP: $815.92
You Save: $302.02 (38%)
Ships in 1-3 Business Days
1
ADD TO CART
  • Related Parts
  • Product Specifications
  • Vehicle Fitment
  • Customer Questions & Expert Answers
  • Product Specifications

    BrandGenuine Oldsmobile
    Manufacturer Part Number12555637
    Part DescriptionCrankshaft, Engine
    Other NamesCrankshaft
    Item Dimensions25.5 x 8.6 x 6.8 inches
    Item Weight42.20 Pounds
    ConditionNew
    Fitment TypeDirect Replacement
    Replaces12558256
    ManufacturerGeneral Motors
    SKU12555637
    WarrantyThis genuine GM part is guaranteed by GM's factory warranty.
    Shipping & ReturnShipping Policy Return Policy
    Warning: California's Proposition 65
  • Vehicle Fitment

    Year Make Model Engine Important vehicle option details
    1999-2001 Oldsmobile Bravada6 Cyl 4.3LBRAVADA
  • Customer Questions & Expert Answers

    Q:
    I am wonder if this is complete and correct part for my vehicle. Posted by GMPartsGiant Specialist
    A:
    You can Select Your Vehicle to check if 12555637 fits your vehicle.
    Posted by GMPartsGiant Specialist
    Q:
    What steps must be taken to remove the crankshaft from the engine after it has been taken out on Chevrolet Astro? Posted by Customer
    A:
    The crankshaft can only be removed after the engine has been taken out of the vehicle, assuming that the flywheel or driveplate, vibration damper/crankshaft pulley hub, timing chain (for V6 engines), oil pan, oil pump, and piston/connecting rod assemblies have been detached. For engines with a one-piece rear main oil seal, the seal housing must be unbolted from the block prior to crankshaft removal. First, check the end play by mounting a dial indicator aligned with the crankshaft and touching one of the crank throws. Push the crankshaft to the rear and zero the dial indicator, then pry it to the front and note the reading, which indicates the end play. If the end play exceeds specifications, inspect the thrust surfaces for wear; if no wear is found, new main bearings may resolve the issue. If a dial indicator is unavailable, feeler gauges can be used by prying the crankshaft to the front and measuring the clearance between the crankshaft and the thrust main bearing. Check the main bearing caps for markings indicating their locations, numbering them consecutively from front to rear if necessary, and loosen the bolts gradually until they can be removed by hand. Gently tap the caps with a soft-face hammer to separate them from the block, using the bolts as levers if needed, and take care not to drop the bearing inserts. Finally, lift the crankshaft out of the engine, ideally with assistance, and return the bearing inserts to their positions in the block and main bearing caps, tightening the bolts finger tight.
    Posted by GMPartsGiant Specialist
    Q:
    How should the crankshaft be cleaned and inspected for damage on Chevrolet Astro? Posted by Customer
    A:
    Using solvent clean the crankshaft and if possible air dry it, always ensure that the holes are brushed with stiff brush and flushed with solvent. Using a thread mike or feeler gauge, measure the journal diameters of all main and connecting rod bearings for amount of ovality or taper and look for signs of scoring, pits or cracks, etc. Examine the rest of the crankshaft for any cracks or other damage. Use a micrometer to take the actual measurements of the diameter of the main and connecting rod journals and compare the same with the standard dimensions where by taking measurements at different positions around the circumference of each journal in order to check for taper or being out of round. Further, also take measurements at each end of the journal, at a plane perpendicular to the crank throw to detect taper. If the journals are badly scored, undersized, oval or excessively worn, have the crankshaft reconditioned by an automotive machine shop and, if reconditioning is done, use the correct size bearing inserts. Last but not the least, check on the main and the rod bearing inserts.
    Posted by GMPartsGiant Specialist
    Q:
    How can you ensure the crankshaft oil holes are properly prepared and the crankshaft is in good condition before reassembly on Chevrolet Blazer? Posted by Customer
    A:
    Remove all burrs from the crankshaft oil holes with a stone, file, or scraper to ensure the oil holes are chamfered, preventing sharp edges from gouging or scratching the new bearings. Clean the crankshaft with solvent and dry it with compressed air if available, ensuring to clean the oil holes with a stiff brush and flush them with solvent. Check the main and connecting rod bearing journals for uneven wear, scoring, pits, and cracks, and inspect the rest of the crankshaft for cracks and other damage, which should be magnafluxed by an automotive machine shop to reveal hidden issues. Using a micrometer, measure the diameter of the main and connecting rod journals at several points to detect taper and out-of-round conditions, taking measurements at each end of the journal near the crank throws. If the crankshaft journals are damaged, tapered, out-of-round, or worn beyond specified limits, have the crankshaft reground by an automotive machine shop, ensuring the use of the correct size bearing inserts if reconditioned. Check the oil seal journals at each end of the crankshaft for wear and damage; if grooves, nicks, or scratches are present, the new seal may leak upon reassembly. In some cases, an automotive machine shop may repair the journal by pressing on a thin sleeve, but if repair isn't feasible, a new or different crankshaft should be installed. Examine the main and rod bearing inserts for further assessment.
    Posted by GMPartsGiant Specialist
    Q:
    How can you ensure the crankshaft oil holes are properly prepared and the crankshaft is in good condition before reassembly on Chevrolet S10? Posted by Customer
    A:
    Remove all burrs from the crankshaft oil holes with a stone, file, or scraper to ensure the oil holes are chamfered, preventing sharp edges from gouging or scratching the new bearings. Clean the crankshaft with solvent and dry it with compressed air if available, ensuring to clean the oil holes with a stiff brush and flush them with solvent. Check the main and connecting rod bearing journals for uneven wear, scoring, pits, and cracks, and inspect the rest of the crankshaft for cracks and other damage, which should be magnafluxed by an automotive machine shop to reveal hidden issues. Using a micrometer, measure the diameter of the main and connecting rod journals at several points to detect taper and out-of-round conditions, taking measurements at each end of the journal near the crank throws. If the crankshaft journals are damaged, tapered, out-of-round, or worn beyond specified limits, have the crankshaft reground by an automotive machine shop, ensuring the use of the correct size bearing inserts if reconditioned. Check the oil seal journals at each end of the crankshaft for wear and damage; if grooves, nicks, or scratches are present, the new seal may leak upon reassembly. In some cases, an automotive machine shop may repair the journal by pressing on a thin sleeve, but if repair isn't feasible, a new or different crankshaft should be installed. Examine the main and rod bearing inserts for further assessment.
    Posted by GMPartsGiant Specialist
    Q:
    How to check the endplay of a crankshaft before removing it on GMC Sonoma? Posted by Customer
    A:
    Before removing the crankshaft, check the endplay by mounting a dial indicator with the stem aligned with the crankshaft and touching one of the crank throws. Push the crankshaft to the rear and zero the dial indicator, then pry it to the front as far as possible to check the reading; the distance moved indicates the endplay. If it exceeds the specified limit, inspect the crankshaft thrust surfaces for wear, and if no wear is found, replacing the main bearings should resolve the issue. If a dial indicator is unavailable, use feeler gauges by prying or pushing the crankshaft to the front and slipping the gauges between the crankshaft and the thrust main bearing to measure the clearance, which reflects the endplay. Loosen the main bearing cap bolts a quarter turn at a time until they can be removed by hand, checking for markings on the caps to identify their locations, usually numbered from the front to the rear; if unmarked, use stamping dies or a center-punch to label them. Most caps have a cast-in arrow indicating the front of the engine. Gently tap the caps with a soft-faced hammer to separate them from the engine block, using the bolts as levers if necessary, and take care not to drop the bearing insert if it comes out with the cap. Finally, lift the crankshaft out of the engine, ideally with assistance due to its weight, and with the bearing inserts in place, return the caps to their respective locations on the engine block and tighten the bolts finger tight.
    Posted by GMPartsGiant Specialist
    Q:
    How to install a crankshaft during engine reassembly on GMC Jimmy? Posted by Customer
    A:
    The installation of a crankshaft can be one of the first steps to rebuild an engine, assuming that the crankshaft and engine block have been to a degree of degreasing, inspection and repair. Place the engine upside down and then go ahead and take out the main bearing cap screws and pull out the cap and lay it tactical for easiness of reassembly. In case the old bearing inserts are there, they should be taken out and the main bearing areas should be wiped using a piece of cloth free from any form of lint. New main bearing insert, backs need to be cleaned and one half is fitted into the respective main bearing saddle in the block and tabs and oil holes should align without the use of lubrication. The flanged thrust bearing is to be fitted in suitable cap and saddle according to the type of the engine. Scrub the bearing influences and crankshaft main bearing journals, ensure that the oil channels have dirt. After that, you should clean the crankshaft and, with great accuracy, install counterweights sideways in the main bearings. Examining and measuring Plastigage to control the main bearing oil clearance: Stip trimming Plastigage and installing the same on each crankshaft main bearing journal; it must be parallel to the crankshaft main bearing journal axis. Degrease the bearing faces of the caps and replace them in their original positions with the arrows facing forward then torque the main bearing cap bolts to 90lb.in in three levels without rotating the crankshaft. After loosening the bolts and the caps, check the width of the compressed Plastigage and guarantee that the oil clearance complies with the requirement of the standard. If the clearance is wrong it has to be checked if the size of the bearing inserts is increased by dirt or oil. Remove all the Plastigage material carefully not scratching the bearing faces, lift the crankshaft and also clean the block bearing faces and apply a coat of assembly lube. Install the crankshaft back, also lube the lower bearing halves, and put the caps in as the arrows will indicate forward. For the V6 engines, first center main has to be tightened and then the thrust bearings have to be seated after then rear main cap is to be torqued. On four cylinders engines, torquing must include tightening of all bearing caps to a finger tight stage, setting of thrust bearings then tightening of all bearing caps to the standard torque settings. Turn the crankshaft with your hand and do some check and turn the crankshaft horizontally and do some check and at last perform check of end play of the crankshaft using feeler gauge or dial gauge.
    Posted by GMPartsGiant Specialist
    Q:
    What should be checked on the crankshaft and bearing faces before installation for the 2005 Chevrolet Astro? Posted by Customer
    A:
    Clean the bearing faces and crankshaft main bearing journals, checking for dirt in the oil holes.
    Posted by GMPartsGiant Specialist
    See expert answers on similar Crankshaft
    Q:
    How do you check the main bearing oil clearance for the 2007 Chevrolet Express? Posted by Customer
    A:
    After cleaning the crankshaft, lay it in the block and check the main bearing oil clearance using Plastigage. Install the main bearing caps without disturbing the Plastigage, then tighten the bolts according to the specified sequence.
    Posted by GMPartsGiant Specialist
    See expert answers on similar Crankshaft
    Q:
    What should you do after installing the crankshaft for the 2008 GMC Sierra? Posted by Customer
    A:
    Recheck the crankshaft endplay and rotate the crankshaft by hand to check for any binding.
    Posted by GMPartsGiant Specialist
    See expert answers on similar Crankshaft
    Q:
    How do you measure the endplay of the crankshaft for the 2007 Chevrolet Silverado? Posted by Customer
    A:
    Mount a dial indicator and touch the end of the crankshaft. Pry the crankshaft to the rear and zero the dial indicator, then pry it to the front and check the reading.
    Posted by GMPartsGiant Specialist
    See expert answers on similar Crankshaft
    If you have any questions about this product, please don't hesitate to ask us. We will be happy to help you!

Genuine GM Part 12555637, the Right Choice

To ensure reliability, purchase GM part # 12555637 Engine Crankshaft. It is sometimes referred to as Oldsmobile Crankshaft. Directly from GM, genuine parts are superb with regards to quality, longevity, and fit. Every single part passed stringent quality testing, so you can be sure that it's safe, durable, and built to perform like your original parts. This part fits specific Oldsmobile Bravada models.

GMPartsGiant.com is a leading supplier of genuine GM parts and accessories such as GM 12555637 Engine Crankshaft. You're certainly in the right place if you're searching for the great cost-effective OEM GM parts. Look no further than our vast inventory of genuine GM parts offered at unbeatable online prices, all of which are backed by the manufacturer's warranty. Not to forget, our hassle-free return policy and quick delivery service ensure a smooth shopping experience for you. For detailed Oldsmobile parts information, click here.

Why choose GM Parts Giant

  • Dedicated Service

    Your complete satisfaction is our #1 goal

  • Lowest Prices

    Best deals on genuine OE parts from dealerships

  • Fast Delivery

    Orders are processed and delivered promptly