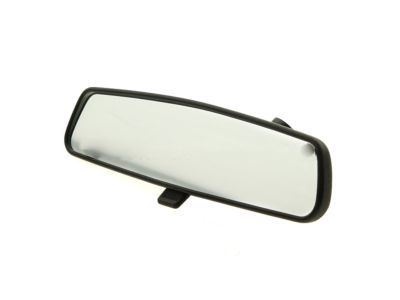
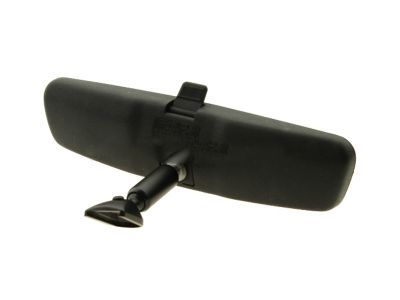
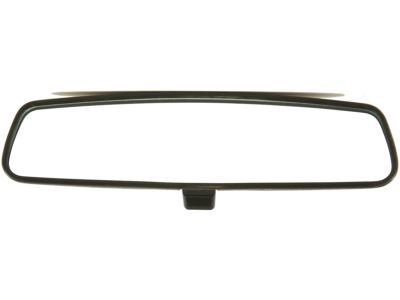
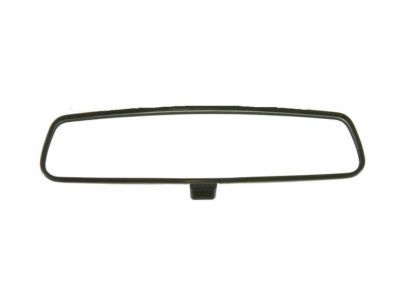
Make sure this part fits

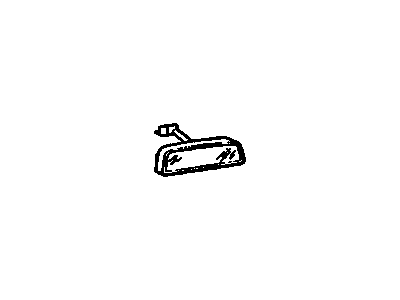
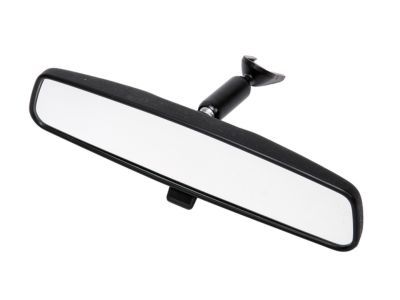
Pontiac 25603373 Mirror Assembly, Inside Rear View

1985-2010 Pontiac

Customer Questions & Expert Answers (22)
GM 25603373 Mirror Assembly, Inside Rear View
  • Part Description
    MIRROR, Inside/Outside Rear View
  • Position
    Rear
  • Replaced By
    13524917
  • Manufacturer
    General Motors
Make sure this part fits
$54.01 MSRP: $78.98
You Save: $24.97 (32%)
Ships in 1-3 Business Days
1
ADD TO CART
  • Related Parts
  • Product Specifications
  • Vehicle Fitment
  • Customer Questions & Expert Answers
  • Product Specifications

    BrandGenuine Pontiac
    Manufacturer Part Number25603373
    Part DescriptionMIRROR, Inside/Outside Rear View
    Other NamesMirror, Mirror Inside
    Item Dimensions12.1 x 6.2 x 4.2 inches
    Item Weight2.30 Pounds
    PositionRear
    ConditionNew
    Fitment TypeDirect Replacement
    ManufacturerGeneral Motors
    SKU25603373
    WarrantyThis genuine GM part is guaranteed by GM's factory warranty.
    Shipping & ReturnShipping Policy Return Policy
    Warning: California's Proposition 65
  • Vehicle Fitment

    Year Make Model Engine Important vehicle option details
    1986-1989 Pontiac 60004 Cyl 2.5L, 6 Cyl 2.8L, 6 Cyl 3.1L2 DOOR, 4 DOOR, LE 2 DOOR, LE 4 DOOR, LE STATION WAGON, SE 4 DOOR, SE STATION WAGON, STATION WAGON, STE 4 DOOR
    1994-2005, 1987-1991 Pontiac Bonneville6 Cyl 3.8L, 8 Cyl 4.6L4 DOOR, LE 4 DOOR, SE 4 DOOR, SSE 4 DOOR, SSEI 4 DOOR
    2007 Pontiac G54 Cyl 2.2L, 4 Cyl 2.4L2 DOOR, 4 DOOR, GT 2 DOOR, GT 4 DOOR, LS 2 DOOR, LS 4 DOOR
    2005-2010 Pontiac G64 Cyl 2.4L, 6 Cyl 3.5L, 6 Cyl 3.5L Flex, 6 Cyl 3.6L, 6 Cyl 3.9LGT 2 DOOR CONVERTIBLE, GT 2 DOOR NOTCHBACK, GT 4 DOOR NOTCHBACK, GTP 2 DOOR CONVERTIBL, GTP 2 DOOR NOTCHBACK, SE 4 DOOR NOTCHBACK, SE1 2 DOOR NOTCHBACK, SE1 4 DOOR NOTCHBACK
    1999-2005, 1985-1988 Pontiac Grand Am4 Cyl 2.0L, 4 Cyl 2.2L, 4 Cyl 2.3L, 4 Cyl 2.4L, 4 Cyl 2.5L, 6 Cyl 3.0L, 6 Cyl 3.4L2 DOOR, GT 2 DOOR COUPE, GT1 2 DOOR COUPE, LE 2 DOOR, SE 2 DOOR, SE 4 DOOR, SE 4 DOOR SEDAN
    1997-2008 Pontiac Grand Prix6 Cyl 3.1L, 6 Cyl 3.8L, 8 Cyl 5.3L2 DOOR, 4 DOOR, GT 2 DOOR, GT 4 DOOR, GT2 4 DOOR, GTP 2 DOOR, GTP 4 DOOR, GXP 4 DOOR, SE 4 DOOR
    1999-2009 Pontiac Montana6 Cyl 3.4L, 6 Cyl 3.5L, 6 Cyl 3.9L, 6 Cyl 3.9L Flex2/SLIDING DOORS, AWD EXT 2/SLIDING DOORS, CROSSOVER SPORT VAN, CROSSOVER SPORT VAN EXTENDED, EXT, EXT 2/SLIDING DOORS, MONTANA, SPECIAL 2/SLIDING DOORS
    2005-2006 Pontiac Pursuit4 Cyl 2.0L, 4 Cyl 2.2L, 4 Cyl 2.4L2 DOOR, 4 DOOR, LEVEL 4 PERFORMANCE (SS) 2 DOOR, LEVEL 4 PERFORMANCE/SC (SS) 2 DOOR, LEVEL ONE (LS) 2 DOOR, LEVEL ONE (LS) 4 DOOR, LEVEL THREE (SS) 2 DOOR, LEVEL THREE (SS) 4 DOOR, LEVEL TWO (LT) 2 DOOR, LEVEL TWO (LT) 4 DOOR
    2006-2009 Pontiac Torrent6 Cyl 3.4L, 6 Cyl 3.6LGT SUV AWD, GT SUV FWD, SUV AWD, SUV FWD
    1997-1998 Pontiac Trans Sport6 Cyl 3.4L2/SLIDING DOORS, EXT, EXT 2/SLIDING DOORS, TRANS SPORT
  • Customer Questions & Expert Answers

    Q:
    I would like to confirm if this is the correct part number for my vehicle. Please advise. Thank you. Posted by GMPartsGiant Specialist
    A:
    You can Select Your Vehicle to check if 25603373 fits your vehicle.
    Posted by GMPartsGiant Specialist
    Q:
    How to remove and install standard, manual remote, or electric remote side view mirrors on Buick Century? Posted by Customer
    A:
    For the installation and removal of standard, manual remote and electric remote side view mirrors, follow these basic steps. First, take off the door trim panel and inner panel water deflector, then pull out the front part of the glass run weatherstrip while holding down the glass. For standard side view mirrors, remove side view mirror base stud nuts from attaching nuts before removing the side view mirror. For manual remote side view mirrors, remove door trim panel and side view mirror remote control escutcheons also disconnect inner panel water deflector. Right-side remote side view mirrors may require detaching a portion of the instrument panel. Remove screws and bolts attaching front glass run channel lower retainer to filler, rotate retainer rearward till patch for noise control is removed to expose screw at belt's end then remove screw. At top front of window frame, remove filler attaching screws and then take out both filler and side view mirror from door. Disconnect negative battery cable first in case of electric remote side view mirrors as well as removing side view mirror remote control escutcheons, door trim panel, inner panel water deflector and electrical connector for side view mirror. Right-side remote side view mirrors may also require detaching part of the instrument panel. Follow these steps for all types of side view mirrors: Ensure that either side view mirror gasket or electric wire is correctly aligned; replace side view mirror including filler on door; set up filler attaching screws at top front of window frame; attach nuts on studs for side view mirror; put back screw at belt together with inserting patch for noise control; fasten front glass run channel lower retainer together with filler by using attaching bolts as well as screws; afterwards insert in place back part of glass run weatherstrip for the former step to be completed just behind it. In this case there should be electric wire routed around the front glass run channel retainer so that it could go into its clip if any type electric remote side view mirrors are installed through it. Nuts must be tightened to 72 in.-lbs or 8 Nm eventually.
    Posted by GMPartsGiant Specialist
    Q:
    How to Troubleshoot and Repair Side View Mirrors on Buick Enclave? Posted by Customer
    A:
    The electric rearview mirrors in vehicles use two motors to adjust the glass. Some vehicles also have memory mirrors that are connected to the power seat memory unit and the Body Control Module (BCM). To troubleshoot any issues with the mirrors, start by operating the mirror control switch through all functions while listening to the sound of the electric motors running. Additionally, check the ground connections and test the wires at the mirror for voltage. If there is no voltage, check the circuit between the mirror and control switch for any opens or shorts. If there is voltage, remove the mirror and test it off the vehicle with jumper wires, making sure to use the correct leads and if the mirror fails this test, it should be replaced.
    Posted by GMPartsGiant Specialist
    Q:
    How to replace a Side View Mirrors on Cadillac CTS? Posted by Customer
    A:
    To replace the side view mirror, start by removing the door trim panel and the window frame trim panel; if the mirror cover has a speaker, disconnect its electrical connector. Next, disconnect the electrical connector from the mirror, then remove the mirror mounting nuts and the mirror itself. For installation, reverse the removal steps. When replacing the mirror glass, take precautions as it can break easily; wear safety glasses and gloves. Use a plastic trim tool to insert between the two tabs in the outer corner and twist to free the glass from the motor, noting that for 2007 and earlier models, the tool should be inserted from the top. If the mirrors are heated, disconnect the electrical connectors. Connect the wires to the new mirror glass and snap it onto the motor. For the inside mirror, disconnect the sensor cover clips, remove the cover and electrical connector, then remove or install the Ton screw or set screw at the base on the windshield. If the mount plate has detached from the windshield, adhesive kits are available at auto parts stores to re-secure it, following the included instructions.
    Posted by GMPartsGiant Specialist
    Q:
    How are the Side View Mirrors controlled on Cadillac CTS? Posted by Customer
    A:
    On these models, the outside mirrors are controlled by the Driver Door Switch Assembly (DDSA), which houses the mirror control switches, the Driver Door Module (DOM), and the front Passenger Door Module (PDM). The DDSA interprets the mirror control switch movements while the door modules supply the battery voltage and ground to their different mirror motors to move the mirrors. The electric rear view mirrors use two motors for adjustments: one for up and down and another for left-right. The control switch has a selector that sends voltage to the left or right side mirror. With the ignition in the ACC position and the engine OFF, roll down the windows and operate the mirror control switch through all functions for both mirrors, listening for the sound of the electric motors. If the motors can be heard but the mirror glass doesn't move, there may be a problem with the drive mechanism inside the mirror, necessitating a complete replacement. If the mirrors don't operate and no sound is heard, check the fuses. If the fuses are fine, remove the mirror control switch and have its continuity checked by a qualified service department. Additionally, check the ground connections. If the mirror still doesn't work, remove it and check the wires for voltage. If there's no voltage in each switch position, inspect the circuit between the mirror and control switch for opens and shorts. If voltage is present, remove the mirror and test it off the vehicle with jumper wires, replacing it if it fails this test.
    Posted by GMPartsGiant Specialist
    Q:
    How to remove and install side view mirrors on Chevrolet Astro? Posted by Customer
    A:
    For 1995 and earlier models, the work starts with the removal of the door trim panel and the water shield at the back side of the mirror area. Gently push and unlock the top right corner of the trim panel that which conceals the exterior mirror mounting nuts and fold it downwards till it comes off. If they are powered up, remove the electrical connector of the mirrors. Subsequently, unscrew the nuts or the screws if they are applied in order to completely pull off the mirror. The installation process is done in the reverse sequence to the removal process.
    Posted by GMPartsGiant Specialist
    Q:
    How to remove and install a door Side View Mirrors on Cadillac Fleetwood? Posted by Customer
    A:
    To remove the mirror, unplug the negative battery terminal first, and then you will have to take off the door trim panel, and then disconnect the connector. If necessary, remove such parts as trim plate and foam sound insulator for the further work. Third, take off all three of the mounting nuts and the mirror-to reach it, take off the black plastic cap under the door weatherstrip in order to get to the forward nut. For installation, place the mirror near the door and screw into the mounting nuts making sure that it is tightened to clockwise 54 inch lbs. (6 Nm). Put back the black plastic cap under the weatherstrip, connect the wiring connector, and if required one should replace the foam sound insulator as well as the mirror trim plate. Last but not the least, replace the door trim panel and bring back the negative terminal of the battery to life.
    Posted by GMPartsGiant Specialist
    Q:
    How to troubleshoot issues with side view mirrors on Chevrolet Cobalt? Posted by Customer
    A:
    To troubleshoot any electric rearview mirror issues, operate the mirror control switch and listen for the sound of the motors. If the motors can be heard but the mirror doesn't move, there may be a problem with the drive mechanism. Check the fuse and mirror control switch continuity. Ensure proper grounding. If the mirror still doesn't work, check the wires for voltage. Check for voltage to determine if the mirror needs to be tested or replaced. Look for potential circuit openings or short circuits if no voltage is detected.
    Posted by GMPartsGiant Specialist
    Q:
    How can the optional Side View Mirrors be adjusted and what troubleshooting steps should be taken if they are not functioning properly on Chevrolet Express? Posted by Customer
    A:
    The optional electric side-view mirrors can be adjusted up-and-down and left-to-right using a driver's side switch on the left door trim panel; turning the switch clockwise adjusts the left mirror, while counterclockwise adjusts the right mirror. The control switch features four arrows, and after selecting the desired mirror, pushing the arrows will position it accordingly. With the ignition in the ACC position, roll down the windows and operate the mirror control switch through all functions for both mirrors. Models with factory-installed dual power mirrors include a defroster grid behind the mirror glass to clear fog, ice, or snow, activated by a button near the heater/air conditioning controls. If the electric motors are audible but the mirror glass does not move, a defective drive mechanism may require mirror replacement. If there is no sound from the mirrors, check the fuse in the passenger compartment fuse box. If the fuse is intact, access the back of the mirror control switch by removing the door panel without disconnecting the wires, then check for voltage at the switch with the ignition ON. If voltage is present, test the switch for continuity in all positions; if it lacks continuity, replace it. Reconnect the switch and check the ground wire; if the mirror operates normally with a jumper wire to ground, repair the faulty connection. If the mirror remains unresponsive, remove it and check for voltage at the mirror wires with the ignition ON and the selector switch in the appropriate position, ensuring voltage is present in all positions except the neutral position. If voltage is absent, inspect the wiring for opens and shorts, and if voltage is confirmed, test the mirror off the vehicle with jumper wires, replacing it if it fails the test.
    Posted by GMPartsGiant Specialist
    Q:
    How to remove and install Side View Mirrors on Chevrolet Express? Posted by Customer
    A:
    To remove the outside side view mirrors on a 2000 and earlier model, start by removing the side view mirror trim cover. For 2003 and later models, remove the front door trim panel. If it is a power side view mirror, disconnect the electrical connector from the side view mirror.
    Posted by GMPartsGiant Specialist
    Q:
    How do side view mirrors function and what steps should be taken if they are not operating correctly on Pontiac G6? Posted by Customer
    A:
    Most electric rear view mirrors utilize two motors for adjustments, one for vertical movement and another for horizontal movement. The control switch features a selector that directs voltage to either the left or right side mirror. With the ignition ON but the engine OFF, roll down the windows and operate the mirror control switch through all functions (LEFT-RIGHT and UP-DOWN) for both mirrors. Listen for the sound of the electric motors running; if the motors are audible but the mirror glass remains stationary, there may be an issue with the drive mechanism inside the mirror. If there is no sound from the mirrors, check the fuse. If the fuse is intact, remove the mirror control switch and have its continuity checked by a qualified repair facility. Ensure the mirror is properly grounded. If the mirror still does not function, remove it and check the wires for voltage. If voltage is absent in each switch position, inspect the circuit between the mirror and control switch for any opens or shorts. If voltage is present, remove the mirror and test it off the vehicle using jumper wires, replacing it if it fails this test.
    Posted by GMPartsGiant Specialist
    Q:
    How to remove and install the door trim panel and side view mirrors assembly on Pontiac Grand Prix? Posted by Customer
    A:
    Remove the door trim panel and the mirror reinforcement panel. For power mirrors, unplug the electrical connector. Remove the three nuts and lift off the mirror assembly. Installation is the reverse of removal.
    Posted by GMPartsGiant Specialist
    Q:
    How to replace the outside and inside side view mirrors on Chevrolet Trailblazer? Posted by Customer
    A:
    To replace the outside mirrors, first, one needs to take out the door trim panel, and the door insulator. After that, one has to remove the mirror wiring harness from the door and then remove the connector. Take the nuts off and unscrew the mirror from the door, making sure to pull out the electical connector is it is a power model. To uninstall an L10 splitter, reverse the installation process that is described above. In the same case with the outside mirror, one may turn the electrical connector if it is present, then undo the setscrew and slide the mirror off the support base on the windshield. Reinstallation is done in the opposite way to uninstallation, that is from top to bottom. If the support base is released from the windshield one can put it back using the mirror adhesive kit which is available in the auto parts stores; wash clean both the surface of the glass and the support base, apply the adhesive in the manner described in the package inserting and the support base should be allowed to set for a day before fixing the mirror.
    Posted by GMPartsGiant Specialist
    Q:
    How to remove and install outside and inside side view mirrors on Saturn Vue? Posted by Customer
    A:
    To remove the outside mirrors, pry the upper corner of the trim panel out until the retaining clip disengages, then slide the panel up to detach it from the door panel. Disconnect the electrical connector from the mirror, remove the three retaining bolts, and detach the mirror from the vehicle, with installation being the reverse of removal. For the inside mirror, disconnect the electrical connector if equipped, then remove the setscrew at the base of the mirror stalk. Slide the mirror upwards to detach it from its mount. If the mount plate has come off the windshield, adhesive kits are available at auto parts stores for reattachment; follow the included instructions, ensuring the flanged part of the mount is positioned away from the glass and the narrower part is pointing up.
    Posted by GMPartsGiant Specialist
    Q:
    How do electric side view mirrors operate and what steps should be taken if they are unresponsive on Saturn Vue? Posted by Customer
    A:
    Most electric side view mirrors utilize two motors for adjustments, In other environments of the same facility, there are ways designed for going up and down and the others for moving from side to side. The control switch has a switch that allows voltage to flow to either the left side mirror or the right side mirror. Switch on the ignition but do not start the engine Turn the window down and operate the mirror control switch through all the functions on both the outside and the interior mirrors while listening to the sound of the electric motors. If you can hear the motors running but the mirror glasss is not moving there could be a problem with the internal drive motor. Unless the mirrors are lazy or dumb enough not to vibrate or make sound in that case, one has to check on the fuse.. If the fuse is serviceable, the mirror control switch should be detached for continuity check at an authorized repair shop. It is also possible to ground the mirror properly which is also a crucial value to consider. In the case where the mirror does not respond and still does not function, it is advised that the mirror should be unplugged to check for voltage at the wires. In the absence of voltage in each switch position, follow the circuit to look for opens or shorts. If voltage is present the mirror should be tested off the vehicle with jumper wires; if it fails this test it should be replaced.
    Posted by GMPartsGiant Specialist
    Q:
    How do you disconnect the electrical connector from the inside mirror for the 2007 Chevrolet Equinox? Posted by Customer
    A:
    To disconnect the electrical connector from the inside mirror, if equipped, you need to disconnect it from the mirror.
    Posted by GMPartsGiant Specialist
    See expert answers on similar Side View Mirrors
    Q:
    How do you install the mirror glass for the 2009 Chevrolet HHR? Posted by Customer
    A:
    Align the mirror face to the backing plate and carefully apply pressure to the glass using a thick pad until it clicks into place.
    Posted by GMPartsGiant Specialist
    See expert answers on similar Side View Mirrors
    Q:
    How do you remove the outside mirror for the 2008 GMC Acadia? Posted by Customer
    A:
    To remove the outside mirror, start by removing the door trim panel and molding. Then, disconnect the electrical connector and remove the mirror fasteners.
    Posted by GMPartsGiant Specialist
    See expert answers on similar Side View Mirrors
    Q:
    How do you install the mirror after removal for the 2009 Pontiac G6? Posted by Customer
    A:
    Installation is the reverse of removal.
    Posted by GMPartsGiant Specialist
    See expert answers on similar Side View Mirrors
    Q:
    What should you do if you're removing a power mirror for the 2005 Saturn ION? Posted by Customer
    A:
    Disconnect the electrical connector before proceeding.
    Posted by GMPartsGiant Specialist
    See expert answers on similar Side View Mirrors
    Q:
    Does this part number come with the base for the mirror? Posted by Customer
    A:
    No, the base is not included with the mirror
    Posted by GMPartsGiant Specialist 30/1/2020
    Q:
    Does this mirror come with lights? Posted by Customer
    A:
    No, this mirror does not include lights on it
    Posted by GMPartsGiant Specialist 29/1/2020
    If you have any questions about this product, please don't hesitate to ask us. We will be happy to help you!

Genuine GM Part 25603373, the Right Choice

To ensure reliability, purchase GM part # 25603373 Mirror Assembly, Inside Rear View. It is sometimes referred to as Pontiac Side View Mirrors. Directly from GM, genuine parts are superb with regards to quality, longevity, and fit. Every single part passed stringent quality testing, so you can be sure that it's safe, durable, and built to perform like your original parts. This part fits specific Pontiac 6000, G5, Grand Prix models.

GMPartsGiant.com is a leading supplier of genuine GM parts and accessories such as GM 25603373 Mirror Assembly, Inside Rear View. You're certainly in the right place if you're searching for the great cost-effective OEM GM parts. Look no further than our vast inventory of genuine GM parts offered at unbeatable online prices, all of which are backed by the manufacturer's warranty. Not to forget, our hassle-free return policy and quick delivery service ensure a smooth shopping experience for you. For detailed Pontiac parts information, click here.

Why choose GM Parts Giant

  • Dedicated Service

    Your complete satisfaction is our #1 goal

  • Lowest Prices

    Best deals on genuine OE parts from dealerships

  • Fast Delivery

    Orders are processed and delivered promptly