Make sure this part fits

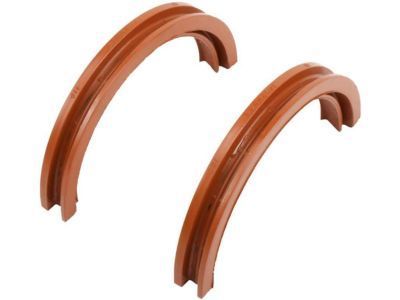
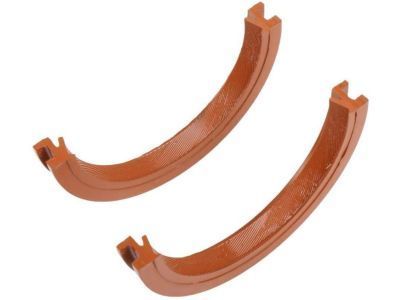
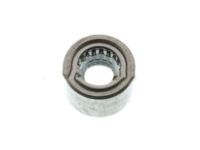
Pontiac 10121044 Seal Unit, Crankshaft Rear (Free Of Asbestos)

1982-1991 Pontiac

Customer Questions & Expert Answers (8)
GM 10121044 Seal Unit, Crankshaft Rear (Free Of Asbestos)
  • Part Description
    SEAL KIT, Engine Rear Main Bearing
  • Position
    Rear
  • Manufacturer
    General Motors
Make sure this part fits
$36.04 MSRP: $56.68
You Save: $20.64 (37%)
Ships in 1-3 Business Days
1
ADD TO CART
  • Related Parts
  • Product Specifications
  • Vehicle Fitment
  • Customer Questions & Expert Answers
  • Product Specifications

    BrandGenuine Pontiac
    Manufacturer Part Number10121044
    Part DescriptionSEAL KIT, Engine Rear Main Bearing
    Other NamesRear Main Seal
    Item Dimensions6.7 x 5.0 x 0.3 inches
    Item Weight0.40 Pounds
    PositionRear
    ConditionNew
    Fitment TypeDirect Replacement
    ManufacturerGeneral Motors
    SKU10121044
    WarrantyThis genuine GM part is guaranteed by GM's factory warranty.
    Shipping & ReturnShipping Policy Return Policy
    Warning: California's Proposition 65
  • Vehicle Fitment

    Year Make Model Engine Important vehicle option details
    1982-1986 Pontiac Bonneville8 Cyl 5.0L2 DOOR, 4 DOOR, BROUGHAM 2 DOOR, LE 2 DOOR, STATION WAGON
    1982-1991 Pontiac Firebird8 Cyl 5.0L2 DOOR, CONVERTIBLE
    1982-1987 Pontiac Grand Prix8 Cyl 5.0L2 DOOR, 4 DOOR, BROUGHAM 2 DOOR, LE 2 DOOR, STATION WAGON
    1983-1986 Pontiac Parisienne6 Cyl 4.3L, 8 Cyl 5.0L4 DOOR, BROUGHAM, STATION WAGON
  • Customer Questions & Expert Answers

    Q:
    I am wonder if this is complete and correct part for my vehicle. Posted by GMPartsGiant Specialist
    A:
    You can Select Your Vehicle to check if 10121044 fits your vehicle.
    Posted by GMPartsGiant Specialist
    Q:
    How to properly install a crankshaft seal on Chevrolet Astro? Posted by Customer
    A:
    For a four-cylinder engine, begin by cleaning the bore in the block and sealing the contact surface on the crankshaft, checking for any scratches or nicks that could damage the new Crankshaft Seal lip and lead to oil leaks; if the crankshaft is damaged, a new or different crankshaft is necessary. Apply a light coat of engine oil or multi-purpose grease to the outer edge of the new seal and lubricate the seal lip with moly-base grease. Press the new Crankshaft Seal into place using a special installation tool, ensuring the seal lip faces the front of the engine; if the tool is unavailable, carefully work the seal lip over the crankshaft end and tap it in with a hammer and punch until seated. For a V6 engine from 1985, inspect the rear Crankshaft Seal bearing cap and engine block mating surfaces, as well as the seal grooves, for any defects, removing them with a fine file or deburring tool. Install one seal section in the block with the lip facing the front, leaving one end protruding approximately 1/4 to 3/8-inch, and ensure it is completely seated. Repeat this for the remaining seal half in the rear Crankshaft Seal bearing cap, leaving the opposite end protruding the same distance. During the final crankshaft installation, after checking bearing oil clearances, apply a thin, even coat of anaerobic-type gasket sealant to the indicated areas, avoiding contact with the bearing face, crankshaft journal, seal ends, or seal lips, and lubricate the seal lips with moly-base grease or clean engine oil. For models from 1986 onward, which feature a one-piece Crankshaft Seal, install the crankshaft first and bolt the main bearing caps in place before installing the new seal in the housing and bolting the housing to the block. Before crankshaft installation, carefully check the seal contact surface for any scratches or nicks that could damage the new Crankshaft Seal lip; if damaged, a new or different crankshaft is required. Remove the old seal from the housing by prying it out with a large screwdriver, noting how far it is recessed into the housing bore, as the new Crankshaft Seal must be recessed the same amount while avoiding damage to the bore. Ensure the housing is clean, apply a thin coat of engine oil to the outer edge of the new seal, and press it squarely into the housing bore, using a press or a large vise with smooth wood pieces to distribute force evenly. Avoid allowing oil or other lubricants to contact the seal lip surface, use a new gasket without sealant, and ensure dowel pins are in place before installing the housing. Tighten the nuts or screws gradually until the seal housing is fully seated, then tighten them to the specified torque.
    Posted by GMPartsGiant Specialist
    Q:
    How should both halves of the rear crankshaft seal be replaced in V8 engine on Chevrolet Caprice? Posted by Customer
    A:
    Always replace both halves of the rear Crankshaft Seal as a unit. While replacing this seal is much easier with the engine removed, it can also be done with the engine in place. Begin by removing the oil pan and oil pump, followed by the rear main bearing cap. Use a screwdriver to pry the lower half of the seal from the bearing cap. For the upper half, utilize a small hammer and a brass pin punch to roll the seal around the crankshaft journal, tapping one end until the other end protrudes enough to pull it out with pliers. Clean all sealant and foreign material from the cylinder bearing cap and case without using abrasive cleaners, and inspect components for nicks, scratches, or burrs at sealing surfaces. Coat the seal lips of the new seal with light engine oil, avoiding oil on the mating ends. A small plastic installation tool should be included with the new seal; if not, create one by cutting an old feeler gauge blade. Position the narrow end of the installation tool between the crankshaft and the seal seat to protect the new seal from damage. Raise the new upper half of the seal into position with the seal lips facing the front of the engine, pushing it onto its seat while using the installation tool for protection. Roll the seal around the crankshaft, using the tool as a protector, and once both ends are flush with the engine block, carefully remove the installation tool without withdrawing the seal. Install the lower half of the Crankshaft Seal to the bearing cap, again using the installation tool for protection, ensuring the seal is firmly seated before withdrawing the tool. Apply a bit of sealant on the bearing cap areas adjacent to the seal ends, then install the bearing cap with the seal and torque the attaching bolts to about 10-12 ft-lb. Finally, tap the end of the crankshaft rearward and then forward to align the thrust surfaces, and re-torque the bearing cap bolts to the proper specification.
    Posted by GMPartsGiant Specialist
    Q:
    How should both halves of the rear crankshaft seal be replaced in V8 engine on Chevrolet El Camino? Posted by Customer
    A:
    Always replace both halves of the rear Crankshaft Seal as a unit. While replacing this seal is much easier with the engine removed from the car, it can be done with the engine in place. Begin by removing the oil pan and oil pump, followed by the rear main bearing cap from the engine. Use a screwdriver to pry the lower half of the Crankshaft Seal from the bearing cap. To remove the upper half of the seal, use a small hammer and a brass pin punch to roll the seal around the crankshaft journal, tapping one end until the other end protrudes enough to pull it out with pliers. Clean all sealant and foreign material from the cylinder bearing cap and case without using abrasive cleaners, and inspect components for nicks, scratches, or burrs at all sealing surfaces. Coat the seal lips of the new seal with light engine oil, avoiding oil on the seal mating ends. A small plastic installation tool should be included with the purchase of the rear Crankshaft Seal; if not, create one from an old feeler gauge blade. Position the narrow end of the installation tool between the crankshaft and the seal seat to protect the new seal from damage. Raise the new upper half of the seal into position with the seal lips facing towards the front of the engine, pushing it onto its seat while using the installation tool for protection. Roll the seal around the crankshaft, using the tool as a protector, and once both ends of the seal are flush with the engine block, carefully remove the installation tool without withdrawing the seal. Install the lower half of the Crankshaft Seal to the bearing cap, again using the installation tool for protection, ensuring the seal is firmly seated before withdrawing the tool. Smear a bit of sealant to the bearing cap areas adjacent to the seal ends, then install the bearing cap with the seal and torque the attaching bolts to about 10-12 ft-lb. Finally, tap the end of the crankshaft first rearward, then forward to align the thrust surfaces, and retorque the bearing cap bolts to the proper specification.
    Posted by GMPartsGiant Specialist
    Q:
    How to remove and install the crankshaft seal in four cylinder engine on Pontiac Firebird? Posted by Customer
    A:
    Remove the cable from the negative battery terminal. Loosen the accessory drivebelt tension adjusting bolts as necessary and remove the drivebelts, tagging each belt for easier reinstallation. With the parking brake applied and the shifter in Park for automatic or in gear for manual to prevent the engine from turning over, remove the crankshaft pulley bolt, using a breaker bar if needed due to tightness. Mark the position of the pulley in relation to the hub, then remove the bolts and separate the pulley from the hub. Use a puller to remove the hub from the crankshaft. Carefully pry the oil seal out of the front cover with a large screwdriver, taking care not to distort the cover. Install the new seal with the helical lip toward the rear of the engine, driving it into place with a seal installation tool or a large socket, or using a block of wood and hammer if space allows. Apply a thin layer of clean multipurpose grease to the seal contact surface of the hub. Position the pulley hub on the crankshaft and slide it through the seal until it bottoms against the crankshaft gear, ensuring the slot in the hub aligns with the Woodruff key in the crankshaft. The hub-to-crankshaft bolt can be used to press the hub into position. Install the crank pulley on the hub, aligning it with the marks made during removal, and coat the pulley-to-hub bolts with thread-locking compound before tightening the hub-to-crankshaft and pulley-to-hub bolts to the specified torque. The remaining installation steps follow the reverse order of removal, ensuring the drivebelts are tightened to the proper tension.
    Posted by GMPartsGiant Specialist
    Q:
    What are the installation procedures and differences for rear crankshaft seals on Pontiac Firebird? Posted by Customer
    A:
    The four-cylinder engine features a one-piece rear Crankshaft Seal installed after the final crankshaft installation. V6 engines from 1984 and earlier originally came with a two-piece rear Crankshaft Seal, which is prone to leakage and should be replaced with a one-piece service replacement rear Crankshaft Seal kit; this kit can be obtained from an auto parts supplier or dealership and is installed during crankshaft installation. V6 engines from 1985 and later are equipped with a one-piece rear Crankshaft Seal similar to the four-cylinder design, installed after the final crankshaft installation. For V8 engines from 1985 and earlier, it is important to inspect the bearing cap and engine block mating surfaces for defects, install the lower seal section in the block with the lip facing the front, and ensure it is seated properly. The remaining seal half is then installed in the rear Crankshaft Seal bearing cap, also ensuring proper seating. During the final installation of the crankshaft, a thin, even film of anaerobic-type gasket sealant should be applied to the Crankshaft Seal bearing cap split-line. For models from 1986 and later, the rear Crankshaft Seal is installed after the final crankshaft installation; the old oil seal must be carefully pried out, the retainer cleaned, and a new gasket installed with specified torque. The seal lip should be lubricated with clean engine oil, and the seal can be pressed into the housing using a one-piece rear Crankshaft Seal installation tool or driven in carefully with a blunt tool, ensuring it is squarely positioned without damage.
    Posted by GMPartsGiant Specialist
    Q:
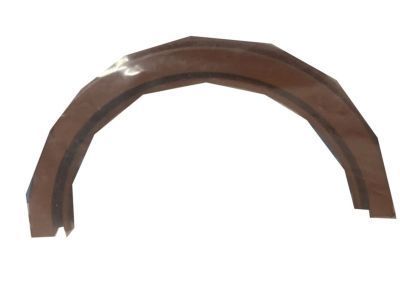
    How do you install the new shedder for the 1986 Chevrolet Caprice? Posted by Customer
    A:
    Drive in the new shedder using a punch, staking it in place in at least three locations.
    Posted by GMPartsGiant Specialist
    See expert answers on similar Crankshaft Seal
    Q:
    How can the rear bearing be aligned properly for the 1986 Chevrolet El Camino? Posted by Customer
    A:
    Tap the end of the crankshaft with a lead hammer to align the rear bearing properly.
    Posted by GMPartsGiant Specialist
    See expert answers on similar Crankshaft Seal
    If you have any questions about this product, please don't hesitate to ask us. We will be happy to help you!

Genuine GM Part 10121044, the Right Choice

To ensure reliability, purchase GM part # 10121044 Seal Unit, Crankshaft Rear (Free Of Asbestos). It is sometimes referred to as Pontiac Crankshaft Seal. Directly from GM, genuine parts are superb with regards to quality, longevity, and fit. Every single part passed stringent quality testing, so you can be sure that it's safe, durable, and built to perform like your original parts. This part fits specific Pontiac Bonneville, Firebird, Grand Prix models.

GMPartsGiant.com is a leading supplier of genuine GM parts and accessories such as GM 10121044 Seal Unit, Crankshaft Rear (Free Of Asbestos). You're certainly in the right place if you're searching for the great cost-effective OEM GM parts. Look no further than our vast inventory of genuine GM parts offered at unbeatable online prices, all of which are backed by the manufacturer's warranty. Not to forget, our hassle-free return policy and quick delivery service ensure a smooth shopping experience for you. For detailed Pontiac parts information, click here.

Why choose GM Parts Giant

  • Dedicated Service

    Your complete satisfaction is our #1 goal

  • Lowest Prices

    Best deals on genuine OE parts from dealerships

  • Fast Delivery

    Orders are processed and delivered promptly