
Why choose GMPartsGiant
- Large Inventory
The best site to buy Chevrolet Impala genuine parts for years has been GMPartsGiant.com. We're the best online parts and accessory store for your Chevrolet Impala. GMPartsGiant.com offers a large parts and accessory inventory to cover all your vehicle's repairs. Feel free to browse through our genuine Chevrolet Impala parts and accessory catalog to find all your vehicle's needs.
- Fast Shipping Times
All of our Chevrolet Impala auto parts and accessories are expedited directly from verified dealers and backed by the manufacturer's warranty. Our experienced team ensures the orders are packed to provide quick transit times. The majority of the orders are shipped out within a couple of business days to get the parts out to you as fast as possible.
- Low Prices
Our low prices say it all. You can rest assured that you will always receive unbeatable prices on OEM Chevrolet Impala parts. Our giant inventory is beyond compare and has everything you need at an extraordinary value not found anywhere else. Whether you're restoring an old vehicle or upgrading the performance of your vehicle you can count on the quality of our products without hurting your bank account.
Popular Genuine Chevrolet Impala Parts
- Engine Parts View More >
- Front Suspension, Steering Parts View More >
- Fuel System, Exhaust, Emission System Parts View More >
- Brakes Parts View More >
- Transmission - Automatic Parts View More >
- Frames, Springs, Shocks, Bumpers Parts View More >
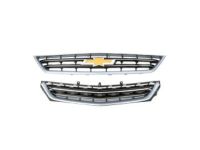
- Cooling System, Grille, Oil System Parts View More >
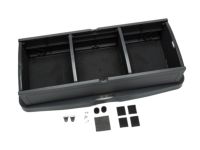
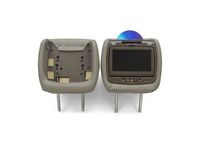
- Interior Trim, Front Seat Trim, Seat Belts Parts View More >


Shop Genuine Chevrolet Impala Parts with GMPartsGiant.com
The Chevrolet Impala is a celebrated full-sized sedan, manufactured by Chevrolet across ten generations from 1958 to 2020, with some periods of hiatus. Renowned for its powerful engine lineup, the Impala has evolved significantly over the years. The first generation offered a variety of engines, from the 235 cu in Blue Flame I6 to the 348 cu in W-series Turbo Thrust V8. The ninth generation presented an even wider range, including 3.5L LZ4 V6 and 5.3L LS4 V8 options. The tenth and final generation introduced engines such as the 2.4L LUK Ecotec I4 eAssist, with the latest 3.6L LFX V6 version producing 182 hp at 6700 rpm and 172 lb-ft of torque at 4900 rpm. The Impala also boasted responsive transmission systems, ranging from the 3-speed manual in the first generation to the 6-speed 6T70 automatic in the tenth. Over the decades, the Impala's dimensions have also evolved, starting from a length of 209.1 inches in the first generation, to a more streamlined 201.3 inches in the tenth. This full-size vehicle offered not just potent engines, but also a host of features including MacPherson Strut front suspension, Multi-Link rear suspension, synthetic upholstery, and an eight-way power-adjustable driver's seat. Options for leather upholstery, heated and ventilated front seats, and heated steering wheels underscored the Impala's reputation for combining performance with comfort and style.
Over its lengthy history, Chevrolet Impala owners have noted some common problems, with two in particular standing out. One issue is related to shifting, as some owners reported rough shifts, mismatched indicators and gears, inability to turn the vehicle off or start in a different gear, or the car failing to go into gear at all. These issues may signal a bad or failing shift cable, necessitating a careful inspection of the transmission system. Another problem often pointed out is the failure of the intake manifold gasket. Symptoms include constant engine overheating or misfires, visible coolant leaks, decreased power on acceleration, and poor fuel economy. Beyond addressing these common problems, routine maintenance is crucial to prolong the lifespan of your Chevrolet Impala and ensure safety. Replacing parts that are prone to wear, such as the windshield wiper or blade-particularly under rough driving conditions-and checking the seat belt, a vital safety measure, are key parts of regular vehicle upkeep.
Selecting OEM parts provides assurance as they are synonymous with top-notch quality and longevity. They are meticulously engineered to meet the official factory's stringent specifications and undergo rigorous quality control tests during manufacturing, ensuring durability and a perfect fit. For superior quality and affordable Chevrolet Impala parts, like Front End Sheet Metal, Heater, Body Moldings, Sheet Metal, Rear Compartment Hardware, Roof Hardware, consider our website. We proudly present a wide selection of genuine Impala parts at unbeatable prices. These OEM parts, supported by the manufacturer's warranty, are also eligible for our hassle-free return policy and swift delivery service.
Chevrolet Impala Parts Questions & Answers
- Q: How to remove the Shift Cable on Chevrolet Impala?A:To remove the air inlet duct of the throttle body, all cables should be unclipped or freed from their retainers. Use a small pry-bar to push the cable off of the transaxle selector lever ball stud and then squeeze together the tabs on the cable housing to release it from where it is held near the lever by a bracket. Before finally pulling off of the shift lever, tie something such as wire or cord to its end. After you have taken out your shifter assembly, under the carpeting and out through your firewall pull it forward. Reverse steps for installation and adjust new cable after installing. For 2006 models, disconnect cable from manual lever on transaxle and place manual lever in neutral position. Inside car put shift lever in neutral and pull up on cable adjuster tab at cable bracket on transaxle then connect cable to manual lever. Cable will self adjust automatically Make sure that engine starts in only Park and Neutral positions. Park shift lever for 2007-onward vehicle models while setting parking brake. To release cable end do not grasp white part of plastic connector; instead pull back it with spring button pressed down. This will allow adjusting tensioning by means of a spring inside this mechanism for final release. Push white part of plastic connector back into its original position and check if all gear positions can be selected properly Adjust if necessary the tension setting on a transmission control cable.
- Q: How to disassemble the control arm on Chevrolet Impala?A:To disassemble the control arm, start by marking the relationship of the control arm to the front mounting bracket while the vehicle is at normal ride height. Then, loosen the wheel lug nuts, apply the parking brake, and raise the front of the vehicle. Support it securely on jackstands and remove the wheel. Next, remove the stabilizer bar link from the control arm and either remove the steering knuckle or separate the balljoint from the steering knuckle. After that, remove the fasteners that attach the control arm to the subframe and separate the control arm from the subframe. For inspection, check the control arm for distortion and the bushings for wear, replacing any worn or damaged parts. Do not attempt to straighten a bent control arm. If the bushings are cracked or show signs of wear, take the control arm to have the bushings replaced. To install the control arm, reverse the removal steps and tighten all fasteners to the proper torque values. Install the wheel and lug nuts, lower the vehicle, and tighten the lug nuts to the proper torque specifications. Finally, it is recommended to have the front wheel alignment checked and adjusted if necessary after completing this job.
- Q: How to disassemble and reassemble a Coil Springs and Shock Absorber assembly on Chevrolet Impala?A:If the struts or coil springs show signs of wear, they must be replaced as they can't be serviced. Before starting, check the cost and availability of parts. To disassemble, remove the strut and spring assembly and mount the strut clevis bracket in a vise. Use a spring compressor to relieve pressure from the upper spring seat. Unscrew the damper shaft nut, remove the nut and upper mount, and check the rubber portion for cracking. Remove the upper spring seat from the damper shaft and inspect the rubber portion and bearing. Check the dust boot and rubber bump stop for cracking and replace if needed. Remove the compressed spring. To reassemble, extend the damper rod and install the rubber bump stop and dust boot. Place the compressed coil spring onto the lower seat of the damper, install the upper insulator and spring seat, followed by the upper mount and mounting nut. Tighten to the proper torque specifications, remove the spring compressor tool, and install the strut spring assembly.
- Q: How to remove and replace a power steering pump on Chevrolet Impala?A:To remove and replace a power steering pump, start by using a large syringe or suction gun to remove as much fluid as possible from the power steering fluid reservoir. Place a drain pan underneath the vehicle to catch any spilled fluid. Next, remove the drivebelt and disconnect the return hose and pressure line fitting from the power steering pump using a flare-nut wrench. Then, remove the mounting bolts securing the pump to the mounting bracket and remove the pump. To install the new pump, reverse the removal steps, making sure to tighten the mounting bolts and line and hose fittings securely. Install the drivebelt and fill the power steering reservoir with the recommended fluid. Finally, bleed the power steering hydraulic system.


