Make sure this part fits your vehicle

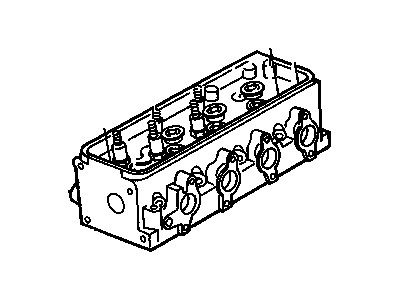
Buick 12360424 Engine Cylinder Head (W/Valve)

1993-1996 Buick Century

GM 12360424 Engine Cylinder Head (W/Valve)
  • Part Description
    Head,Cyl(W/Valve)
  • Manufacturer
    General Motors
Customer Questions & Answers
$914.74 MSRP: $1182.60
You Save: $267.86 (23%)
1
ADD TO CART
Ships in 1-3 Business Days
  • Product Specifications

    BrandGenuine Buick
    Manufacturer Part Number12360424
    Part DescriptionHead,Cyl(W/Valve)
    Other NamesCylinder Head
    Item Dimensions21.6 x 8.6 x 6.5 inches
    Item Weight30.00 Pounds
    ConditionNew
    Fitment TypeDirect Replacement
    ManufacturerGeneral Motors
    SKU12360424
    WarrantyThis genuine GM part is guaranteed by GM's factory warranty.
    Shipping & ReturnShipping Policy Return Policy
    Warning: California’s Proposition 65
  • Vehicle Fitment

    Year Make Model Engine Important vehicle option details
    1993-1996 Buick Century4 Cyl 2.2LCUSTOM, CUSTOM 2 DOOR, CUSTOM 4 DOOR, CUSTOM STATION WAGON, LIMITED 4 DOOR, SPECIAL, SPECIAL 4 DOOR, SPECIAL STATION WAGON

Customer Questions & Answers

Q:
I am wonder if this is complete and correct part for my vehicle. Posted by GMPartsGiant Specialist
A:
You can Select Your Vehicle to check if 12360424 fits your vehicle.
Posted by GMPartsGiant Specialist
Q:
How to remove and install a cylinder head in 2.0L/2.2L four cylinder overhead valve engine? Posted by Customer
A:
Allow the engine to cool completely before loosening the cylinder head bolts. On vehicles with high mileage and during an engine overhaul, camshaft lobe height should be checked prior to cylinder head removal. Removal involves relieving fuel pressure, disconnecting the negative battery terminal, removing the alternator and brackets, intake manifold, exhaust manifold, drivebelt tensioner bracket, and power steering pump (if equipped). Additionally, disconnect wires, hoses, fuel, and vacuum lines from the cylinder head, and label them for reinstallation. Disconnect spark plug wires and remove spark plugs. Remove the rocker arm cover, rocker arms, and pushrods. Using a new head gasket, outline cylinders and bolt pattern on cardboard, and loosen each cylinder head mounting bolt 1/4-turn at a time, storing them in the cardboard holder. Lift the head off the engine with care, tap if stuck, and place it on a block of wood. Remove the cylinder head gasket. For installation, transfer external parts to the new cylinder head if needed, clean gasket surfaces, ensure clean threads on head bolts and engine block, apply gasket sealant to the new gasket (1987-1989 models), lower the cylinder head onto the engine, and install bolts finger tight. Gradually tighten each bolt in 1/4-turn increments in the recommended sequence until reaching the specified torque. Mark each bolt during tightening to track the sequence. Complete the remaining installation steps, including refilling the cooling system and changing the oil and filter.
Posted by GMPartsGiant Specialist
Q:
How to thoroughly clean the cylinder head and related valve train components? Posted by Customer
A:
Thoroughly clean the cylinder head and related valve train components, removing old gasket material and sealant, scaling from coolant passages, deposits from holes, and corrosion and thread sealant from threaded holes. Clean the rocker arm pivot stud threads and the entire cylinder head with solvent, as well as the rocker arms, pivot balls, nuts, pushrods, valve springs, spring seats, rotators, keepers, and retainers. Scrape off heavy deposits from the valves and use a motorized wire brush to remove deposits from the valve heads and stems. Inspect the cylinder head for cracks, coolant leakage, and warpage, and check the valve seats for damage. Measure the valve stem-to-guide clearance and inspect each valve face, stem, and neck for wear, deformation, cracks, pits, and burns. Measure the margin width on each valve and check the valve springs for wear and measure the free length. Inspect the spring retainers, keepers, and rotators, as well as the rocker arm faces, pivot contact areas, pivot balls, pushrod ends, and rocker arm studs. Replace any damaged or excessively worn parts. Finally, if the valve components are in poor condition and worn beyond the specified limits, reassemble the valves in the cylinder head.
Posted by GMPartsGiant Specialist
Q:
How do you remove the cylinder head in V6 engine? Posted by Customer
A:
To remove the cylinder head, start by disconnecting the negative battery cable. Then, remove the intake manifold and the oil dipstick tube mounting bolt if necessary. Disconnect all wires, vacuum hoses, and spark plug wires, labeling them for reinstallation. Detach the exhaust manifold and remove the rocker arm cover, rocker arms, and pushrods. Use a new head gasket to outline the cylinders and bolt pattern on a piece of cardboard, and loosen each cylinder head mounting bolt gradually. Lift the head(s) off the engine, being careful not to damage the mating surfaces. For installation, ensure the mating surfaces are clean and use a gasket scraper to remove old material. Check for damage and chase the threads in the head bolt holes. Position the new gasket on the dowel pins and carefully place the head on the block. Apply Teflon pipe sealant to the bolt threads and undersides of the bolt heads, then tighten the bolts in the recommended sequence. Finally, complete the remaining installation steps and change the oil and filter.
Posted by GMPartsGiant Specialist
Q:
How do you remove and reinstall a cylinder head in 2.3L four cylinder (Quad-4) engine? Posted by Customer
A:
Begin by disconnecting the negative battery cable. Proceed to remove the intake manifold after draining the cooling system to prevent coolant from entering the engine's internal areas during head removal. Detach the exhaust manifold, and then remove the camshafts and housings. Create a holder for the head bolts using the new head gasket to outline cylinder and bolt patterns on a piece of cardboard, indicating the front of the engine for reference and punching holes at the bolt locations. Loosen the head bolts in 1/4-turn increments, working in a pattern opposite to the tightening sequence, and store them in the cardboard holder for reinstallation. Lift the head off the engine, using caution if resistance is encountered, and place the head on blocks of wood to protect the gasket sealing surfaces. Ensure the cylinder head and block mating surfaces are impeccably clean for installation, using a gasket scraper and cleaning with lacquer thinner or acetone to prevent oil on the surfaces. Check for damage on the mating surfaces, file if necessary, and chase the threads in the head bolt holes with a tap to remove corrosion. Position the new gasket over dowel pins in the block, carefully place the head on the block without disturbing the gasket, and install the bolts in their original locations, tightening them finger-tight before the final torque. Complete the remaining installation steps in reverse, refill the cooling system, change the oil and filter, and run the engine to check for leaks and proper operation.
Posted by GMPartsGiant Specialist
Q:
How to disassemble and inspect cylinder heads? Posted by Customer
A:
New and rebuilt cylinder heads are commonly available for most engines at dealerships and auto parts stores. Some specialized tools are necessary for the disassembly and inspection procedures, and replacement parts aren't always readily available, making it more practical and economical for the home mechanic to purchase replacement head(s) rather than disassemble, inspect, and recondition the original(s). Cylinder head disassembly involves the removal of the intake and exhaust valves and related components. If you're working on a Quad-4 engine, the camshafts and housings must be removed before beginning the cylinder head disassembly procedure. If you're working on a 2.0/2.2-liter four-cylinder engine or a V6 engine, remove the rocker arm nuts, pivot balls, and rocker arms from the cylinder head studs. Label the parts or store them separately so they can be reinstalled in their original location. Before the valves are removed, arrange to label and store them, along with their related components, so they can be kept separate and reinstalled in their original locations. Compress the springs on the first valve with a spring compressor and remove the keepers. Carefully release the valve spring compressor and remove the retainer, the spring, and the spring seat (if used). Note that valve rotators are installed under the springs on the Quad-4 engine. Pull the valve out of the head, then remove the oil seal from the guide. If the valve binds in the guide (won't pull through), push it back into the head and deburr the area around the keeper groove with a fine file or whetstone. Repeat the procedure for the remaining valves. Remember to keep all the parts for each valve together so they can be reinstalled in the same locations. Once the valves and related components have been removed and stored in an organized manner, the head should be thoroughly cleaned and inspected. If a complete engine overhaul is being done, finish the engine disassembly procedures before beginning the cylinder head cleaning and inspection process.
Posted by GMPartsGiant Specialist
Q:
What should you install before the valve seals during the reassembly of the cylinder head for the 1990 Chevrolet Beretta? Posted by Customer
A:
Before installing the valve seals during cylinder head reassembly, you should install the spring seats or valve rotators (if equipped).
Posted by GMPartsGiant Specialist
See expert answers on similar Cylinder Head
Q:
What are the initial steps to remove the cylinder head for the 1994 Chevrolet S10? Posted by Customer
A:
The initial steps to remove the cylinder head are to disconnect the negative battery cable and drain the cooling system.
Posted by GMPartsGiant Specialist
See expert answers on similar Cylinder Head
Q:
What components need to be removed before taking out the cylinder heads for the 2002 Chevrolet S10? Posted by Customer
A:
The intake manifold, exhaust manifolds, valve covers, and pushrods.
Posted by GMPartsGiant Specialist
See expert answers on similar Cylinder Head
Q:
How should the cylinder head bolts be loosened for the 1995 GMC Sonoma? Posted by Customer
A:
Loosen the cylinder head bolts in 1/4-turn increments.
Posted by GMPartsGiant Specialist
See expert answers on similar Cylinder Head
Q:
What should be done after installing the cylinder head for the 2001 GMC Sonoma? Posted by Customer
A:
After installing the cylinder head, you should finish by changing the oil and filter, adding coolant, running the engine, and checking for leaks.
Posted by GMPartsGiant Specialist
See expert answers on similar Cylinder Head
If you have any questions about this product, please don't hesitate to ask us. We will be happy to help you!

Genuine GM Part 12360424, the Right Choice

Your vehicle deserves only genuine OEM GM parts and accessories. To ensure reliability, purchase GM part # 12360424 Engine Cylinder Head (W/Valve). It is sometimes referred to as Buick Cylinder Head. Our GM parts and accessories are expedited directly from authorized GM dealers strategically located all across the U.S. and are backed by the manufacturer's 12 month, 12,000 mile warranty. OEM GM parts are the best for restoring your vehicle to factory condition performance. This part fits specific Buick Century models.

Affordable, reliable and built to last, GM part # 12360424 Engine Cylinder Head (W/Valve) stands out as the smart option. GMPartsGiant.com is your prime online source with the biggest and best selection of genuine GM parts and accessories at giant discounted prices. We have the OEM GM parts and accessories you need at the wholesale prices. GMPartsGiant.com has you covered no matter what type of GM vehicle you drive. For detailed Buick parts information, click here.

Why choose GM Parts Giant

  • Dedicated Service

    Your complete satisfaction is our #1 goal

  • Lowest Prices

    Best deals on genuine OE parts from dealerships

  • Fast Delivery

    Orders are processed and delivered promptly