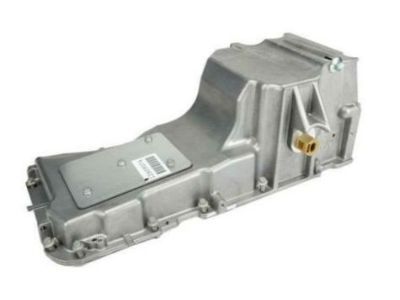
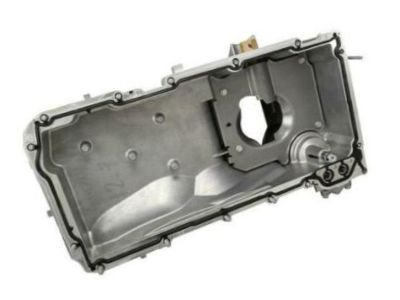
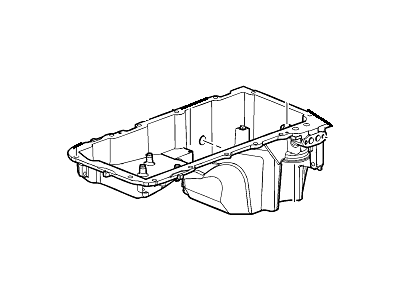
Disconnect the cable from the negative terminal of the battery. Raise the vehicle and support it securely on jackstands, drain the engine oil, and remove the oil filter. Remove the oil pan skid plate if equipped. Remove the lower crossmember from below the oil pan. On 4WD models, remove the front differential carrier. There is an engine wiring harness at the front of the oil pan. Disconnect the harness bracket. Disconnect the front exhaust Y pipe from the engine and the exhaust system and remove it from the vehicle. Remove the starter motor. Also, remove the plastic bell housing side covers. Disconnect the transmission cooler line bracket from the side of the oil pan. Disconnect the remaining wiring harness brackets. Remove the transmission-to-engine mounting bolts. Disconnect the electrical connector from the oil level sensor if equipped. Remove the transmission-to-oil pan bolts. Remove the oil pan bolts, then lower the pan from the engine. The pan will probably stick to the engine, so strike the pan with a rubber mallet until it breaks the gasket seal. Wash out the oil pan with solvent. Thoroughly clean the mounting surfaces of the oil pan and engine block of old gasket material and sealer. Wipe the gasket surfaces clean with a rag soaked in brake system cleaner. Apply a 3/16-inch wide, one-inch long bead of ATV sealant to the corners where the front cover meets the block and at the rear where the rear main cap meets the block. Then attach the new gasket to the pan, install the pan, and tighten the bolts/studs finger-light. The alignment of the rear face of the aluminum pan to the rear of the block is important. Measure between the rear face of the pan and the front face of the transmission bell housing with feeler gauges. Clearance should ideally be flush, but up to 0.011 inches is allowable. If the clearance is OK, tighten the pan bolts/studs in sequence to the torque specifications. The remainder of installation is the reverse of removal. Add the proper type and quantity of oil, start the engine, and check for leaks before placing the vehicle back in service.


")
")
