Make sure this part fits

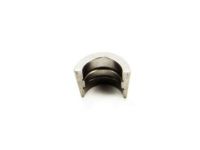
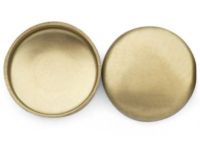
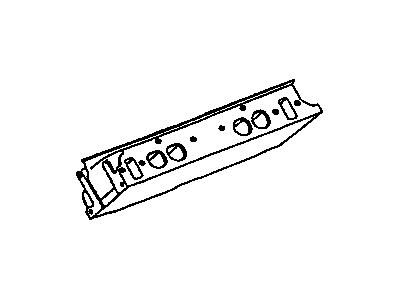
Chevrolet 12360333 Cylinder Head Kit

1982-1984 Chevrolet

Customer Questions & Expert Answers (14)
GM 12360333 Cylinder Head Kit
  • Part Description
    Head Kit,Cyl
  • Manufacturer
    General Motors
  • Manufacturer's Notes
    This part is discontinued.
Make sure this part fits
  • Related Parts
  • Product Specifications
  • Vehicle Fitment
  • Customer Questions & Expert Answers
  • Product Specifications

    BrandGenuine Chevrolet
    Manufacturer Part Number12360333
    Part DescriptionHead Kit,Cyl
    Item Dimensions23.2 x 8.0 x 4.7 inches
    Item Weight45.50 Pounds
    ConditionNew
    Fitment TypeDirect Replacement
    ManufacturerGeneral Motors
    SKU12360333
    WarrantyThis genuine GM part is guaranteed by GM's factory warranty.
    Shipping & ReturnShipping Policy Return Policy
    Warning: California's Proposition 65
  • Vehicle Fitment

    Year Make Model Engine Important vehicle option details
    1982-1984 Chevrolet Camaro4 Cyl 2.5L2 DOOR, 4 DOOR
    1982-1984 Chevrolet Celebrity4 Cyl 2.5L2 DOOR, 4 DOOR, STATION WAGON
    1982-1984 Chevrolet Citation4 Cyl 2.5L2 DOOR, 2 DOOR NOTCHBACK, 2 DOOR PLAINBACK HATCHBACK, 4 DOOR
  • Customer Questions & Expert Answers

    Q:
    I am wonder if this is complete and correct part for my vehicle. Posted by GMPartsGiant Specialist
    A:
    You can Select Your Vehicle to check if 12360333 fits your vehicle.
    Posted by GMPartsGiant Specialist
    Q:
    How should one inspect the cylinder head and its components for cracks, clearance, and warpage on Buick Skylark? Posted by Customer
    A:
    That part of the head where the exhaust ports and chambers are located should be checked for signs of externally visible cracks, while the water chamber also should be checked for similar signs. Check the valve stem-to-bore clearance by measuring the diameter of the valve stem in three places: On the material, measurements across the width were taken from the top, middle and bottom layer and by using a micrometer or dial caliper. Taper type exhaust valves have their stems threaded about 0.001-inch larger on top end than at head. Place a hole gauge in the over head valve guide bore so as to get the bore diameter which in turn enables one to determine the valve clearance. If the clearance is greater than the specified limit an oversize valve must be used and ideally the valve guide bore should be reamed, this is always best left to a dealer or machine shop. Clearence when taken in extreme impacts the oil consumption if it is taken very high and the noises and sticking of valves when it is taken low. Another method used in confirming clearance is to install a valve with the head slightly off the seat, then connect a dial indicator to the valve head, open and close the valve and record the movement of the dial from which the actual clearance is arrived at by dividing the record by two. Check each valve spring available and its damper checking for deformation, crack or broken parts and replace with a new one. To check the check valve spring tension use GM tool J-8056, by measuring the height at which the springs are compressed the tension without the dampers; if it is not within 10 lb of the specified load, then replace the spring. Rocker arm studs must be checked for signs of wear and damage by removing them by using deep socket, while new ones must be put on gasket sealant before being tighten to the required torque value. Shell pushes should be examined for warping, by rolling each of them on a piece of clean glass; a pushrod found to be twisted or damaged in any way should be replaced. Dimensions and positions of cylinder head must also be checked: Place a straightline along the length of the cylinder head and check the feeler gauge across the three positions of the head gasket surface and across the diagonals. If with a straightedge touching end to end, warpage is greater than .006-inch, the cylinder head should be machined; if warpage is greater than .003 inch when a 6 inch straightedge is laid across the entire head, the head should be resurfaced. Boring is a job for an automotive machine and remember that resurfacing the cylinder head will change its position with relation to the intake manifold and therefore the manifold should be resurfaced in proportion.
    Posted by GMPartsGiant Specialist
    Q:
    How to assemble a Cylinder Head on Buick Skylark? Posted by Customer
    A:
    Check that all subassemblies of the valve mechanism are cleaned and dematted, and that the bare cylinder head is free of carbon and dirt itself and also reamed or ground for valves. Place a valve in the correct port and install the valve spring set of that cylinder comprising of the spring, damper, shield as well as the cap. Place the valve spring compressor of the assembly over the valve stem and compress it. It is worth to insert a new oil seal with the flat side downwards, and it must not be twisted. Next is to put the valve locks and release the compressor and ensure that the lock rests well on the upper part of the valve stem. Measure the installed height of the valve springs with a narrow, thin scale; measure from the top of the shim or spring seat to the top of the valve spring or spring shield. If needed, place up to 1/16 th inch thick shim under the valve spring to build the required thickness; nevertheless, do not shim down to a height that is thinner than the specified minimum length of the spring; if this happens, get a new spring. Last of all, inspect each of the twenty stems for oil leaks using a vacuum test simply because if the seal is installed correctly, it should not cause any vacuum leakage.
    Posted by GMPartsGiant Specialist
    Q:
    How to Remove the Cylinder Heads in V6 engine on Buick Skylark? Posted by Customer
    A:
    If the engine has been removed from the car, disregard the following steps which do not apply. First, remove the intake manifold, followed by the exhaust manifolds. Next, take off the upper generator bracket and stud, and then remove the dipstick tube bracket from the left cylinder head. Loosen the rocker arm nuts enough to pivot the rocker arms away from the pushrods, and then remove the pushrods, ensuring that all valve mechanism components are kept separate for reinstallation in their original positions. Loosen each of the cylinder head mounting bolts gradually until they can be removed, noting the length of each bolt to assist with installation. Lift the heads free of the engine, possibly with the help of an assistant, and if the head is stuck to the engine block, avoid prying it free to prevent damage to the sealing surfaces; instead, use a hammer and a block of wood, tapping upward at each end. Finally, remove the cylinder head gaskets and place the heads on wood blocks to prevent damage.
    Posted by GMPartsGiant Specialist
    Q:
    How should one inspect the cylinder head and its components for cracks, clearance, and warpage on Oldsmobile Omega? Posted by Customer
    A:
    That part of the head where the exhaust ports and chambers are located should be checked for signs of externally visible cracks, while the water chamber also should be checked for similar signs. Check the valve stem-to-bore clearance by measuring the diameter of the valve stem in three places: On the material, measurements across the width were taken from the top, middle and bottom layer and by using a micrometer or dial caliper. Taper type exhaust valves have their stems threaded about 0.001-inch larger on top end than at head. Place a hole gauge in the over head valve guide bore so as to get the bore diameter which in turn enables one to determine the valve clearance. If the clearance is greater than the specified limit an oversize valve must be used and ideally the valve guide bore should be reamed, this is always best left to a dealer or machine shop. Clearence when taken in extreme impacts the oil consumption if it is taken very high and the noises and sticking of valves when it is taken low. Another method used in confirming clearance is to install a valve with the head slightly off the seat, then connect a dial indicator to the valve head, open and close the valve and record the movement of the dial from which the actual clearance is arrived at by dividing the record by two. Check each valve spring available and its damper checking for deformation, crack or broken parts and replace with a new one. To check the check valve spring tension use GM tool J-8056, by measuring the height at which the springs are compressed the tension without the dampers; if it is not within 10 lb of the specified load, then replace the spring. Rocker arm studs must be checked for signs of wear and damage by removing them by using deep socket, while new ones must be put on gasket sealant before being tighten to the required torque value. Shell pushes should be examined for warping, by rolling each of them on a piece of clean glass; a pushrod found to be twisted or damaged in any way should be replaced. Dimensions and positions of cylinder head must also be checked: Place a straightline along the length of the cylinder head and check the feeler gauge across the three positions of the head gasket surface and across the diagonals. If with a straightedge touching end to end, warpage is greater than .006-inch, the cylinder head should be machined; if warpage is greater than .003 inch when a 6 inch straightedge is laid across the entire head, the head should be resurfaced. Boring is a job for an automotive machine and remember that resurfacing the cylinder head will change its position with relation to the intake manifold and therefore the manifold should be resurfaced in proportion.
    Posted by GMPartsGiant Specialist
    Q:
    What are the options for replacing or overhauling cylinder heads on Oldsmobile Omega? Posted by Customer
    A:
    New and rebuit cylinder heads may be purchased from the dealers and auto parts stores in case of GM engines. Due to the fact that specialized tools are unavailable for dismantling and inspecting the heads and it may be difficult to source for replacement parts or due to the fact that it is usually cheaper for the home mechanic to purchase replacement heads and install them. The other possibility is that one can transport the complete cylinder heads to a professional auto-shops or General Motors dealership for general overhaul. A decision could also be made depending on other information if the complete engine is being overhauled at the same time. If the nuts, balls and rocker arms have not been removed, first, remove the rocker arm nuts, balls and rocker arms. Press down each valve spring with the valve spring compressor and unbolt the valve locking keys and do it to each of the valves. Slide out the keys and then retract the spring and lead to the removal of the spring cap, spring shield if used, spring and the spring damper. Align the cylinder head with a straight edge, and gauge for conformity in terms of warpage using a feeler gauge; remove all the valves and associated machinery and store these parts in cylinder head removal designated tray/box/stand so that they can be realigned as they were. Take out the oil seals installed at the stem of each valve and replace with new ones during reassembly, and where the bottom of the valve spring has additional spring shims, such should also be removed. Last, depressurise, disconnect the air-line, unlock and open the valve and finally slide each of the valves and their respective components in the numbered box or rack to finish the process of removing the valve mechanism and to also make sure that the parts of the valves are secured such that they do not get mixed up.
    Posted by GMPartsGiant Specialist
    Q:
    How to clean the combustion chambers, valve ports and Cylinder Head on Oldsmobile Omega? Posted by Customer
    A:
    Clean all carbon from the combustion chambers and valve ports using GM tool J-8089 or a similar cleaning attachment available at auto parts stores, which connects to a common hand drill motor. Thoroughly clean the valve guides with GM tool J-8101 or other comparable devices found at auto parts stores. Use parts cleaner to remove all sludge and dirt from the rocker arms, rocker balls, pushrods, and valve springs, working on one set of components at a time and returning each set to its numbered location on your box or rack. A buffing wheel should be employed to eliminate all carbon deposits from the valves, ensuring the order of the valves is not mixed up during cleaning. Clean all carbon deposits from the head gasket mating surface carefully to avoid scratching this sealing surface, and thoroughly clean the threads on all cylinder head attaching bolts.
    Posted by GMPartsGiant Specialist
    Q:
    How should the gasket surfaces on both the cylinder heads and the engine block be cleaned and prepared for installation on Pontiac Phoenix? Posted by Customer
    A:
    Thoroughly clean the gasket surfaces on both the cylinder heads and the engine block without scratching or damaging these sealing areas. Ensure the threads of the attaching bolts and the threaded holes in the engine block are free of dirt by running a tap through these holes. Place the gasket over the engine block dowel pins and carefully lower the cylinder head onto the engine, ensuring the gasket remains in place. Coat the threads of the cylinder head attaching bolts and the area where the head and stem meet with a sealing compound, installing each bolt finger-tight without tightening them at this stage. Tighten each bolt gradually in the specified sequence until the proper torque reading is achieved, then check to ensure none of the bolts were missed in the sequence. Install the exhaust manifold(s) and each valve lifter into its proper bore, using Molykote or an equivalent coating on each lifter. Apply a small amount of Molykote or its equivalent on each end of the pushrods before installing them in their original positions, ensuring they are seated properly in the lifter cavity. Place each rocker arm and corresponding rocker balls onto their original studs, applying a small amount of Molykote or its equivalent to the rocker balls and valve stem ends. For L4 engines, torque the rocker arm nuts/bolts to specifications. Install the rocker arm covers, applying a bead of RTV sealer around the entire sealing surface of the cylinder head, ensuring the bead is 1/18-in wide and going around the inboard side of the bolt holes. Install the cover while the sealer is still wet and torque the bolts to specifications. Install the intake manifold with new gaskets and the remaining engine components in the reverse order of removal. Finally, fill the radiator with coolant, start the engine to check for leaks, adjust the ignition timing as necessary, and recheck the coolant level once the engine has warmed up to operating temperature.
    Posted by GMPartsGiant Specialist
    Q:
    What steps should be followed to remove the cylinder head in four cylinder engine on Pontiac Phoenix? Posted by Customer
    A:
    If the engine has been removed from the car, disregard the following steps which do not apply. Begin by removing the intake manifold and the exhaust manifold. Next, take out the bolts securing the generator bracket to the cylinder head and disconnect the NC compressor, swinging it out of the way for clearance without disconnecting any NC lines unless the system has been depressurized. Disconnect all electrical and vacuum lines that would interfere with cylinder head removal, ensuring to label the lines for their locations. Remove the upper radiator hose, disconnect the spark plug wires, and remove the spark plugs, labeling the wires accordingly. Take off the rocker arm cover, breaking the gasket seal if necessary by striking the cover gently. When disassembling the valve mechanisms, keep all components separate for proper reinstallation, using a numbered cardboard box or rack for organization. Remove each rocker arm nut or bolt, then lift the rocker arms off their studs. Proceed to remove the pushrods and detach the thermostat housing from the cylinder head. Remove all vacuum valves and switches from the cylinder head, followed by the engine lifting "eyes" and the A/C compressor mounting bracket. Loosen each of the 10 cylinder head mounting bolts one turn at a time until they can be removed, noting the length and position of each bolt for reinstallation. Finally, lift the head free of the engine, using a hammer and block of wood if it is stuck, and remove the old cylinder head gasket.
    Posted by GMPartsGiant Specialist
    Q:
    What components should be reassembled after the cylinder head installation is complete for the 1984 Buick Century? Posted by Customer
    A:
    After cylinder head installation, you should reassemble the remaining components in reverse order, including the rocker arm cover, rocker shaft assembly, pushrods, and any components that were removed earlier.
    Posted by GMPartsGiant Specialist
    See expert answers on similar Cylinder Head
    Q:
    What should one understand before overhauling cylinder heads for the 1983 Oldsmobile Cutlass? Posted by Customer
    A:
    If overhauling the cylinder heads is chosen, it is important to understand the steps involved, as well as the tools and replacement parts necessary for the job.
    Posted by GMPartsGiant Specialist
    See expert answers on similar Cylinder Head
    Q:
    What is the next step regarding the alternator for the 1982 Pontiac Firebird? Posted by Customer
    A:
    Remove the lower alternator mounting bolt from the right-side cylinder head.
    Posted by GMPartsGiant Specialist
    See expert answers on similar Cylinder Head
    Q:
    What should be done regarding the valve stem for the 1982 Oldsmobile Cutlass? Posted by Customer
    A:
    Install a new oil seal in the lower groove of the valve stem, ensuring it is flat and not twisted.
    Posted by GMPartsGiant Specialist
    See expert answers on similar Cylinder Head
    Q:
    What should be done when disassembling the valve mechanisms for the 1983 Pontiac Firebird? Posted by Customer
    A:
    Keep all components separate for reinstallation, using a numbered cardboard box or rack corresponding to the engine cylinders.
    Posted by GMPartsGiant Specialist
    See expert answers on similar Cylinder Head
    If you have any questions about this product, please don't hesitate to ask us. We will be happy to help you!

Genuine GM Part 12360333, the Right Choice

To ensure reliability, purchase GM part # 12360333 Cylinder Head Kit. It is sometimes referred to as Chevrolet Cylinder Head. Directly from GM, genuine parts are superb with regards to quality, longevity, and fit. Every single part passed stringent quality testing, so you can be sure that it's safe, durable, and built to perform like your original parts. This part fits specific Chevrolet Camaro, Celebrity, Citation models.

GMPartsGiant.com is a leading supplier of genuine GM parts and accessories such as GM 12360333 Cylinder Head Kit. You're certainly in the right place if you're searching for the great cost-effective OEM GM parts. Look no further than our vast inventory of genuine GM parts offered at unbeatable online prices, all of which are backed by the manufacturer's warranty. Not to forget, our hassle-free return policy and quick delivery service ensure a smooth shopping experience for you. For detailed Chevrolet parts information, click here.

Why choose GM Parts Giant

  • Dedicated Service

    Your complete satisfaction is our #1 goal

  • Lowest Prices

    Best deals on genuine OE parts from dealerships

  • Fast Delivery

    Orders are processed and delivered promptly