Make sure this part fits

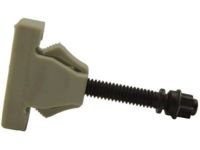
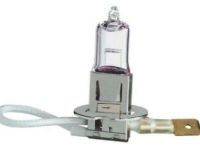
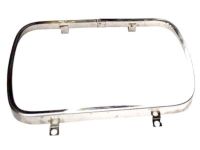
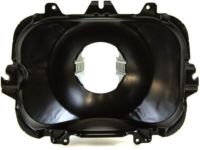
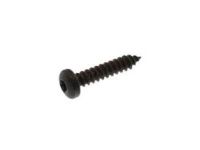
GM 16522983 Headlamp Capsule Assembly

1982-2002 GM

Customer Questions & Expert Answers (13)
GM 16522983 Headlamp Capsule Assembly
  • Part Description
    Capsule Assembly, Headlamp ; Capsule, Capsule/Headlamp/Fog Lamp
  • Replaced By
    25949657
  • Manufacturer
    General Motors
Make sure this part fits
$131.98 MSRP: $200.01
You Save: $68.03 (35%)
Ships in 1-3 Business Days
1
ADD TO CART
  • Related Parts
  • Product Specifications
  • Vehicle Fitment
  • Customer Questions & Expert Answers
  • Product Specifications

    BrandGenuine GM
    Manufacturer Part Number16522983
    Part DescriptionCapsule Assembly, Headlamp ; Capsule, Capsule/Headlamp/Fog Lamp
    Item Dimensions9.6 x 8.2 x 14.3 inches
    Item Weight2.60 Pounds
    ConditionNew
    Fitment TypeDirect Replacement
    ManufacturerGeneral Motors
    SKU16522983
    WarrantyThis genuine GM part is guaranteed by GM's factory warranty.
    Shipping & ReturnShipping Policy Return Policy
    Warning: California's Proposition 65
  • Vehicle Fitment

    Year Make Model Engine Important vehicle option details
    1985-1989 Chevrolet Astro4 Cyl 2.5L, 6 Cyl 4.3LVAN ASTRO
    1988-1991 Chevrolet C15006 Cyl 4.3L, 8 Cyl 5.0L, 8 Cyl 5.7L, 8 Cyl 6.2L Diesel, 8 Cyl 7.4LC1500 EXTENDED CAB LONG BOX, C1500 EXTENDED CAB STANDARD BOX, C1500 REGULAR CAB LONG BOX, C1500 REGULAR CAB STANDARD BOX
    1988-1991 Chevrolet C25006 Cyl 4.3L, 8 Cyl 5.0L, 8 Cyl 5.7L, 8 Cyl 6.2L Diesel, 8 Cyl 7.4LC2500 EXTENDED CAB LONG BOX, C2500 EXTENDED CAB STANDARD BOX, C2500 REGULAR CAB
    1988-1991 Chevrolet C35008 Cyl 5.7L, 8 Cyl 6.2L Diesel, 8 Cyl 7.4LC3500 CAB CHASSIS 135.5, C3500 CAB CHASSIS 159.9, C3500 CAB CHASSIS 183.5, C3500 EXTENDED CAB, C3500 REGULAR CAB
    1983 Chevrolet Cadet4 Cyl 2.0L2 DOOR, 2 DOOR HATCHBACK, 2 DOOR NOTCHBACK, 4 DOOR, STATION WAGON
    1982-1983 Chevrolet Cavalier4 Cyl 1.8L, 4 Cyl 2.0L2 DOOR, 2 DOOR HATCHBACK, 2 DOOR NOTCHBACK, 4 DOOR, STATION WAGON
    1982-1987 Chevrolet Chevette4 Cyl 1.6L, 4 Cyl 1.8L Diesel2 DOOR, 4 DOOR, CS 2 DOOR, CS 4 DOOR, SCOOTER 2 DOOR, SCOOTER 4 DOOR
    1982-1985 Chevrolet Citation4 Cyl 2.5L, 6 Cyl 2.8L2 DOOR, 2 DOOR NOTCHBACK, 2 DOOR PLAINBACK HATCHBACK, 4 DOOR
    1984-1990 Chevrolet Corvette8 Cyl 5.7L2 DOOR, CONVERTIBLE
    1996-2002 Chevrolet Express6 Cyl 4.3L, 8 Cyl 5.0L, 8 Cyl 5.7L, 8 Cyl 6.5L Diesel, 8 Cyl 7.4L, 8 Cyl 8.1L1 TON CARGO EXPRESS, 1 TON COMMERCIAL/RECREATIONAL VEHICLE EXPRESS, 1 TON PASSENGER, 1/2 TON CARGO EXPRESS, 1/2 TON PASSENGER EXPRESS, 3/4 TON CARGO EXPRESS, 3/4 TON PASSENGER EXPRESS
    View More
  • Customer Questions & Expert Answers

    Q:
    I am wonder if this is complete and correct part for my vehicle. Posted by GMPartsGiant Specialist
    A:
    You can Select Your Vehicle to check if 16522983 fits your vehicle.
    Posted by GMPartsGiant Specialist
    Q:
    How important is it to aim headlights correctly to avoid blinding oncoming drivers and ensure optimal visibility on the road on Chevrolet Astro? Posted by Customer
    A:
    It's important that the headlights be aimed correctly to avoid blinding oncoming drivers and to ensure optimal visibility on the road. Headlights should be checked for proper aim every 12 months and whenever a new sealed beam headlight is installed or front end body work is performed. Each sealed beam headlight features two spring-loaded screws: one on the top for vertical movement and one on the side for horizontal movement. For composite type headlights, the hood must be opened to access the adjuster screws located on top of each headlight assembly, which are Torx head number T-15. The simplest adjustment method requires an empty wall 25 feet in front of the vehicle and a level floor. Park the vehicle on a level surface 25 feet from the wall, then position masking tape vertically on the wall in line with the vehicle centerline and the centerlines of both headlights. A horizontal tape line should be placed in line with the centerline of all headlights, which may be easier to position with the vehicle parked just a few inches away. Adjustments should be made with the vehicle level, the gas tank half-full, and without any unusually heavy load. For the Low beam adjustment, position the high intensity zone two inches below the horizontal line and two inches to the right of the headlight vertical line, adjusting the top screw clockwise to raise the beam and counterclockwise to lower it, while using the side screw to move the beam left or right. With the High beams on, the high intensity zone should be vertically centered just below the horizontal line, keeping in mind that it may not be possible to achieve perfect aim for both High and Low beams; if a compromise is necessary, prioritize the Low beams for driver safety.
    Posted by GMPartsGiant Specialist
    Q:
    How to replace a sealed beam headlight on Chevrolet Astro? Posted by Customer
    A:
    To replace a sealed beam headlight, put off the headlight switch, and for the earlier models, take out the headlight bezel. Subsequently, unscrew the headlight retaining ring screws, do not touch the adjusting screws and lift off the headlight retaining ring. Re wire the headlight electrical connector and pull out the headlight. Removing is done in reverse to installation while adjusting the headlights takes place. To work on a halogen bulb-type headlight, power off the headlight switch first; for the side lens, you have to unbolt the headlight's side lens retaining bolt situated at the car's fender and pull it out. After that, there is removal of three mounting screws in order to liberate the headlight assembly from the core support so as to disconnect bulb electrical connections as well as the grasping of the bulb holder where it will be turned anti-clockwise to be released. Removal is done in the reverse order of installation; the headlights may be adjusted if needed.
    Posted by GMPartsGiant Specialist
    Q:
    How to remove and install a headlight on Oldsmobile Omega? Posted by Customer
    A:
    To begin, remove the headlight trim cover, followed by the headlight retaining ring. Next, pull the headlight bulb out from its carrier and unplug it from the electrical connector. Finally, installation is the reverse of the removal procedure.
    Posted by GMPartsGiant Specialist
    Q:
    How should you replace a headlight while maintaining its aim on Pontiac Firebird? Posted by Customer
    A:
    When replacing the headlight, do not operate the spring loaded adjusting screws to retain the headlight alignment. First, take out the screws which are on the headlight bezel and the bezel used for aesthetic purposes. The return pin could be removed by using cotter pin removal tool to unhook the return from the retaining ring. Subsequently, remove the two bolts of the retaining ring and remove the ring while lifting the light by its sides. Ease the sealed beam unit out slightly and short circa the wires at the rear, then take the light out of the car. For the new unit to join the wires arrange it so that the numbers molded into the lens are at the upper side. Place the retaining ring to the device with the mounting screws and spring; set the bezel and test functionality. So where the adjusting screws were not turned, no adjustment of the new headlight should be necessary.
    Posted by GMPartsGiant Specialist
    Q:
    Why is it important to aim headlights correctly and how should they be adjusted on Pontiac Fiero? Posted by Customer
    A:
    This is because the headlights should be working well and should also not be blinding other drivers on the road and at the same time, they should also be aimed properly to have the best vision on the road. The headlights should be tested for correct alignment once every 12 months and when a new sealed beam headlights are fitted, or when front end bodywork is done. The headlights have two spring-loaded adjusting screws: A steeper was one on the top moving up and down and another on the side moving left and right. One of the easiest techniques in headlight correcting entails having a plain wall twenty-five feet in front of the car and a horizontal floor. First start by parallel parking it 25 feet away from the wall and then place a tape vertically on the wall to stand parallel to that of the centre line of the automobile and the centre line of the two headlights. A horizontal tape line should be placed in relation to centerline of the headlights, this may be a little difficult while one is trying to park the car, this is easier when one moves the car a few inches back. These changes should be done with the vehicle level, the gas tank half-full and with no abnormally heavy load. For low beam adjustment the high-intensity zone should be located two inches below the horizontal line and two inches right of the headlight vertical line, and to adjust the beam up and down the top adjusting screw should be used and to adjust it left and right the side screw should be used. If high beams are activated the high intensity zone has to lie halfway right under the horizontal line, nevertheless it is virtually impossible to strike both high and low beams; however low beams have to have priority for the benefit of the drivers.
    Posted by GMPartsGiant Specialist
    Q:
    What should be considered temporary when a home mechanic adjusts the aim of the headlights on Pontiac Firebird? Posted by Customer
    A:
    All corrections that the home mechanic makes which impacts on the sight line of the car headlights should be seen in the temporary nature only. If at all possible have the beams readjusted promptly by a facility that possesses the right type of aligning equipment as some states mandate the usage to be through only state-certified facilities. Each state has its laws on the use of seat belts, it is therefore advisable to consult the local motor vehicle department. There are adjustment screws on the front part of each headlight for horizontal adjustment using the side screw as well as for vertical adjustment using the top screw; the top screw moves the headlight beam upwards and the side screw moves it to the left. These adjustment screws are present in the same positions on concealed headlight assembly while the rest caution has to be taken not to mar the body paint work.
    Posted by GMPartsGiant Specialist
    Q:
    How to adjust the headlights on Pontiac Phoenix? Posted by Customer
    A:
    The headlight adjustment screws are located to the side and top of each lamp, with the top screw adjusting the lamp's beam vertically and the side screw adjusting it horizontally. Although proper adjustment should ideally be done using appropriate beam setting equipment due to legal specifications, a procedure can help achieve a close approximation. First, position the car on level ground, facing a wall at a right angle and approximately 30 feet away. Measure the height of the centers of the headlights from the ground and mark these measurements on the wall. Next, measure the distance from the centerline of the car to the center of each headlight and mark these measurements on the wall to create intersecting lines aligned with the center of each headlight. Turn on the regular beam of the headlights and adjust the horizontal screws until each beam is centered with the corresponding marks on the wall, then adjust the vertical screw until the top of each beam aligns with the horizontal centerline mark. Finally, bounce the car on its suspension to ensure the beams return to their correct positions.
    Posted by GMPartsGiant Specialist
    Q:
    What should be kept in mind if a compromise must be made in headlight aim for the 1988 Chevrolet C1500? Posted by Customer
    A:
    If a compromise must be made, it is important to prioritize the aim of the low beams as they are the most used and have the greatest effect on driver safety.
    Posted by GMPartsGiant Specialist
    See expert answers on similar Headlight
    Q:
    How should masking tape be positioned for headlight adjustment for the 1999 Chevrolet Express? Posted by Customer
    A:
    Begin by positioning masking tape vertically on the wall in line with the vehicle centerline and the centerlines of both headlights. Then, place a horizontal tape line aligned with the centerline of the headlights. It may be easier to place the tape with the vehicle parked just a few inches away.
    Posted by GMPartsGiant Specialist
    See expert answers on similar Headlight
    Q:
    How should the bulb and lock ring be twisted for the 1989 Chevrolet K1500? Posted by Customer
    A:
    Counter-clockwise.
    Posted by GMPartsGiant Specialist
    See expert answers on similar Headlight
    Q:
    What is the installation process for the new headlight for the 1985 Pontiac Fiero? Posted by Customer
    A:
    With the front compartment lid open and the headlight switch off, position the retaining spring hook in its seat on the actuator, then close the lid and turn the switch on. Pull the headlight retaining spring forward with pliers, positioning it in its seat on the inside lower corner of the headlight assembly.
    Posted by GMPartsGiant Specialist
    See expert answers on similar Headlight
    Q:
    What is the first step in the headlight assembly removal process for the 1989 Pontiac Firebird? Posted by Customer
    A:
    With the hood raised, remove the screws retaining the rear of the headlight door, then raise the headlight assembly.
    Posted by GMPartsGiant Specialist
    See expert answers on similar Headlight
    If you have any questions about this product, please don't hesitate to ask us. We will be happy to help you!

Genuine GM Part 16522983, the Right Choice

To ensure reliability, purchase GM part # 16522983 Headlamp Capsule Assembly. It is sometimes referred to as GM Headlight. Directly from GM, genuine parts are superb with regards to quality, longevity, and fit. Every single part passed stringent quality testing, so you can be sure that it's safe, durable, and built to perform like your original parts. This part fits specific Chevrolet Chevette, Express, S10 models. It fits GMC C2500, C3500, K1500. It also fits Oldsmobile Omega. This also fits Pontiac Fiero, Firebird, Phoenix.

GMPartsGiant.com is a leading supplier of genuine GM parts and accessories such as GM 16522983 Headlamp Capsule Assembly. You're certainly in the right place if you're searching for the great cost-effective OEM GM parts. Look no further than our vast inventory of genuine GM parts offered at unbeatable online prices, all of which are backed by the manufacturer's warranty. Not to forget, our hassle-free return policy and quick delivery service ensure a smooth shopping experience for you. For detailed GMC parts information, click here.

Why choose GM Parts Giant

  • Dedicated Service

    Your complete satisfaction is our #1 goal

  • Lowest Prices

    Best deals on genuine OE parts from dealerships

  • Fast Delivery

    Orders are processed and delivered promptly