My Garage
My Account
Cart
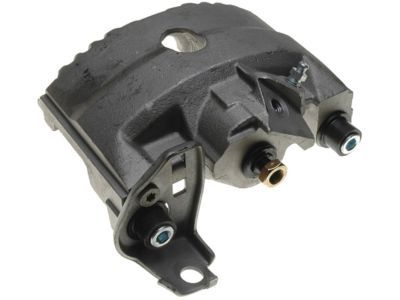
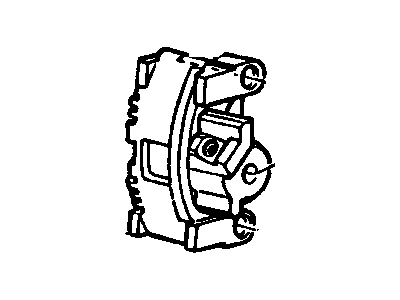
Genuine 1984 Pontiac Fiero Brake Calipers
Caliper- Select Vehicle by Model
- Select Vehicle by VIN
Select Vehicle by Model
orMake
Model
Year
Select Vehicle by VIN
For the most accurate results, select vehicle by your VIN (Vehicle Identification Number).
2 Brake Calipers found
- Product Specifications
- Other Name: CALIPER, Wheel Brake Cylinder/Caliper; Caliper
- Position: Rear
- Replaces: 18036720, 18019030
- Item Weight: 6.10 Pounds
- Item Dimensions: 14.4 x 13.7 x 10.6 inches
- Condition: New
- Fitment Type: Direct Replacement
- SKU: 19140959
- Warranty: This genuine part is guaranteed by GM's factory warranty.
- Product Specifications
- Other Name: CALIPER, Wheel Brake Cylinder/Caliper; Caliper
- Position: Rear
- Replaces: 18019029, 18036721
- Item Weight: 6.00 Pounds
- Item Dimensions: 10.0 x 7.0 x 7.0 inches
- Condition: New
- Fitment Type: Direct Replacement
- SKU: 19140958
- Warranty: This genuine part is guaranteed by GM's factory warranty.
1984 Pontiac Fiero Brake Calipers
We are your prime source for competitively priced and high-quality OEM 1984 Pontiac Fiero Brake Calipers. We provide you with parts that will allow you to save a lot of money without sacrificing quality. All our OEM parts are backed by the manufacturer's warranty and shipped out at a swift rate.
1984 Pontiac Fiero Brake Calipers Parts Questions & Experts Answers
- Q: How to remove and install rear Brake Calipers on 1984 Pontiac Fiero?A: Asbestos can never be ingested because it has severe effects on the health of an individual. Start with making sure you unscrew the cap of the brake fluid container and pump out about two-thirds portion of the brake fluid into a container for drainage. Before proceeding to release the parking brake, loosen the wheel lug nuts, apply the parking brake, lift the rear of the vehicle and then immobilise the vehicle on jackstands. Take out the wheel and put back one of the wheel lugs and make sure that the flat side of it is in contact with the rotor, do this for the brake assembly only. Loosen the nut of parking brake cable from the lever on the caliper with a screw driver and then using the water pump plier, remove the cable of the parking brake and by pressing the spring of the parking brake with a screw driver and then sliding it off from the parking brake cable. It is kept before loosening and withdrawing the parking brake lever, nut, lever seal, anti-friction washer and the caliper actuator screw. Place a C-clamp across the inboard face of the caliper housing and across the face of the mounting bracket so the clamp doesn't contact the actuator screw, tighten it down until the piston bottoms in the bore of the cylinder then remove the C-clamp. If the pads are to be inspected or replaced or the rotor is to be done the same, then it has to be done as follows avoiding the disconnection of hydraulic hose in order to bleed the hydraulic system. For caliper replacement or overhaul, the brake hose inlet fitting bolt has to be removed, and the brake hose has to be disconnected; the openings have to be halted using plugs to ensure that no fluid is lost. Take out the caliper mounting bolts, it is not necessary to take off the parking brake cable bracket if you are only replacing the pad or the rotor but if you are reconditioning or replacing the caliper you will have to take this bracket off. Take the caliper as far as possible from the vehicle, check the lever seal and the anti-friction washer if the former is worn out or damaged; do the same thing for the latter. There should be a check for signs of corrosion on the mounting bolts and sleeves, then new bushing, bolts, or sleeves should be fitted if necessary. Leave the upper cavity empty and fill the bottom cavity of the mounting bolt bore with silicone grease then fit the sleeves, bolt boots and bushings to the caliper mounting bolt bores. Fit the caliper over the rotor and over the mounting bracket, tighten the caliper mounting bolts, to the torque specified. If brake hose was disconnected reconnect and tighten with new copper crush washers to be sure of the right torque. If the hydraulic hose was disconnected, fill the master cylinder and bleed the hydraulic system and take several pumps of the pedal and if the caliper was removed for pad replacement. Remove any contamination around the lever seal and replace with a new lever seal and anti friction washer re-lubricated with silicone brake grease. Mount the parking brake lever on the actuator screw hex and turn it to the front of the car, then while doing all this and tightening the nut , the parking brake is set on. Replace the spring and parking brake cable by pulling the cable over to a position to engage the lever just touching on the stop of the caliper. Take off the rotor hub nut, mount the wheel and temporarily tighten the lugs before raising and then torquing the lugs. Last, test the functioning of the brakes critically especially before getting into the traffic zone.


