My Garage
My Account
Cart
Genuine 1998 Pontiac Grand Prix Oil Pan
Oil Drain Pan- Select Vehicle by Model
- Select Vehicle by VIN
Select Vehicle by Model
orMake
Model
Year
Select Vehicle by VIN
For the most accurate results, select vehicle by your VIN (Vehicle Identification Number).
2 Oil Pans found
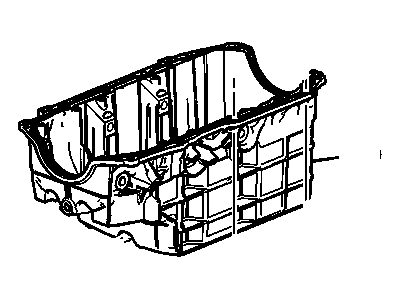
1998 Pontiac Grand Prix Pan Asm,Oil
Part Number: 12512670$185.45 MSRP: $276.52You Save: $91.07 (33%)Ships in 1-2 Business DaysProduct Specifications- Other Name: PAN, Engine Oil; Oil Pan
- Item Weight: 15.50 Pounds
- Item Dimensions: 21.7 x 12.4 x 9.1 inches
- Condition: New
- Fitment Type: Direct Replacement
- SKU: 12512670
- Warranty: This genuine part is guaranteed by GM's factory warranty.
- Product Specifications
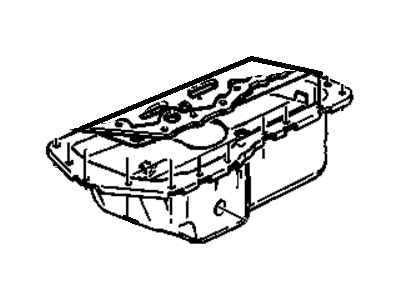
- Other Name: PAN, Engine Oil; Oil Pan
- Replaces: 24508692, 24505348, 24507900
- Item Weight: 6.60 Pounds
- Item Dimensions: 20.0 x 10.6 x 7.7 inches
- Condition: New
- Fitment Type: Direct Replacement
- SKU: 12563240
- Warranty: This genuine part is guaranteed by GM's factory warranty.
1998 Pontiac Grand Prix Oil Pan
We are your prime source for competitively priced and high-quality OEM 1998 Pontiac Grand Prix Oil Pan. We provide you with parts that will allow you to save a lot of money without sacrificing quality. All our OEM parts are backed by the manufacturer's warranty and shipped out at a swift rate.
1998 Pontiac Grand Prix Oil Pan Parts Questions & Experts Answers
- Q: Is it necessary to remove the transaxle to make clearance for oil pan removal in 2.8L,3.1L V6 engine on 1998 Pontiac Grand Prix?A: On some early models with automatic transaxle, there can be difficulties and it can be required to disconnect the transaxle to free the space for oil pan removal. Starting with the removal of the negative cable from the battery; the engine should be supported from above by an engine support fixture and be chained to the front and rear engine lifting eyes. On those models with Theftlock audio system, check that the lock out is switched off before disconnecting the battery. Subsequently, the removal of the serpentine drivebelt, air conditioning compressor and optionally the compressor bracket shall be performed. On the 3100 models, then, unlatch the electric cooling fan assemblies. Lift the front part of the car with the help of jackstands, engage the parking clutch and leave the rear wheels non-operational. Take out the lower splash pan, and if required drain the engine oil. For the 3100, request the front exhaust pipe and to disconnect the connector from the oil level sensor on the underside of the oil pan, then to disconnect the transaxle to oil pan braces if any. This nut can be removed by using a spanner to take off the steering gear pinch bolt, however until the steering gear is separated from the rack and pinion stubshaft do not loosen this nut. Then, you can uninstall the transaxle mount to frame retaining nuts and, eventually, the nuts of the engine-to-frame mount. On 2.8L and 3.1L engines, it is necessary to remove the bracket of the engine mount from the front of the engine housing. Get rid of the flywheel/driveplate lower cover, as well as the starter. Support the front end of the frame with a floor jack at the frame front center crossmember, then make the rear drivetrain front suspension frame bolts loose, now, unbolt the front frame bolts and drop the front of the frame. For 3100 engines, the front engine mount has to be unbolted from the oil pan. In some models equipped with an oil level sensor located on the oil pan, it is necessary to turn off the electrical connector of this sensor, as well as remove it before starting work to remove the oil pan. Loosen the oil pan bolts and nuts then pull of the oil pan from the block being careful not to scratch the sealing faces. Wash the pan with solvent and be sure all sealant and gasket material is removed from the block and pan contacting surfaces and inspect the oil pan flange for distortion. Where possible, a new gasket must be fitted to the oil pan and RTV sealant must applied to forward edge of the gasket. Put the oil pan in place on the block and fit the nuts/bolts loosely, tightened enough with another turn clockwise to fix it properly to the recommended torque in a diagonal sequence. The following steps are the mirror images of the removal process: Last but not the least, fill the engine with oil, start the engine and let it run to normal temperature and look for any signs of leakage.


