My Garage
My Account
Cart
Genuine Chevrolet Transmission Assembly
Trans Assembly- Select Vehicle by Model
- Select Vehicle by VIN
Select Vehicle by Model
orMake
Model
Year
Select Vehicle by VIN
For the most accurate results, select vehicle by your VIN (Vehicle Identification Number).
1279 Transmission Assemblies found
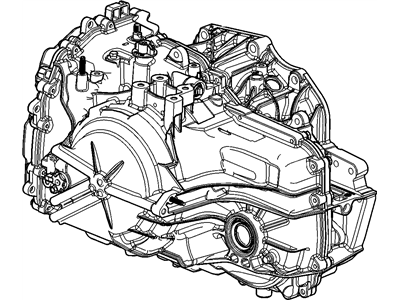
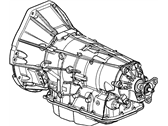
Chevrolet Transaxle Asm,Auto (Service Remanufacture) 2Czw *Programming
Part Number: 19331878$3106.94 MSRP: $3478.99You Save: $372.05 (11%)Ships in 1-3 Business DaysProduct Specifications- Other Name: TRANSAXLE, Automatic; Transaxle
- Replaces: 17804320, 24256449, 24256842, 19260036, 24259618, 24265049, 24256450
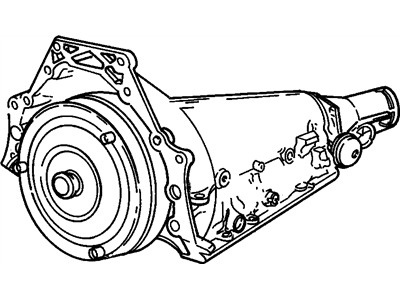
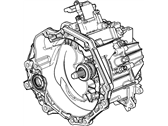
Chevrolet Transmission Asm,Auto (Goodwrench Remanufacture)
Part Number: 17804180$2086.15 MSRP: $2961.25You Save: $875.10 (30%)Product Specifications- Other Name: TRANSMISSION, Manual(5 Speed)
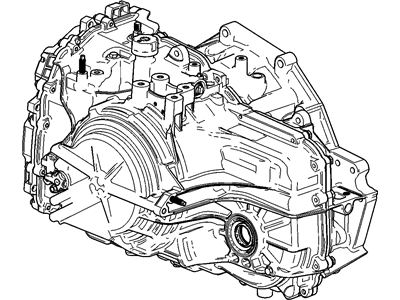
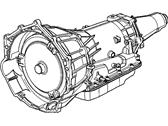
Chevrolet Transmission Asm, Auto (Goodwrench Remanufacture) (3Kkp)
Part Number: 17804163$2217.71 MSRP: $3148.68You Save: $930.97 (30%)Product Specifications- Other Name: TRANSMISSION, Manual(5 Speed)
- Replaces: 08690957, 8690957
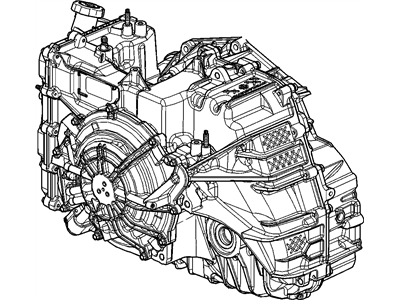
Chevrolet Automatic Transmission Assembly (Remanufactured)
Part Number: 24203684$1528.39 MSRP: $2156.68You Save: $628.29 (30%)Product Specifications- Other Name: TRANSMISSION, Automatic
Chevrolet Transmission Asm, Auto (Goodwrench Remanufacture) (5Mbp)
Part Number: 17804177$3617.39 MSRP: $4083.75You Save: $466.36 (12%)Ships in 1-3 Business DaysProduct Specifications- Other Name: TRANSMISSION, Automatic
Chevrolet TRANSMISSION ASM,AUTO 11DDA (SERV REMAN)
Part Number: 19431759$4302.11 MSRP: $4819.13You Save: $517.02 (11%)Ships in 1-3 Business DaysProduct Specifications- Other Name: Transmission
- Replaces: 19257123, 24257175, 19329608, 19303210, 19418873
Chevrolet TRANSAXLE ASM,AUTO (SERVICE REMAN)
Part Number: 19354029$3946.54 MSRP: $4448.92You Save: $502.38 (12%)Ships in 1-3 Business DaysProduct Specifications- Other Name: Transaxle
- Replaces: 24042401, 24275767, 24278585
Chevrolet TRANSMISSION ASM,AUTO 17CKA REMAN
Part Number: 19431764$4236.58 MSRP: $4745.00You Save: $508.42 (11%)Product Specifications- Other Name: Transmission
- Replaces: 19418462, 19333281, 24279064, 19419937, 24258086, 19418449, 24270749
Chevrolet TRANSMISSION ASM,AUTO 17CLA (SERV REMAN)
Part Number: 19431766$4222.22 MSRP: $4728.75You Save: $506.53 (11%)Product Specifications- Other Name: Transmission
- Replaces: 19418455, 24279065, 24270750, 19333285, 19419938, 24265620
Chevrolet Automatic Transmission Assembly
Part Number: 19434868$5018.39 MSRP: $5605.65You Save: $587.26 (11%)Product Specifications- Other Name: TRANSMISSION ASM,AUTO (REMAN)
- Replaces: 24279588, 19355592, 24268010, 24274275, 24283596, 19433289
Chevrolet TRANSMISSION ASM,AUTO 17DHA (SERV REMAN)
Part Number: 19431754$4220.01 MSRP: $4726.25You Save: $506.24 (11%)Product Specifications- Other Name: Transmission
- Replaces: 19303199, 19257124, 19303207, 19418456, 19299593, 24250672, 19367387, 24250416, 19303211, 19419940, 24257203, 19367384, 24257176, 24245905, 24270752, 24279078
Chevrolet Transaxle Asm,Auto (4Xrk 3.16 Awd Generator Ii)
Part Number: 19354268$3961.08 MSRP: $4445.22You Save: $484.14 (11%)Product Specifications- Other Name: TRANSAXLE ASM,AUTO (4XRK 3.16 AWD GEN II); Transaxle
- Replaces: 24250057, 24260831
Chevrolet Transaxle Assembly, Auto 7Wlk
Part Number: 19417243$4233.91 MSRP: $4765.73You Save: $531.82 (12%)Ships in 1-3 Business DaysProduct Specifications- Other Name: Transaxle
- Replaces: 19354260, 24262790, 24278558, 24257285, 24260663
Chevrolet TRANSMISSION ASM,AUTO 19CKA (SERV REMAN)
Part Number: 19431548$4200.30 MSRP: $4703.96You Save: $503.66 (11%)Ships in 1-3 Business DaysProduct Specifications- Other Name: Transmission
- Replaces: 24284620
Chevrolet Transaxle Assembly, Auto 9Ikb (3.49 Ratio) Awd
Part Number: 24296140$4797.31 MSRP: $5391.19You Save: $593.88 (12%)Product Specifications- Other Name: Transaxle
- Replaced by: 19419488
- Replaces: 24293278
Chevrolet TRANSAXLE ASM,AUTO (SERV REMAN) 9TLB (3.49 RATIO) FWD
Part Number: 19416754$5249.42 MSRP: $5902.63You Save: $653.21 (12%)Product Specifications- Replaces: 24283847, 24291921
- Product Specifications
- Other Name: TRANSMISSION, Automatic
- Replaces: 08683987, 8683987
Chevrolet TRANSMISSION ASM,AUTO 17DCA (SERV REMAN)
Part Number: 19431753$4225.53 MSRP: $4732.50You Save: $506.97 (11%)Product Specifications- Other Name: Transmission
- Replaces: 19418453, 24279077, 24265611, 24250414, 19303201, 19303209, 19299591, 19419939, 19367388, 24250609, 24258946, 19367385
Chevrolet Automatic Transmission Assembly
Part Number: 19434870$5302.14 MSRP: $5926.62You Save: $624.48 (11%)Product Specifications- Other Name: TRANSMISSION ASM,AUTO (REMAN)
- Replaces: 19433315, 24279036, 24042783
Chevrolet Automatic Transmission Assembly
Part Number: 19434869$5118.86 MSRP: $5719.31You Save: $600.45 (11%)Product Specifications- Other Name: Automatic Transmission Remanufactured; TRANSMISSION ASM AUTO (REMAN), Transmission
- Replaces: 24281108, 19433297, 19355638, 24288554, 24272942, 24281336
| Page 1 of 64 |Next >
1-20 of 1279 Results
Chevrolet Transmission Assembly
At GMPartsGiant.com, we offer an extensive inventory of genuine Chevrolet Transmission Assemblies at competitive prices in the market. All our OEM Chevrolet Transmission Assemblies are backed by the manufacturer's warranty and will be shipped promptly to your doorstep. Rest assured, our hassle-free return policy is designed to support you throughout your shopping experience!
Chevrolet Transmission Assembly Parts Questions & Experts Answers
- Q: Is replacing a transmission assembly a challenging task for a do-it-yourselfer on Chevrolet Camaro?A:Just to illustrate this, let me say that whilst overhauling a car with a manual gear box is difficult for a do-it-yourself mechanic, the major problem concerns the breaking down of innumerable small components that gets assembled together in an extremely tight tolerance with clearance between various parts that often may require select-fit spacers and snap-rings. As it goes with most modern automobiles, a competent person can manage to pull out a transmission and replace it in case of a breakdown, although the whole process of overhauling is recommended for professional repair shops because depending on the time and costs incurred it may at times take more than the cost of a rebuilt unit which can be sourced from the dealer's spare part department or auto mobile stores. While it may be possible for a new mechanic to rebuild a transmission with the proper special tools, and taking a systematic, slow approach, basic tools needed for the job include internal and external snap-ring pliers, a bearing puller, a slide hammer, a set of pin punches, a dial indicator and possibly a hydraulic press and a good workbench with vise or a transmission stand. Documentation during disassembly need to be done in details regarding the process of removal of the components, the location they were found and the attachment means. Moreover, knowledge of the specific region of the transmission that is problematic can make it easier to inspect and rebuild the item as several issues are related to the specific zone in the transmission.
- Q: What are the steps involved in removing and installing a transmission assembly on Chevrolet Cruze?A:The vehicle must be raised and supported sufficiently to allow the transaxle to exit the engine compartment, ensuring support by the uni-body rather than the subframe, as the subframe needs to be removed for transaxle removal. Begin by placing the vehicle in PARK with the parking brake engaged, then disconnect the negative battery cable and remove the battery and tray. Next, remove the under-vehicle splash shield, the left front inner fender splash shield, and, for 2016 and later models, the front bumper. Drain the cooling system and remove the upper radiator hose, along with the charge air cooler outlet hose for 1.4L models. Label and unplug all transaxle electrical connectors, removing any related brackets as needed. Disconnect the shift cable from the transaxle shift lever and the Vehicle Speed Sensor. Loosen the front wheel lug nuts, raise the vehicle securely on jackstands, and support the radiator/condenser assembly with heavy-duty plastic tie-wraps. Drain the transaxle fluid and remove both driveaxles, then remove the transaxle oil cooler lines by removing the retaining nut and pulling the line straight out. For 2016 and later models, remove the ECM and its mounting bracket bolts. Support the engine from above using an engine hoist or support fixture, then remove the upper engine-to-transaxle bolts and stud. Disconnect the ABS wheel speed sensor harnesses from the subframe and remove the subframe. Support the transaxle with a transmission jack, securing it with straps or chains. Remove the starter, mark the relationship of the torque converter to the driveplate, and remove the torque converter-to-driveplate bolts while turning the crankshaft. Push the torque converter into the bell housing to prevent it from staying with the engine during transaxle removal. Remove the lower transaxle-to-engine bolts and the driver's side powertrain mount, then remove the mount-to-transaxle bolts and the through-bolts from the front and rear mounts. Ensure all wires, hoses, brackets, and mounts are disconnected from the transaxle, slide the transaxle jack toward the side of the vehicle until the transaxle is clear of the engine locating dowels, and lower it while keeping it level. For installation, reverse the removal steps, ensuring the torque converter's drive tangs engage with the automatic transaxle fluid pump inner gear, aligning the match marks made on the torque converter and driveplate. Install all driveplate-to-torque converter bolts before tightening them, then tighten the transaxle mounting bolts, driveaxle hub nuts, and wheel lug nuts to the specified torque. Finally, fill the transaxle with the correct type and amount of automatic transmission fluid and shift the transaxle into all gear positions to confirm shift cable adjustment, readjusting if necessary.
- Q: How to remove and install the Transmission Assembly on Chevrolet Express?A:After internal service/rebuild on 8L45 or 8L90 a "transmission service fast learn" must be done with GM scan tool, procedure can be done by dealer service department or any qualified repair shop. Start by first, taking off the engine covering and then by loosening the negative terminal of the vehicle battery, then lifting the car on jack stands properly. Pull out the old pan and drain the transmission fluid, also remove any exhaust parts that may hinder the removal of the transmission. Remove the shift cable and the inspection cover and be sure to indicate the relation between the torque converter and the drive plate. Working starting with the starter motor, the transmission vent hose and the dipstick tube should be removed then the torque converter-to-driveplate bolts while turning the crankshaft for clearance. Exhaust the driveshaft as well as the electrical connectors of the Park/Neutral position switch in conjunction with the transmission solenoid as well as the vehicle speed sensor. Remove transmission fluid cooler lines, excuse the free ends of these lines so that the fluid cannot spill out. Place jack stands under the engine and put some wood on that to establish a better position and lift the transmission with a suitable jack made for this purpose. The crossmember can be removed after loosening the nut of the transmission mount to the crossmember and the crossmember mounting bolts and nuts and then lifting the transmission to get out the crossmember. If so, take off the transmission heat shield and the rear air conditioning line bracket, if installed. Loosen the bolts fastening the trans to the engine, and the trans-to-oil pan bolts on the 2018 and later V6 models with a long extension and U-joint socket to get at them. Lower the engine and transmission approximately 6 inches, then, loosen and take out the nut of the dipstick tube bracket, and then pull out the dipstick tube being careful not to lose the tube seal. Place the torque converter locking pliers around the lower bell housing case through the inspection hole to minimize on the chances of dropping the torque converter whenever you remove the transmission from the car. Shift the transmission rearward to free the dowel pins from the engine block and to assure that the torque converter is off the driveplate before lowering the transmission. To install, make sure the torque converter is properly mated to the pump; engage it with some effort and smear some transmission fluid on the rear hub if it was removed. Place the torque converter onto the front input shaft and rotate it in opposite directions until it is fully connected; using a ruler you should be very sure that the converter lugs are below the mating area by at least ¾ of an inch. With the transmission safely bolted and secured to the jack lifting the bulky jack put the torque converter holes into the driveplate position. Shift the transmission forward until the dowel pins and the torque converter are in position, so there is no possibility of a gap between the engine and the transmission. Screw in the transmission dipstick tube with seal and tighten the inspection hole cover and tighten the transmission to engine bolts to ensure positive engagement. Lift the rear of the transmission and bolt in the crossmember, after that, remove the jacks that support the transmission and engine. Torque converter-to-driveplate bolts and tighten the bolts gradually, last one to have is the bellhousing cover bolts. Replace the starter motor and in case fit new retaining rings on the quick connect fittings on the transmission fluid cooler lines. Secure the terminals of the transmission electrical connectors, fit in the inspection cover followed by the driveshaft; any exhaust system part removed should then be re-established. modify shift cable, final removal of jackstands, lowering of the vehicle, replenish the transmission with the type of fluid recommended, engaging the engine and observing the possibility of leakage.
Related Chevrolet Parts
Browse by Model
Astro Transmission Assembly Avalanche Transmission Assembly Aveo Transmission Assembly Beretta Transmission Assembly Blazer Transmission Assembly Bolt EUV Transmission Assembly Bolt EV Transmission Assembly C10 Transmission Assembly C1500 Transmission Assembly C20 Transmission Assembly C2500 Transmission Assembly C30 Transmission Assembly C3500 Transmission Assembly Camaro Transmission Assembly Caprice Transmission Assembly Captiva Sport Transmission Assembly Cavalier Transmission Assembly City Express Transmission Assembly Cobalt Transmission Assembly Colorado Transmission Assembly Corsica Transmission Assembly Corvette Transmission Assembly Cruze Transmission Assembly Equinox Transmission Assembly Express Transmission Assembly G10 Transmission Assembly G20 Transmission Assembly G30 Transmission Assembly HHR Transmission Assembly Impala Transmission Assembly K10 Transmission Assembly K1500 Transmission Assembly K20 Transmission Assembly K2500 Transmission Assembly K30 Transmission Assembly K3500 Transmission Assembly Lumina Transmission Assembly Malibu Transmission Assembly Metro Transmission Assembly Monte Carlo Transmission Assembly Orlando Transmission Assembly P20 Transmission Assembly P30 Transmission Assembly Prizm Transmission Assembly R10 Transmission Assembly R20 Transmission Assembly R2500 Transmission Assembly R30 Transmission Assembly R3500 Transmission Assembly S10 Transmission Assembly SS Transmission Assembly SSR Transmission Assembly Silverado Transmission Assembly Sonic Transmission Assembly Spark EV Transmission Assembly Spark Transmission Assembly Sprint Transmission Assembly Storm Transmission Assembly Suburban Transmission Assembly Tahoe Transmission Assembly Tracker Transmission Assembly Trailblazer Transmission Assembly Traverse Transmission Assembly Trax Transmission Assembly Uplander Transmission Assembly V10 Transmission Assembly V20 Transmission Assembly V30 Transmission Assembly V3500 Transmission Assembly Venture Transmission Assembly Volt Transmission Assembly
