Make sure this part fits

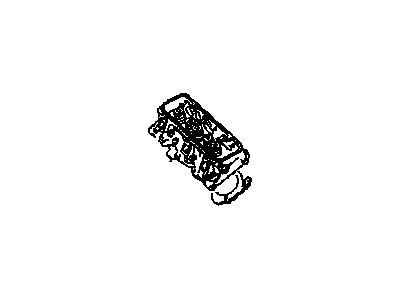
Cadillac 12337563 F, Head, Reman

1982 Cadillac

Customer Questions & Expert Answers (20)
GM 12337563 F, Head, Reman
  • Part Description
    F, Head, Rem
  • Manufacturer
    General Motors
  • Manufacturer's Notes
    This part is discontinued.
Make sure this part fits
  • Related Parts
  • Product Specifications
  • Vehicle Fitment
  • Customer Questions & Expert Answers
  • Product Specifications

    BrandGenuine Cadillac
    Manufacturer Part Number12337563
    Part DescriptionF, Head, Rem
    ConditionNew
    Fitment TypeDirect Replacement
    ManufacturerGeneral Motors
    SKU12337563
    WarrantyThis genuine GM part is guaranteed by GM's factory warranty.
    Shipping & ReturnShipping Policy Return Policy
    Warning: California's Proposition 65
  • Vehicle Fitment

    Year Make Model Engine Important vehicle option details
    1982 Cadillac Deville6 Cyl 4.1L2 DOOR, 4 DOOR, BROUGHAM 2 DOOR, BROUGHAM 4 DOOR
    1982 Cadillac Eldorado6 Cyl 4.1LELDORADO
    1982 Cadillac Fleetwood6 Cyl 4.1L2 DOOR, 4 DOOR, BROUGHAM 2 DOOR, BROUGHAM 4 DOOR
    1982 Cadillac Seville6 Cyl 4.1LSEVILLE
  • Customer Questions & Expert Answers

    Q:
    I am wonder if this is complete and correct part for my vehicle. Posted by GMPartsGiant Specialist
    A:
    You can Select Your Vehicle to check if 12337563 fits your vehicle.
    Posted by GMPartsGiant Specialist
    Q:
    How to remove and install cylinder heads on Buick Century? Posted by Customer
    A:
    If you ever need to remove and install cylinder heads on various Buick, Chevrolet, Pontiac and Oldsmobile engines, here are some general steps, To begin with, disconnect the battery and drain the coolant. Take off the air cleaner, then if there is one, take off the air conditioning compressor (but keep lines attached), and also remove the air hose at check valve. After that, get rid of turbocharger assembly or manifold as required. While removing the right head start by loosing an alternator belt and separate wiring to take out that component. As for left head, eliminate dipstick power steering pump as well as air pump. Label and disconnect plug wires plus exhaust manifold from head being removed. While doing so remove rocker arm cover/exhaust manifold/header pipe/rocker shaft assembly/pushrods keeping them in order .Do not allow any foreign material to enter critical areas while you carefully clean engine block gasket surface. Put a new head gasket in place holding it with dowels in block .Prior to installation carry out cleaning of cylinder head face where gasket goes do this by placing cylinder head on dowels in block then use thread sealer on all bolts. In accordance with Torque Specifications chart tighten bolts gradually following specified torque sequence until reaching final torque value. At last reassemble remaining components backwards way they were disassembled.Another thing to note is that when working on Chevrolet engines proper tightening of cylinder head bolts requires use of a torque wrench while for Oldsmobile diesel engines it is important to thoroughly clean mating surfaces and apply a new head gasket with specific torque values and sealing procedures followed.Very importantly check the cylinder head for warpage using a straight edge together with feeler gauges; if warpage exceeds specified limits then resurface it at an established machine shop.
    Posted by GMPartsGiant Specialist
    Q:
    How to remove and install cylinder heads on Buick Regal? Posted by Customer
    A:
    If you ever need to remove and install cylinder heads on various Buick, Chevrolet, Pontiac and Oldsmobile engines, here are some general steps, To begin with, disconnect the battery and drain the coolant. Take off the air cleaner, then if there is one, take off the air conditioning compressor (but keep lines attached), and also remove the air hose at check valve. After that, get rid of turbocharger assembly or manifold as required. While removing the right head start by loosing an alternator belt and separate wiring to take out that component. As for left head, eliminate dipstick power steering pump as well as air pump. Label and disconnect plug wires plus exhaust manifold from head being removed. While doing so remove rocker arm cover/exhaust manifold/header pipe/rocker shaft assembly/pushrods keeping them in order .Do not allow any foreign material to enter critical areas while you carefully clean engine block gasket surface. Put a new head gasket in place holding it with dowels in block .Prior to installation carry out cleaning of cylinder head face where gasket goes do this by placing cylinder head on dowels in block then use thread sealer on all bolts. In accordance with Torque Specifications chart tighten bolts gradually following specified torque sequence until reaching final torque value. At last reassemble remaining components backwards way they were disassembled.Another thing to note is that when working on Chevrolet engines proper tightening of cylinder head bolts requires use of a torque wrench while for Oldsmobile diesel engines it is important to thoroughly clean mating surfaces and apply a new head gasket with specific torque values and sealing procedures followed.Very importantly check the cylinder head for warpage using a straight edge together with feeler gauges; if warpage exceeds specified limits then resurface it at an established machine shop.
    Posted by GMPartsGiant Specialist
    Q:
    How to Remove the Cylinder Heads in V8 engine on Chevrolet Caprice? Posted by Customer
    A:
    In case the engine has been stripped off the car then this can be ignored as the following steps do not apply. In case the vehicle has air conditioning, it should be taken to the certified dealer or refrigeration specialist for depressurizing, and in any case, no hoses have to be removed while the system is under pressure. Start ensuring that you do away with the intake manifold as well as the exhaust manifolds. Then unbolt the lower bracket to the alternator lower nut and take out the lower bracket as well as unbolt the lower mounting bolt of the alternator then set the alternator aside. If fitted-disconnect and remove the A/C compressor and forward mounting bracket and plug all the hose connections to avoid the entry of dirt. If you have power steering, get the pump off the bracket, but leave the hoses connected by strapping it out of the way with some wire. If not done earlier, remove the coolant from the engine block by removing the drain plugs which are available at both sides of the block. Loosen the rocker arm cover by unscrewing the bolts and pulling it up with the aid of a screwdriver on the head of the cylinder; if necessary, hit the front part of the cover to break the adhesive bands of the gasket without using a lever. Again, it's preferable to disassemble each part of the valve mechanism, to be reinstalled back in the engine cylinder, so that they do not mix, and this can be done by putting the parts in a cardboard box or metallic rack, with numbers on the side, for ease of identification of each cylinder. Pull every rocker arm nut and put them aside in a separate cardboard box or specifically designed rack. Remove the rocker arm together with its rocker balls from the mounting studs of the engine; set each object in the right position on the numbered box or rack. Drill holes in the cardboard box or rack and lift each pushrod from the cylinder head and fix each of it to its respective punched hole. Turn the cylinder head attaching bolt a half turn at a time until they could be taken out with the record of the length of each bolt for refitting. Note the number of bolts that were undone; it is noteworthy that small-block engines are endowed with 17 bolts while big-block engines have only 16. With help turn the heads upside down and be careful because they are quite heavy. If the head is weld onto the engine block, do not try to pulled it off so that the heads' sealing surfaces will not be damage; instead, put a block of wood on top of the head and use a hammer and hit it up and down on the wood on both ends. Last but not the least, it is advised to put the heads on woods so as not to cause any harm.
    Posted by GMPartsGiant Specialist
    Q:
    What are the steps involved in removing and overhauling the cylinder heads in V6 engine on Chevrolet Caprice? Posted by Customer
    A:
    Due to the similarities between the 229 V6 and the V8 engines, on vehicles equipped with AIR, disconnect the rubber hose at the injection tubing check valve to avoid removing the tubing from the exhaust manifold. Begin by removing the intake manifold and draining coolant from the engine. When removing the right cylinder head, loosen and remove drive belts, disconnect generator wires, and for vehicles with air-conditioning, remove the compressor from the mounting bracket and position it out of the way with hoses connected before removing the generator with its bracket. For the left cylinder head, remove the oil dipstick rod and tube, and if applicable, remove the power steering gear pump with its mounting bracket and move it aside with hoses attached. Mark the positions of the spark plug wires with tape, disconnect them, and remove the spark plug wire clips from the rocker arm cover studs. Next, remove the exhaust manifold and bolts, then carefully clean the dirt and grease from each cylinder head, valve cover, and surrounding area to prevent grit from entering the engine, as this can damage hydraulic valve lifters. Remove the rocker arm cover attaching bolts and lift the rocker arm cover, breaking the gasket seal if necessary without prying on the sealing surfaces. Keep pushrods, lifters, and other valve mechanism components separate and in order for re-installation, using a numbered rack or cardboard with holes. Remove the bolts holding the rocker arm shaft assembly to the cylinder head, lift the assembly, and place the pushrods in the numbered rack or cardboard. Loosen the cylinder head bolts gradually and remove them, keeping track of bolt length and location. Lift the cylinder head off the engine, using a hammer and block of wood to tap upward at each end if it is stuck, and set it on wood blocks to prevent damage. At this point, decide whether to overhaul the cylinder heads yourself or exchange them for new or rebuilt units available at GM dealers or auto parts stores, or take them to a competent machine shop or GM dealer for the overhaul process. If the complete engine is being overhauled simultaneously, consider rebuilding alternatives, and if choosing to overhaul the cylinder heads, understand the necessary steps, tools, and replacement parts.
    Posted by GMPartsGiant Specialist
    Q:
    What are the steps involved in removing and overhauling the cylinder heads equipped with AIR in V6 engine on Chevrolet El Camino? Posted by Customer
    A:
    Due to the similarities between the 200/229 V6 and the VS engines, on vehicles equipped with AIR, disconnect the rubber hose at the injection tubing check valve to avoid removing the tubing from the exhaust manifold. Begin by removing the intake manifold and draining coolant from the engine. When removing the right cylinder head, loosen and remove drive belts, disconnect generator wires, and if equipped with air-conditioning, remove the compressor from the mounting bracket and position it out of the way with hoses connected before removing the generator with its bracket. For the left cylinder head, remove the oil dipstick rod and tube, and if applicable, remove the power steering pump gear pump with its mounting bracket and move it aside with hoses attached. Mark the positions of the spark plug wires with tape, disconnect them, and remove the spark plug wire clips from the rocker arm cover studs. Next, remove the exhaust manifold and bolts, then carefully clean the dirt and grease from each cylinder head, valve cover, and surrounding area to prevent grit from entering the engine, as this can damage hydraulic valve lifters. Remove the rocker arm cover attaching bolts and lift the cover off the cylinder head, breaking the gasket seal if necessary without prying on the sealing surfaces. Keep pushrods, lifters, and other valve mechanism components separate and in order for re-installation, using a numbered rack or cardboard with holes. Remove the bolts holding the rocker arm shaft assembly to the cylinder head, lift off the assembly, and place the pushrods in the numbered rack or cardboard. Loosen the cylinder head bolts gradually and remove them, keeping track of their length and location. Lift the cylinder head off the engine, using a hammer and block of wood to tap upward at each end if it is stuck, and set it on wood blocks to prevent damage. At this point, decide whether to overhaul the cylinder heads yourself, exchange them for new or rebuilt units available at GM dealers or auto parts stores, or take them to a competent machine shop or GM dealer for the overhaul process. If choosing to overhaul the cylinder heads, gain an understanding of the necessary steps, tools, and replacement parts involved.
    Posted by GMPartsGiant Specialist
    Q:
    What is the first step in assembling the valve mechanism for the 1982 Chevrolet Caprice? Posted by Customer
    A:
    Insert a valve into the appropriate port and assemble the valve spring assembly for that cylinder, which includes the spring, damper, shield, and cap.
    Posted by GMPartsGiant Specialist
    See expert answers on similar Cylinder Head
    Q:
    What should be done with the oil seals and spring shims during the overhaul for the 1983 Chevrolet Caprice? Posted by Customer
    A:
    Remove the oil seals from the stem of each valve, ensuring new seals are used upon reassembly, and take out any spring shims located at the bottom of the valve spring.
    Posted by GMPartsGiant Specialist
    See expert answers on similar Cylinder Head
    Q:
    Why is it important to ensure the torque wrench is accurate for the 1985 Chevrolet Caprice? Posted by Customer
    A:
    An accurate torque wrench is essential to prevent uneven tightening that can distort the cylinder bores, leading to compression loss and excessive oil consumption.
    Posted by GMPartsGiant Specialist
    See expert answers on similar Cylinder Head
    Q:
    How do I adjust the valves and install the rocker arm covers for the 1984 Chevrolet Caprice? Posted by Customer
    A:
    Adjust the valves and install the rocker arm covers, using a gasket for early models or RTV sealant for newer models. If a gasket was previously used, replace it with a new one, tightening the bolts to specifications; if no gasket was used, apply a 1/2-inch bead of RTV sealer around the sealing surface and install the cover while the sealer is still wet, torquing the bolts to specifications.
    Posted by GMPartsGiant Specialist
    See expert answers on similar Cylinder Head
    Q:
    What are the specifications for warpage that require resurfacing for the 1982 Chevrolet Caprice? Posted by Customer
    A:
    If warpage exceeds 0.006 in at any point with a straightedge spanning the entire head, resurfacing is necessary. Using a straightedge with a span of 6 inches should not exceed 0.003 in.
    Posted by GMPartsGiant Specialist
    See expert answers on similar Cylinder Head
    Q:
    Who should perform the resurfacing of the cylinder head for the 1984 Chevrolet El Camino? Posted by Customer
    A:
    Resurfacing is a task for a professional automotive machine shop.
    Posted by GMPartsGiant Specialist
    See expert answers on similar Cylinder Head
    Q:
    How many bolts are typically removed from small-block and big-block engines for the 1982 Chevrolet El Camino? Posted by Customer
    A:
    Count the number of bolts removed, as small-block engines have 17 bolts while big-block engines use 16.
    Posted by GMPartsGiant Specialist
    See expert answers on similar Cylinder Head
    Q:
    How should the bolts be tightened for the 1983 Chevrolet El Camino? Posted by Customer
    A:
    Tighten each bolt gradually in the specified sequence until the proper torque reading is achieved, then check to ensure all bolts have been tightened in the correct order.
    Posted by GMPartsGiant Specialist
    See expert answers on similar Cylinder Head
    Q:
    What should be done if the spring is too short for the 1985 Chevrolet El Camino? Posted by Customer
    A:
    If the spring is too short, it should be replaced with a new one.
    Posted by GMPartsGiant Specialist
    See expert answers on similar Cylinder Head
    Q:
    What is important to understand if the decision is made to overhaul the cylinder heads for the 1985 Chevrolet El Camino? Posted by Customer
    A:
    It is important to understand the steps involved and the tools and replacement parts necessary for the job.
    Posted by GMPartsGiant Specialist
    See expert answers on similar Cylinder Head
    Q:
    What should be done if the valve stem-to-bore clearance exceeds specifications for the 1987 Oldsmobile Cutlass? Posted by Customer
    A:
    If the clearance exceeds specifications, an oversize valve must be used after reaming the valve guide, which should be handled by a dealer or machine shop.
    Posted by GMPartsGiant Specialist
    See expert answers on similar Cylinder Head
    Q:
    How do you secure the valve spring assembly for the 1986 Oldsmobile Cutlass? Posted by Customer
    A:
    Use a valve spring compressor to compress the assembly over the valve stem and hold it in position.
    Posted by GMPartsGiant Specialist
    See expert answers on similar Cylinder Head
    Q:
    What are the initial steps for removing components from the engine for the 1986 Oldsmobile Cutlass? Posted by Customer
    A:
    Begin by removing the intake manifold and the exhaust manifolds. Next, remove the lower mounting bolt for the alternator and set the alternator aside while removing the lower bracket.
    Posted by GMPartsGiant Specialist
    See expert answers on similar Cylinder Head
    Q:
    What should one understand before overhauling cylinder heads for the 1983 Oldsmobile Cutlass? Posted by Customer
    A:
    If overhauling the cylinder heads is chosen, it is important to understand the steps involved, as well as the tools and replacement parts necessary for the job.
    Posted by GMPartsGiant Specialist
    See expert answers on similar Cylinder Head
    If you have any questions about this product, please don't hesitate to ask us. We will be happy to help you!

Genuine GM Part 12337563, the Right Choice

To ensure reliability, purchase GM part # 12337563 F, Head, Reman. It is sometimes referred to as Cadillac Cylinder Head. Directly from GM, genuine parts are superb with regards to quality, longevity, and fit. Every single part passed stringent quality testing, so you can be sure that it's safe, durable, and built to perform like your original parts. This part fits specific Cadillac Deville, Fleetwood, Seville models.

GMPartsGiant.com is a leading supplier of genuine GM parts and accessories such as GM 12337563 F, Head, Reman. You're certainly in the right place if you're searching for the great cost-effective OEM GM parts. Look no further than our vast inventory of genuine GM parts offered at unbeatable online prices, all of which are backed by the manufacturer's warranty. Not to forget, our hassle-free return policy and quick delivery service ensure a smooth shopping experience for you. For detailed Cadillac parts information, click here.

Why choose GM Parts Giant

  • Dedicated Service

    Your complete satisfaction is our #1 goal

  • Lowest Prices

    Best deals on genuine OE parts from dealerships

  • Fast Delivery

    Orders are processed and delivered promptly