Why choose GMPartsGiant
- Large Inventory
The best site to buy Saturn Vue genuine parts for years has been GMPartsGiant.com. We're the best online parts and accessory store for your Saturn Vue. GMPartsGiant.com offers a large parts and accessory inventory to cover all your vehicle's repairs. Feel free to browse through our genuine Saturn Vue parts and accessory catalog to find all your vehicle's needs.
- Fast Shipping Times
All of our Saturn Vue auto parts and accessories are expedited directly from verified dealers and backed by the manufacturer's warranty. Our experienced team ensures the orders are packed to provide quick transit times. The majority of the orders are shipped out within a couple of business days to get the parts out to you as fast as possible.
- Low Prices
Our low prices say it all. You can rest assured that you will always receive unbeatable prices on OEM Saturn Vue parts. Our giant inventory is beyond compare and has everything you need at an extraordinary value not found anywhere else. Whether you're restoring an old vehicle or upgrading the performance of your vehicle you can count on the quality of our products without hurting your bank account.
Popular Genuine Saturn Vue Parts
- Engine Parts View More >
- Front Suspension, Steering Parts View More >
- Fuel System, Exhaust, Emission System Parts View More >
- Brakes Parts View More >
- Transmission - Automatic Parts View More >
- Frames, Springs, Shocks, Bumpers Parts View More >
- Cooling System, Grille, Oil System Parts View More >
- Front End Sheet Metal, Heater Parts View More >
Shop Genuine Saturn Vue Parts with GMPartsGiant.com
The Saturn Vue is a compact SUV with 5 doors and is available with transverse front-engine, front-wheel-drive / all-wheel drive. It is powered by the engine of either a four-cylinder (I4) or V6 gasoline and is available with either 4 or V6 trim levels and a Green Line (Hybrid Electric Vehicle) is provided for the final model year of 2007. It initially provided the L81 V6 from the L-Series and five-speed Aisin AF33 automatic transmission, and, since 2004, all six-cylinder Vues were equipped with Honda's engine parts that produce 250 horsepower (190 kW) and a Honda transmission. The four-cylinder Vue offered the VTi continuously variable transmission (CVT) Improvement has been made in upgrading the interior design. The second generation offers 3 versions of Vue, that is, base, Red Line, and Green Line and is powered by an engine that produces a 2.4L 169 hp, providing an engine of 3.5L 222hp and a 3.6L 257hp and is equipped with automatic transmission. The all-new Vue is available in four versions - XE, XR, Green Line, and Red Line. The owners will be able to choose the right model by considering a wide range of parts, powertrains, and configurations.
Saturn Vue, being Saturn's best-selling model, is owned by many and requires regular maintenance for optimal functioning. Common issues include transmission failure, frequently reported by Vue owners on CarComplaints.com. This can affect your driving experience with the vehicle potentially becoming stuck in neutral, having shifting difficulties, and clutch slippage. If you encounter such issues and smell odd odors, check the Vue transmission assembly, shift cable, automatic transmission filter, and transfer case seal. Engine issues are also common, with symptoms like increased fuel consumption, misfires, hard starts, or inability to start. If you hear unusual noises while driving or the Check Engine Light is activated, inspect the Vue rocker arm, air filter, spark plug, and intake manifold gasket. Maintaining the Saturn Vue's condition demands constant effort, particularly for parts exposed to harsh conditions, such as the wiper blade or windshield wiper. These should be replaced yearly due to their role in ensuring driver visibility in adverse weather. Regular maintenance of other components like the cabin air filter, door lock actuator, and various electrical parts is also essential.
In terms of quality, OEM parts emerge as the premier choice. These components are directly manufactured by Saturn, adhering to stringent factory guidelines, and are subjected to rigorous quality control procedures during production. We are devoted to providing the budget-priced OEM Saturn Vue parts, like Body Moldings, Sheet Metal, Rear Compartment Hardware, Roof Hardware, Transmission - Manual for customers worldwide. If you want to get affordable and perfectly fitted as well as superior quality parts, including Interior Trim, Front Seat Trim, Seat Belts, Rear Seat Trim, Carpet, feel free to choose from our largest selection of genuine Saturn Vue parts, such as Transfer Case that come with the manufacturer's warranty. Order now and you can get them at your door within a matter of days due to our fast shipping times.
Saturn Vue Parts Questions & Answers
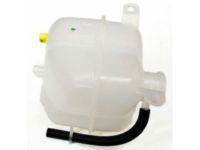
- Q: How to remove the Coolant Reservoir on Saturn Vue?A: To remove the pressure cap, use a suction device to remove coolant from the reservoir before disconnecting the hoses. Save the coolant if it's still in good condition. Disconnect the upper hose from the reservoir, checking for cracks or hardness and replacing if necessary. Remove the reservoir mounting bolts, lift the reservoir, and disconnect the low-level sensor. Disconnect the hose from the bottom of the reservoir and plug it immediately. Clean the reservoir's interior with soapy water and a brush to remove any deposits, and inspect for damage. The installation is simply the reverse of the removal steps.
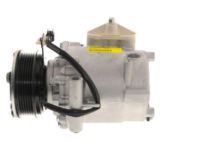
- Q: How to remove the A/C Compressor on Saturn Vue?A: To remove the AC system, start by discharging the refrigerant and disconnecting the negative battery terminal. Remove the drive belt and raise the front of the vehicle, securing it with jack stands. Disconnect the compressor clutch electrical connector. For 4-cylinder models, remove the bolt retaining the refrigerant lines to the compressor. For 2002-2003 V6 models, remove the interfering oxygen sensor and loosen the hose retaining bolts. For 2004 and later V6 models, remove the retaining bolt from the hose connector and support the front of the subframe. Lower the engine assembly slightly. Remove the compressor mounting bolts and then the compressor itself. To install, transfer the clutch if necessary and adjust the oil level if using a new or rebuilt compressor. Follow the reverse steps of removal, using new o-rings for the line fittings. Tighten the subframe mounting bolts and reconnect the battery. Finally, have the system evacuated, charged, and leak tested.


