Make sure this part fits

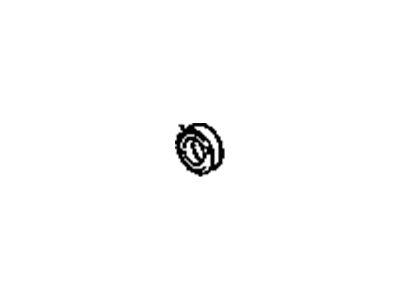
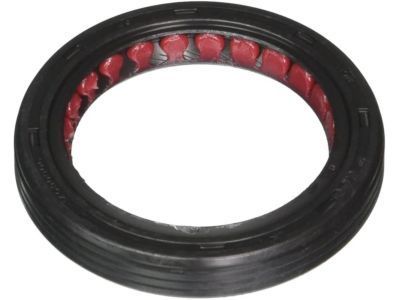
Saturn 14090906 Seal,Crankshaft Front Oil

2005-2009 Saturn

Customer Questions & Expert Answers (43)
GM 14090906 Seal,Crankshaft Front Oil
  • Part Description
    SEAL, Engine Front Cover & Crankshaft Seal
  • Position
    Front
  • Replaces
    12577710
  • Manufacturer
    General Motors
Make sure this part fits
$21.01 MSRP: $39.63
You Save: $18.62 (47%)
Ships in 1-2 Business Days
1
ADD TO CART
  • Related Parts
  • Product Specifications
  • Vehicle Fitment
  • Customer Questions & Expert Answers
  • Product Specifications

    BrandGenuine Saturn
    Manufacturer Part Number14090906
    Part DescriptionSEAL, Engine Front Cover & Crankshaft Seal
    Item Dimensions3.0 x 3.0 x 0.5 inches
    Item Weight0.30 Pounds
    PositionFront
    ConditionNew
    Fitment TypeDirect Replacement
    Replaces12577710
    ManufacturerGeneral Motors
    SKU14090906
    WarrantyThis genuine GM part is guaranteed by GM's factory warranty.
    Shipping & ReturnShipping Policy Return Policy
    Warning: California's Proposition 65
  • Vehicle Fitment

    Year Make Model Engine Important vehicle option details
    2007-2008 Saturn Aura6 Cyl 3.5LHYBRID 4 DOOR NOTCHBACK, XE 4 DOOR NOTCHBACK, XR 4 DOOR NOTCHBACK
    2005-2007 Saturn Relay6 Cyl 3.5L, 6 Cyl 3.9LAWD, RELAY
    2008-2009 Saturn Vue6 Cyl 3.5LXE AWD
  • Customer Questions & Expert Answers

    Q:
    I am wonder if this is complete and correct part for my vehicle. Posted by GMPartsGiant Specialist
    A:
    You can Select Your Vehicle to check if 14090906 fits your vehicle.
    Posted by GMPartsGiant Specialist
    Q:
    How to remove and install a front crankshaft seal in V8 engine on Chevrolet Impala? Posted by Customer
    A:
    Remove the crankshaft balancer and note how the seal is installed, ensuring the new one is positioned to the same depth and orientation. Carefully pry the oil seal out of the cover using a seal puller or a large screwdriver, taking care not to damage the crankshaft or distort the cover; wrapping electrician's tape around the screwdriver tip can help prevent damage. If replacing the seal with the timing chain cover removed, support the cover on two blocks of wood and drive the seal out from the backside using a hammer and punch, being cautious not to scratch or distort the area where the seal fits to avoid leaks. Apply clean engine oil or multi-purpose grease to the outer edge of the new seal and install it in the cover with the lip facing inward, using a large socket and hammer to drive it into place, ensuring it enters the bore squarely and stops at the proper depth. Check the surface on the balancer hub where the oil seal rides; if it is grooved, a press-on sleeve may be available to renew the sealing surface, which can be pressed into place with a hammer and a block of wood. Lubricate the balancer hub with clean engine oil and reinstall the crankshaft balancer, completing the installation in reverse order of removal.
    Posted by GMPartsGiant Specialist
    Q:
    How to replace the front crankshaft seal in V6 engine on Oldsmobile Cutlass? Posted by Customer
    A:
    Remove the timing chain cover, then use a punch to drive out the old oil seal and shedder, working from the front toward the rear of the timing chain cover. Apply the new oil seal packing around the opening with the ends positioned at the top, and drive in the new shedder using a punch, ensuring to stake it in place in at least three locations. Rotate the handle of a hammer or a similar tool to size the packing until the balancer hub can be inserted through the opening, and finally, re-install the timing chain cover.
    Posted by GMPartsGiant Specialist
    Q:
    How to remove and install a front crankshaft seal in V6 engine on Chevrolet Monte Carlo? Posted by Customer
    A:
    Crankshaft pulley should also be unfastened and pay attention to how the seal is fitted, then repeat the same with the new one in terms of depth and position. Using a seal puller or a large screwdriver gently remove the oil seal from the cover without damaging the crankshaft or distorting the cover. In order not to mar the surface, an electrician's tape should be wound around the tip of the screwdriver. Use clean engine oil or multipurpose grease on outer periphery of new seal and fit the cover where this lip is to be inside. Tighten the seal centrally with a seal driver or a large socket and hammer, so that the seal fits the bore correctly and reaches the required depth before it is counter sunk. Over time an indentation or a groove may appear on the outer surface of the pulley hub where it has been in contact with the seal; a press-on sleeve is used to rebuild this sealing surface and this can be done using a hammer and a block of wood. Before installing crankshaft pulley clean the hub with some engine oil and fit the vibration damper installation tool to fix onto the crankshaft to press it into place. Last, fit the crankshaft pulley retaining bolt and torque it to the appropriate value and finally to complete in backward way of what was removed.
    Posted by GMPartsGiant Specialist
    Q:
    How to remove and install a front crankshaft seal in 2.2L four cylinder engine on Pontiac Grand Prix? Posted by Customer
    A:
    Remove the crankshaft pulley. Pry the old oil seal out with a seal removal tool or a screwdriver, being very careful not to nick or damage the crankshaft; wrapping the screwdriver tip with vinyl tape can help protect it. Apply a thin coat of ATV-type sealant to the outer edge of the new seal and lubricate the seal lip with moly-base grease or clean engine oil. Place the seal squarely in position in the bore and drive it into place with special tool J-35468 or an equivalent. If a special tool is not available, carefully tap the seal into place using a large socket or piece of pipe and a hammer, ensuring the outer diameter of the socket or pipe matches the seal's outer diameter, and confirm that the seal is seated completely in the bore. Install the crankshaft pulley and reinstall the remaining parts in the reverse order of removal. Start the engine and check for oil leaks at the seal.
    Posted by GMPartsGiant Specialist
    Q:
    What should be done during the final crankshaft installation for the 1985 Chevrolet Astro? Posted by Customer
    A:
    After checking main bearing oil clearances, apply a thin, even coat of anaerobic-type gasket sealant to the indicated areas, avoiding contact with the bearing face, crankshaft journal, seal ends, or seal lips. Lubricate the seal lips with moly-base grease or clean engine oil.
    Posted by GMPartsGiant Specialist
    See expert answers on similar Crankshaft Seal
    Q:
    How should the new seal be lubricated for the 1993 Chevrolet Beretta? Posted by Customer
    A:
    Lubricate the seal lip with moly-base grease or clean engine oil.
    Posted by GMPartsGiant Specialist
    See expert answers on similar Crankshaft Seal
    Q:
    How do you remove the rear main oil seal for the 1994 Chevrolet Beretta? Posted by Customer
    A:
    First, remove the oil pan. Then, remove the bolts and detach the seal housing. Drive the old seal out from the back side with a punch and hammer.
    Posted by GMPartsGiant Specialist
    See expert answers on similar Crankshaft Seal
    Q:
    How should you remove the old oil seal for the 1996 Chevrolet Beretta? Posted by Customer
    A:
    Pry it out with a seal removal tool or a screwdriver, being careful not to damage the crankshaft.
    Posted by GMPartsGiant Specialist
    See expert answers on similar Crankshaft Seal
    Q:
    What should be checked on the crankshaft journal for the 1992 Chevrolet Beretta? Posted by Customer
    A:
    The crankshaft journal should be checked for scratches and nicks.
    Posted by GMPartsGiant Specialist
    See expert answers on similar Crankshaft Seal
    Q:
    How can you replace the rear main bearing oil seal without removing the oil pan or crankshaft for the 1995 Chevrolet Blazer? Posted by Customer
    A:
    You can replace the rear main bearing oil seal without removing the oil pan or crankshaft by following these steps: Remove the transmission. If equipped with a manual transmission, remove the pressure plate and clutch disc. Next, remove the flywheel or driveplate. Using a seal removal tool or a large screwdriver, carefully pry the old seal out of the block, being cautious not to scratch or nick the crankshaft.
    Posted by GMPartsGiant Specialist
    See expert answers on similar Crankshaft Seal
    Q:
    What should you do if the seal bore has nicks and scratches for the 1993 Chevrolet Beretta? Posted by Customer
    A:
    If the seal bore has nicks and scratches, carefully smooth it with a fine file if necessary, but be careful not to nick the crankshaft in the process.
    Posted by GMPartsGiant Specialist
    See expert answers on similar Crankshaft Seal
    Q:
    How can you drive the seal into place for the 1995 Chevrolet Beretta? Posted by Customer
    A:
    Drive the seal into place using a large socket and a hammer. If a large socket is not available, a piece of pipe will also suffice.
    Posted by GMPartsGiant Specialist
    See expert answers on similar Crankshaft Seal
    Q:
    How is the alignment tool used during installation for the 2007 Chevrolet Equinox? Posted by Customer
    A:
    Install the special alignment tool (EN 47839) on the rear of the crankshaft, attaching it with the two supplied screws. Then, install the new oil seal housing over the alignment tool and studs onto the rear of the engine block, removing the guide studs but leaving the alignment tool in place.
    Posted by GMPartsGiant Specialist
    See expert answers on similar Crankshaft Seal
    Q:
    Why is it important to avoid scratching the crankshaft sealing surface for the 2006 Chevrolet Equinox? Posted by Customer
    A:
    Scratching or damaging the crankshaft sealing surface or the bore in the engine block can lead to oil leaks after the new seal is installed.
    Posted by GMPartsGiant Specialist
    See expert answers on similar Crankshaft Seal
    Q:
    What can be used if a seal installation tool is unavailable for the 2014 Chevrolet Express? Posted by Customer
    A:
    A large socket can be used to drive the seal squarely into the bore and flush with the rear cover.
    Posted by GMPartsGiant Specialist
    See expert answers on similar Crankshaft Seal
    Q:
    What is the final step in the process for the 2008 Chevrolet Equinox? Posted by Customer
    A:
    Finally, install the driveplate and the transaxle.
    Posted by GMPartsGiant Specialist
    See expert answers on similar Crankshaft Seal
    Q:
    What can be used if a seal installation tool is unavailable for the 2011 Chevrolet Impala? Posted by Customer
    A:
    A large socket, section of pipe, or blunt tool can be used to drive the seal squarely into the bore and flush with the rear cover.
    Posted by GMPartsGiant Specialist
    See expert answers on similar Crankshaft Seal
    Q:
    What should be done after removing the oil seal for the 2008 Chevrolet Impala? Posted by Customer
    A:
    Clean the seal bore thoroughly with a shop towel, ensuring all oil and dirt are removed.
    Posted by GMPartsGiant Specialist
    See expert answers on similar Crankshaft Seal
    Q:
    What should be applied to the mating surface of the oil pan before reinstalling the timing chain cover for the 1998 Chevrolet S10? Posted by Customer
    A:
    Before reinstalling the timing chain cover, a bead of RTV sealant should be applied to the mating surface of the oil pan.
    Posted by GMPartsGiant Specialist
    See expert answers on similar Crankshaft Seal
    Q:
    What should be checked after installing the seal for the 1990 Pontiac Grand Prix? Posted by Customer
    A:
    Check that the seal is seated squarely in the bore.
    Posted by GMPartsGiant Specialist
    See expert answers on similar Crankshaft Seal
    Q:
    What should be checked before installing the crankshaft in the 2.3 liter engine for the 1998 Pontiac Grand Prix? Posted by Customer
    A:
    Check the seal journal for scratches and nicks before crankshaft installation, and remove the old seal from the housing using a hammer and punch, taking care to note its recessed depth for the new seal.
    Posted by GMPartsGiant Specialist
    See expert answers on similar Crankshaft Seal
    Q:
    What are the initial components to be removed for this procedure for the 2011 Chevrolet Silverado? Posted by Customer
    A:
    The initial components to be removed are the crankshaft pulley and the vibration damper.
    Posted by GMPartsGiant Specialist
    See expert answers on similar Crankshaft Seal
    Q:
    What is recommended for installing the new oil seal for the 1997 Pontiac Grand Prix? Posted by Customer
    A:
    A special tool is recommended for installing the new oil seal. Lubricate the lips of the seal with clean engine oil and slide the seal onto the mandril until the dust lip bottoms squarely against the collar of the tool.
    Posted by GMPartsGiant Specialist
    See expert answers on similar Crankshaft Seal
    Q:
    Is there any tool that can assist with the installation of the seal for the 2009 Pontiac G6? Posted by Customer
    A:
    A special aftermarket tool may be available at local auto parts stores to assist with this process.
    Posted by GMPartsGiant Specialist
    See expert answers on similar Crankshaft Seal
    Q:
    What should be applied to the seal contact surface of the hub for the 1992 Pontiac Firebird? Posted by Customer
    A:
    Apply a thin layer of clean multipurpose grease.
    Posted by GMPartsGiant Specialist
    See expert answers on similar Crankshaft Seal
    Q:
    How should the old oil seal be removed for the 1996 Pontiac Grand Prix? Posted by Customer
    A:
    Pry the old oil seal out with a seal removal tool or a screwdriver, being very careful not to nick or otherwise damage the crankshaft in the process.
    Posted by GMPartsGiant Specialist
    See expert answers on similar Crankshaft Seal
    Q:
    How should the new seal be pushed onto the crankshaft for the 1999 Pontiac Grand Prix? Posted by Customer
    A:
    Carefully push the new seal onto the crankshaft, using a smooth object to assist as you push the housing against the block.
    Posted by GMPartsGiant Specialist
    See expert answers on similar Crankshaft Seal
    Q:
    How is the new rope seal installed for the 1990 Oldsmobile Cutlass? Posted by Customer
    A:
    Install a new rope seal into the main bearing cap groove, pushing firmly all around using a hammer handle or special GM tool. Ensure the seal is firmly seated, then trim the ends flush with the bearing cap mating surface.
    Posted by GMPartsGiant Specialist
    See expert answers on similar Crankshaft Seal
    Q:
    What is the initial step in the process of replacing the oil seal for the 1995 GMC Jimmy? Posted by Customer
    A:
    The first step is to remove the cable from the negative battery terminal.
    Posted by GMPartsGiant Specialist
    See expert answers on similar Crankshaft Seal
    Q:
    What should be applied to the new seal before installation for the 1992 Pontiac Grand Prix? Posted by Customer
    A:
    A thin coat of RTV-type sealant should be applied to the outer edge of the new seal, and the seal lip should be lubricated with moly-base grease or clean engine oil.
    Posted by GMPartsGiant Specialist
    See expert answers on similar Crankshaft Seal
    Q:
    What should be done after removing the oil seal for the 1999 Pontiac Grand Prix? Posted by Customer
    A:
    Clean the bore in the block and the seal contact surface on the crankshaft, checking for scratches and nicks that could damage the new seal lip and cause oil leaks. If the crankshaft is damaged, a new or different crankshaft is necessary.
    Posted by GMPartsGiant Specialist
    See expert answers on similar Crankshaft Seal
    Q:
    What is the first step in disconnecting the negative battery cable for the 1999 GMC Sonoma? Posted by Customer
    A:
    Disconnect the negative battery cable from the battery.
    Posted by GMPartsGiant Specialist
    See expert answers on similar Crankshaft Seal
    Q:
    What is the next step after positioning the oil seal housing for the 2006 Pontiac G6? Posted by Customer
    A:
    Install the housing bolts and tighten them to the specified torque before removing the alignment tool.
    Posted by GMPartsGiant Specialist
    See expert answers on similar Crankshaft Seal
    Q:
    What is the final step in the installation process for the 2009 Pontiac G6? Posted by Customer
    A:
    Install the crankshaft pulley retaining bolt and tighten it to the specified torque, completing the installation in reverse order of removal.
    Posted by GMPartsGiant Specialist
    See expert answers on similar Crankshaft Seal
    Q:
    What should be done before installing the seal for the 2012 GMC Sierra? Posted by Customer
    A:
    All surfaces should be lubricated with a small amount of engine oil before installing the seal.
    Posted by GMPartsGiant Specialist
    See expert answers on similar Crankshaft Seal
    Q:
    What is the next step after positioning the seal for the 1985 Pontiac Fiero? Posted by Customer
    A:
    Secure the tool to the crankshaft using the provided bolts and install the seal by rotating the tool's "T" handle until the collar bottoms against the block, then remove the tool.
    Posted by GMPartsGiant Specialist
    See expert answers on similar Crankshaft Seal
    Q:
    How should you remove the oil seal from the cover for the 1995 Pontiac Grand Prix? Posted by Customer
    A:
    Carefully pry the oil seal out of the cover using a seal puller or a large screwdriver, taking care not to distort the cover or scratch the crankshaft.
    Posted by GMPartsGiant Specialist
    See expert answers on similar Crankshaft Seal
    Q:
    What should be done after reassembling the parts for the 1994 Pontiac Grand Prix? Posted by Customer
    A:
    Start the engine and check for oil leaks at the seal.
    Posted by GMPartsGiant Specialist
    See expert answers on similar Crankshaft Seal
    Q:
    What is the first step in replacing the one piece rear main oil seal for the 2007 Pontiac G6? Posted by Customer
    A:
    The first step is to remove the transaxle and the driveplate.
    Posted by GMPartsGiant Specialist
    See expert answers on similar Crankshaft Seal
    Q:
    How should the seal lip be prepared before installation for the 1990 Pontiac Firebird? Posted by Customer
    A:
    The seal lip should be lubricated with clean engine oil.
    Posted by GMPartsGiant Specialist
    See expert answers on similar Crankshaft Seal
    Q:
    What should be checked on the pulley hub after installing the new seal for the 2008 Pontiac G6? Posted by Customer
    A:
    Check the surface on the pulley hub where the oil seal rides; if it is grooved from long-term contact, the pulley should be replaced.
    Posted by GMPartsGiant Specialist
    See expert answers on similar Crankshaft Seal
    Q:
    What should you apply to the outer edge of the new seal before installation for the 1993 Pontiac Grand Prix? Posted by Customer
    A:
    Apply clean engine oil or multi-purpose grease to the outer edge of the new seal.
    Posted by GMPartsGiant Specialist
    See expert answers on similar Crankshaft Seal
    If you have any questions about this product, please don't hesitate to ask us. We will be happy to help you!

Genuine GM Part 14090906, the Right Choice

To ensure reliability, purchase GM part # 14090906 Seal,Crankshaft Front Oil. It is sometimes referred to as Saturn Crankshaft Seal. Directly from GM, genuine parts are superb with regards to quality, longevity, and fit. Every single part passed stringent quality testing, so you can be sure that it's safe, durable, and built to perform like your original parts. This part fits specific Saturn Aura, Relay, Vue models.

GMPartsGiant.com is a leading supplier of genuine GM parts and accessories such as GM 14090906 Seal,Crankshaft Front Oil. You're certainly in the right place if you're searching for the great cost-effective OEM GM parts. Look no further than our vast inventory of genuine GM parts offered at unbeatable online prices, all of which are backed by the manufacturer's warranty. Not to forget, our hassle-free return policy and quick delivery service ensure a smooth shopping experience for you. For detailed Saturn parts information, click here.

Why choose GM Parts Giant

  • Dedicated Service

    Your complete satisfaction is our #1 goal

  • Lowest Prices

    Best deals on genuine OE parts from dealerships

  • Fast Delivery

    Orders are processed and delivered promptly